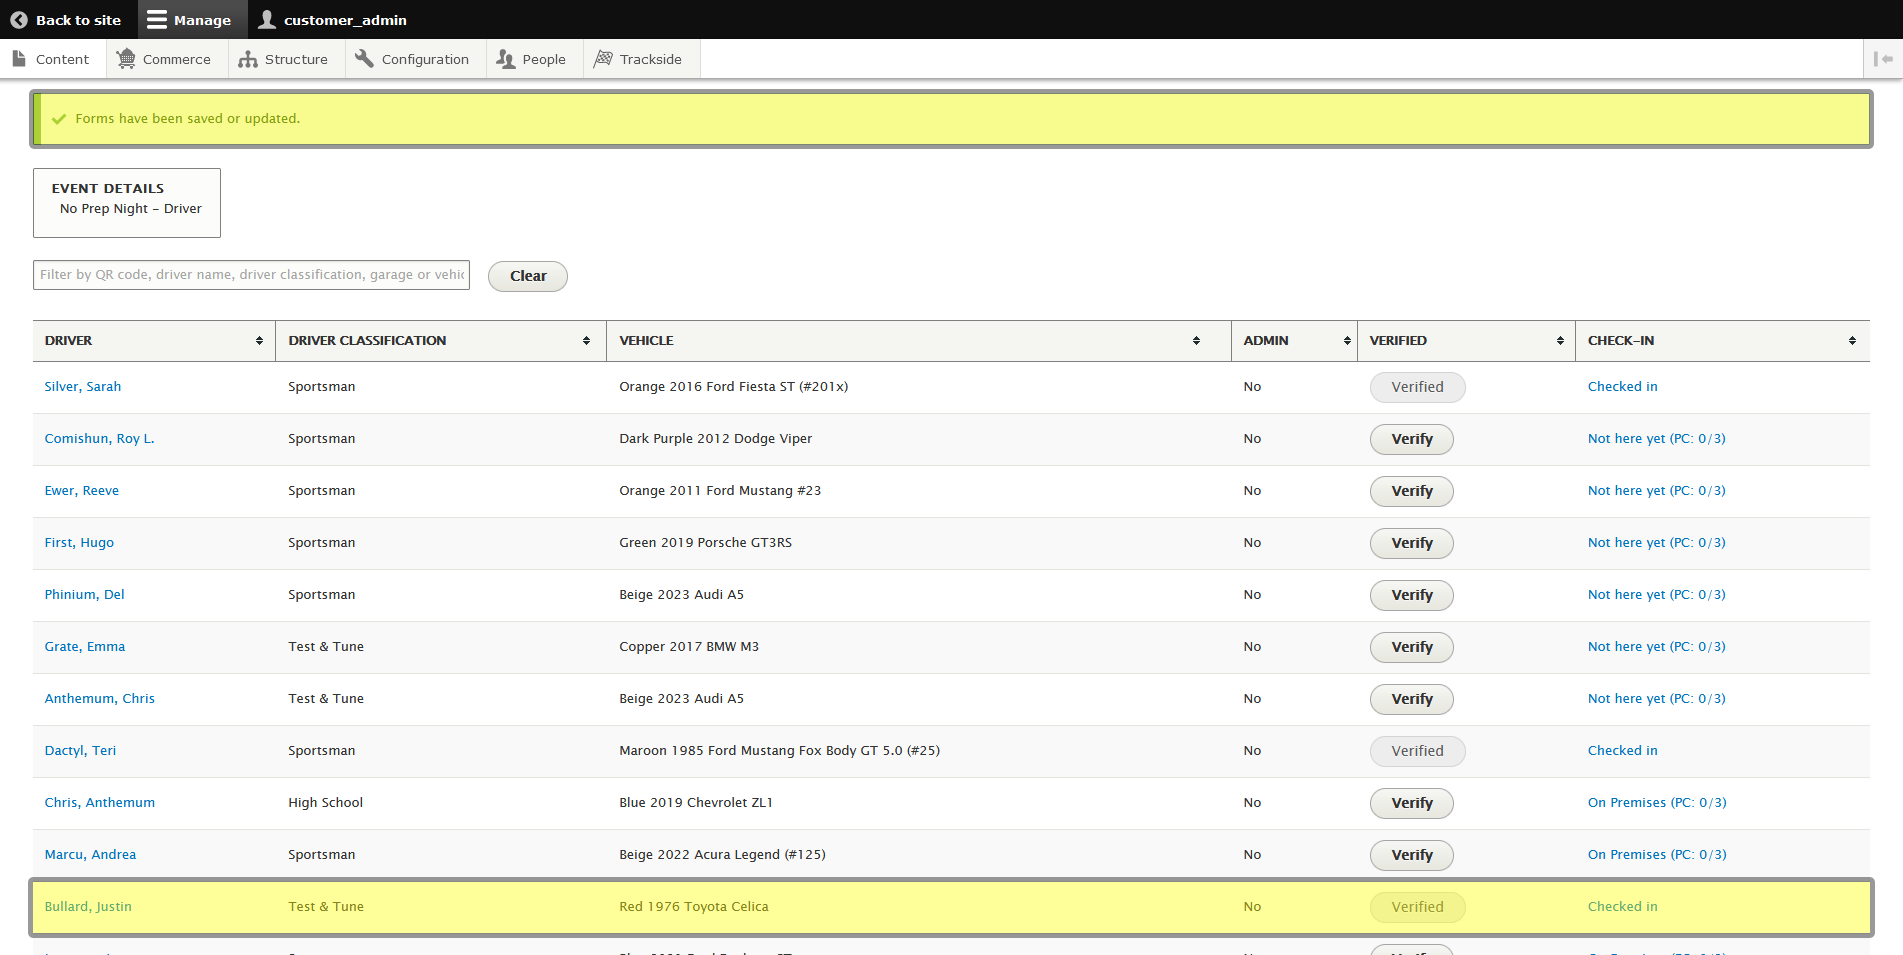
Participant Check-in with Completed Pre-check-in (Modified Plan Feature)
Note: This is a Modified Plan feature. If you are on a lower level plan, use of this feature may change your per-ticket usage rate to the associated higher rate.
This article will cover how track staff will check participants in through Trackside when no changes are needed to the Participant's Pre-Check-ins.
By this point, if you're following from Navigating to Participant Check-in (Modified Plan Feature) , you should have already clicked on the Participant's Verify button and be looking at their pre-check-ins.
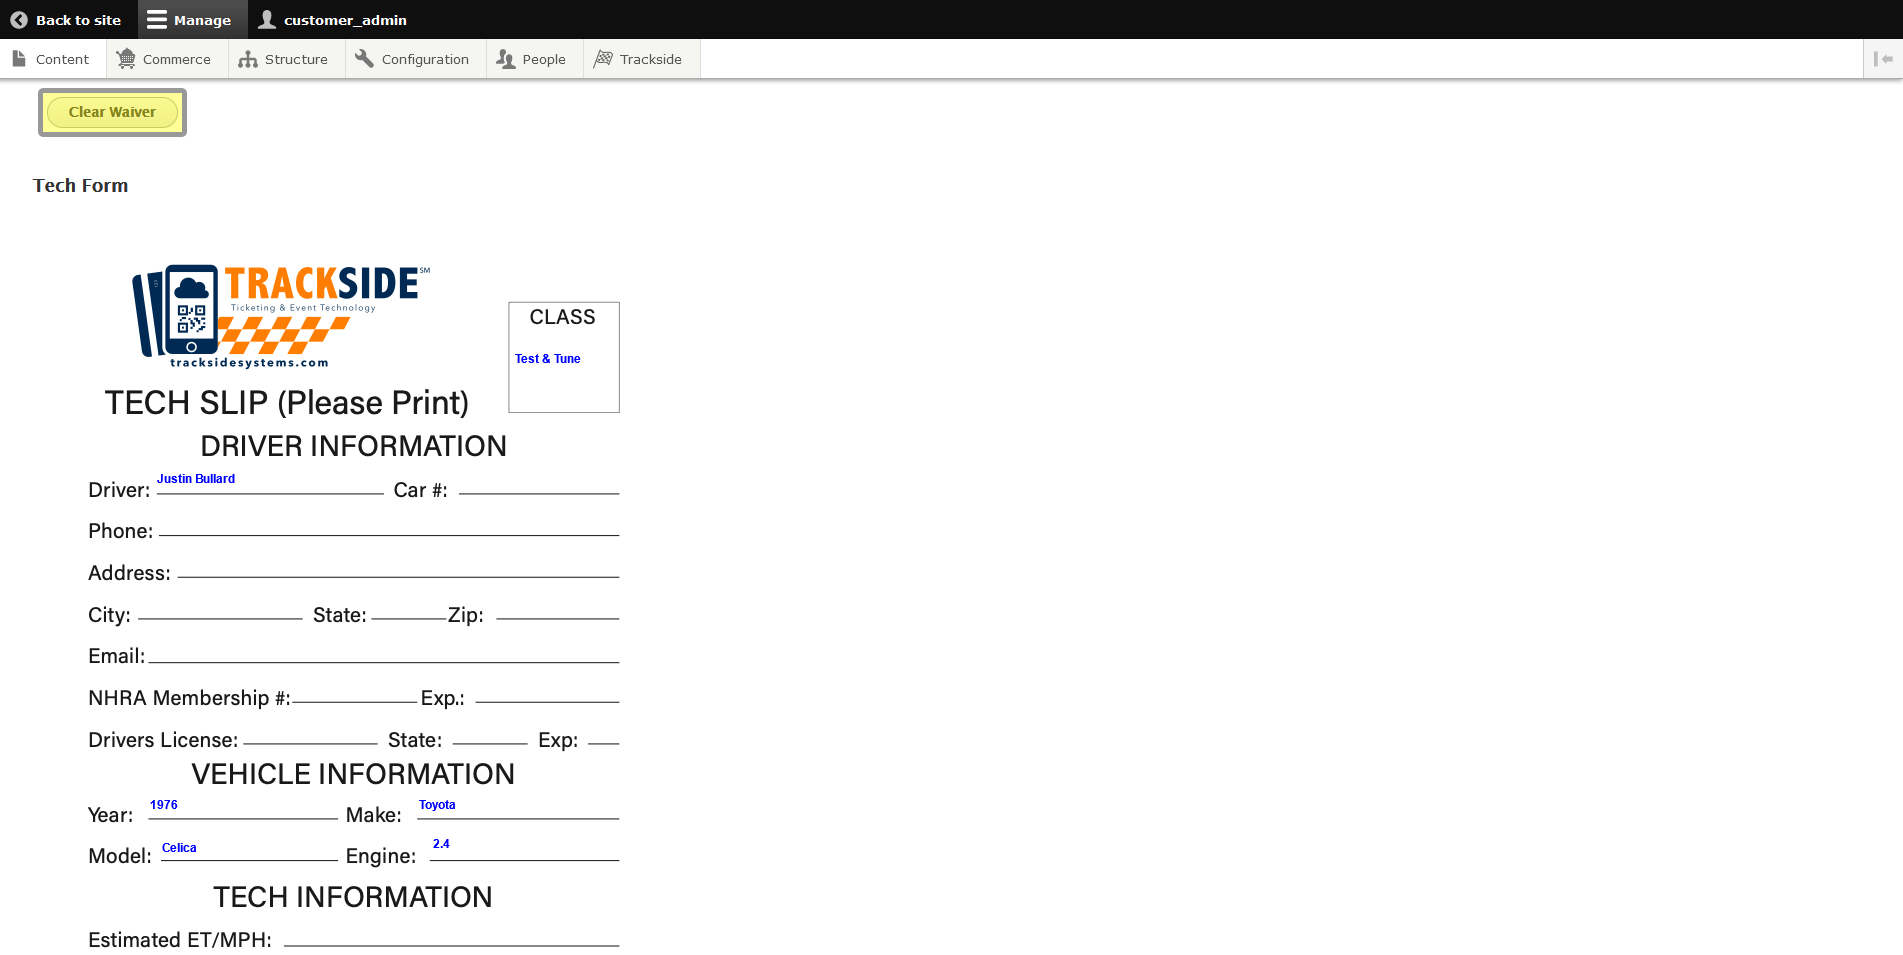
Step 1 - Verify Pre-Check-ins
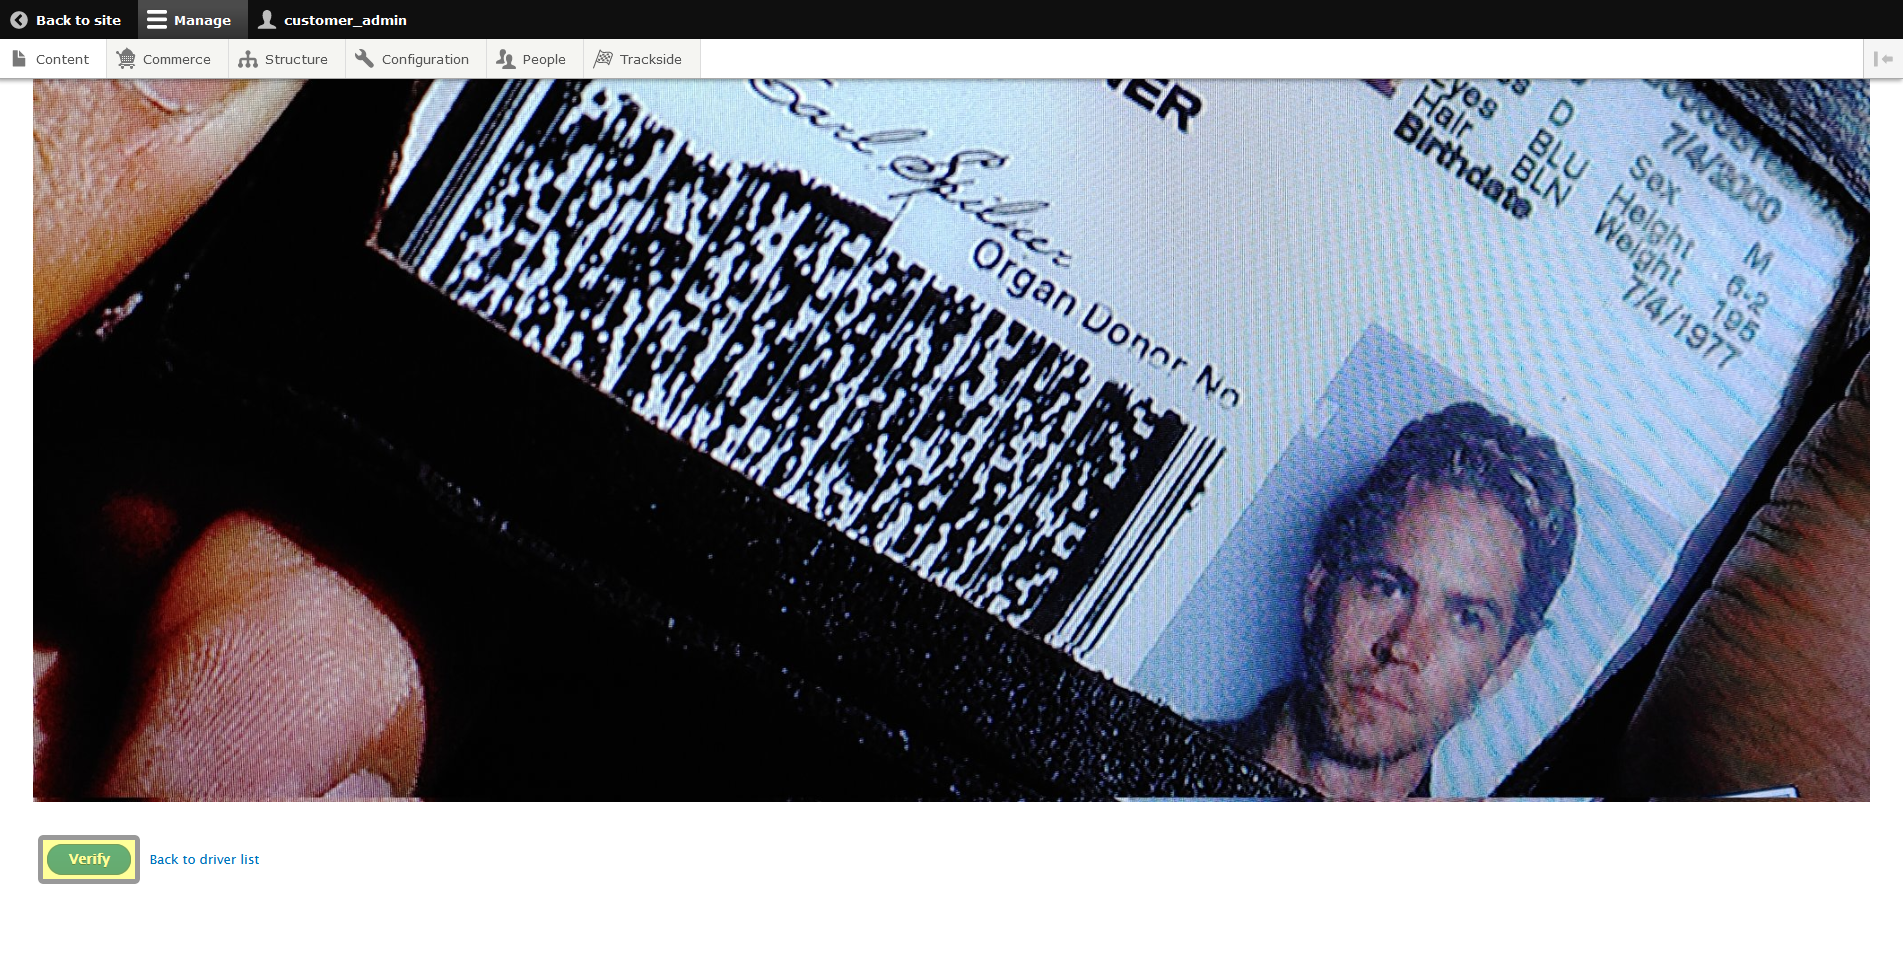
At the top of the page, you'll see the pre-check-ins listed. You can check all 3 on this page. What you're going to need to check will vary depending on your organization's waiver, but you will more than likely at least be looking for a signature.

At the bottom of each form will be an option to clear that form if information needs to be changed. Only use this button if you need to make changes, because as soon as you do, you'll have to fill the form out again in order to proceed.
As soon as you've verified all the information on the forms, and that a proper photo of an ID has been added, clicking the Verify button at the bottom of the page will confirm the information entered and complete check-in. Back to driver list will cancel the verification and leave the process incomplete.
This will return you to the driver list and you'll get a confirmation that the forms were saved. You can also verify that by the driver's name that it now says Verified and Checked in.