Product Mapping (Add Buttons to POS Screen)
This article will help you get easily selectable buttons set up on your POS for quicker selection of Products without bar codes in place of using the Product Lookup function. Ensure you have some products - General Admission Ticket Products and Participant Registration Products are acceptable for this - as well as your Register Groups with Registers assigned and Registers prior to this task.
Step 1: Hover over Configuration
While logged in and with your Manage Menu open, hover over Configuration. For the following few steps, you can also click the menu buttons and it will take you to a page where you can click the following options as well.
Step 2: Hover over Trackside
Hover over Trackside on the next menu.
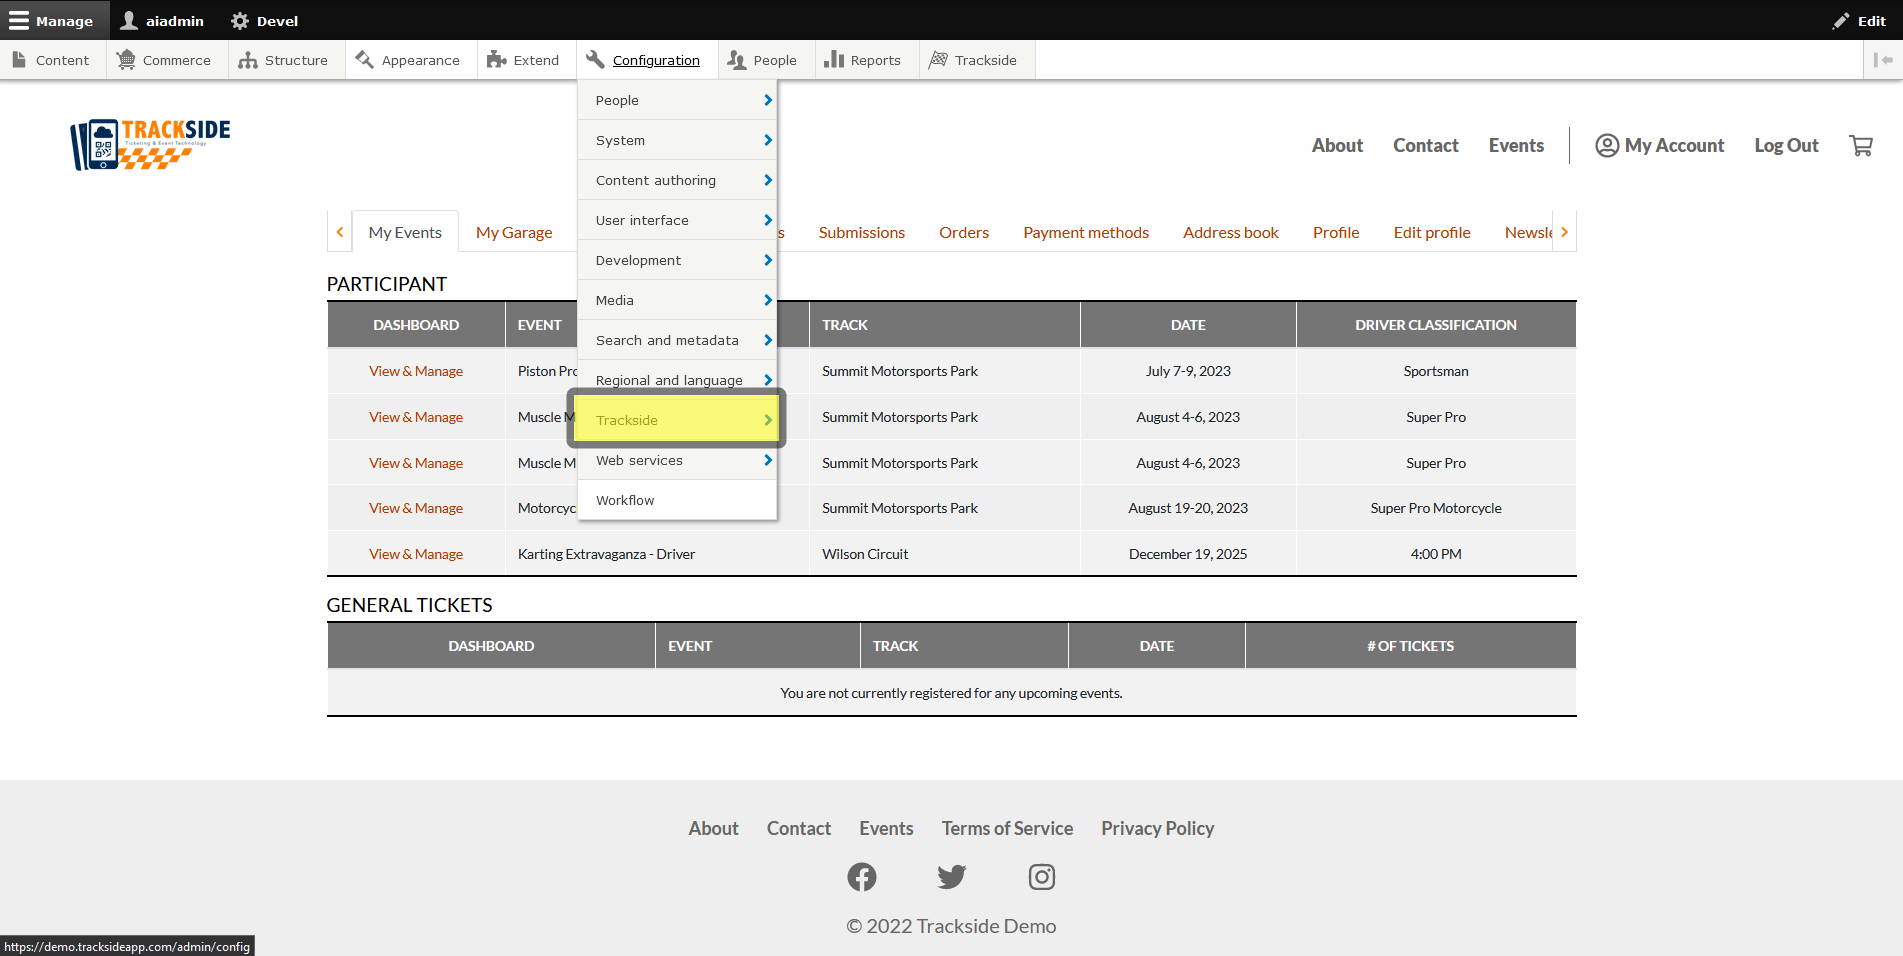
Step 3: Hover over Point of Sale
Next, hover over Point of Sale (POS).

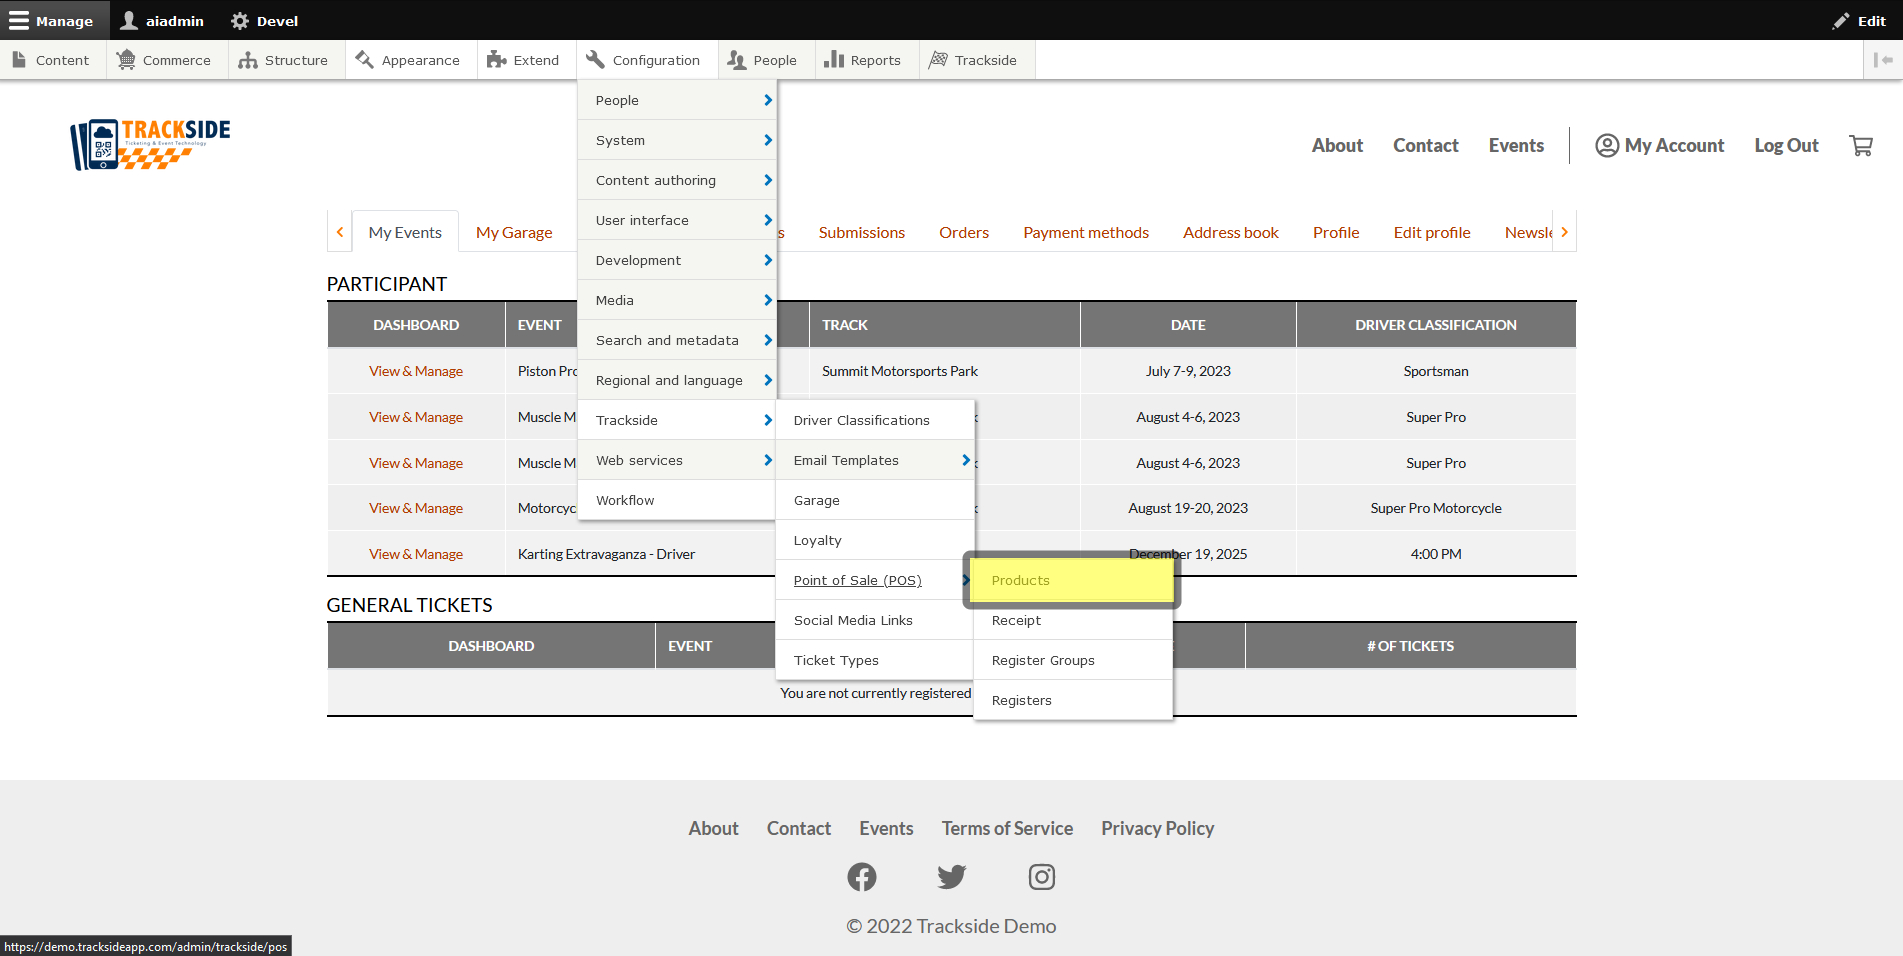
Step 4: Click on Products
Finally, click on Products. This will take us to the screen where we can see all Point of Sale Mappings.
Note - Preexisting Mappings
From here, if you have preexisting mappings, you may edit them by clicking on their names.

Step 5: Add Product Mapping
For this article, we're creating a new mapping, so we're going to click on the Add Product Mapping button above our products.

Step 6: Product Type
This will take us to the screen to set up our Mapping. You will want to start by selecting the Product type you wish to create a mapping for.

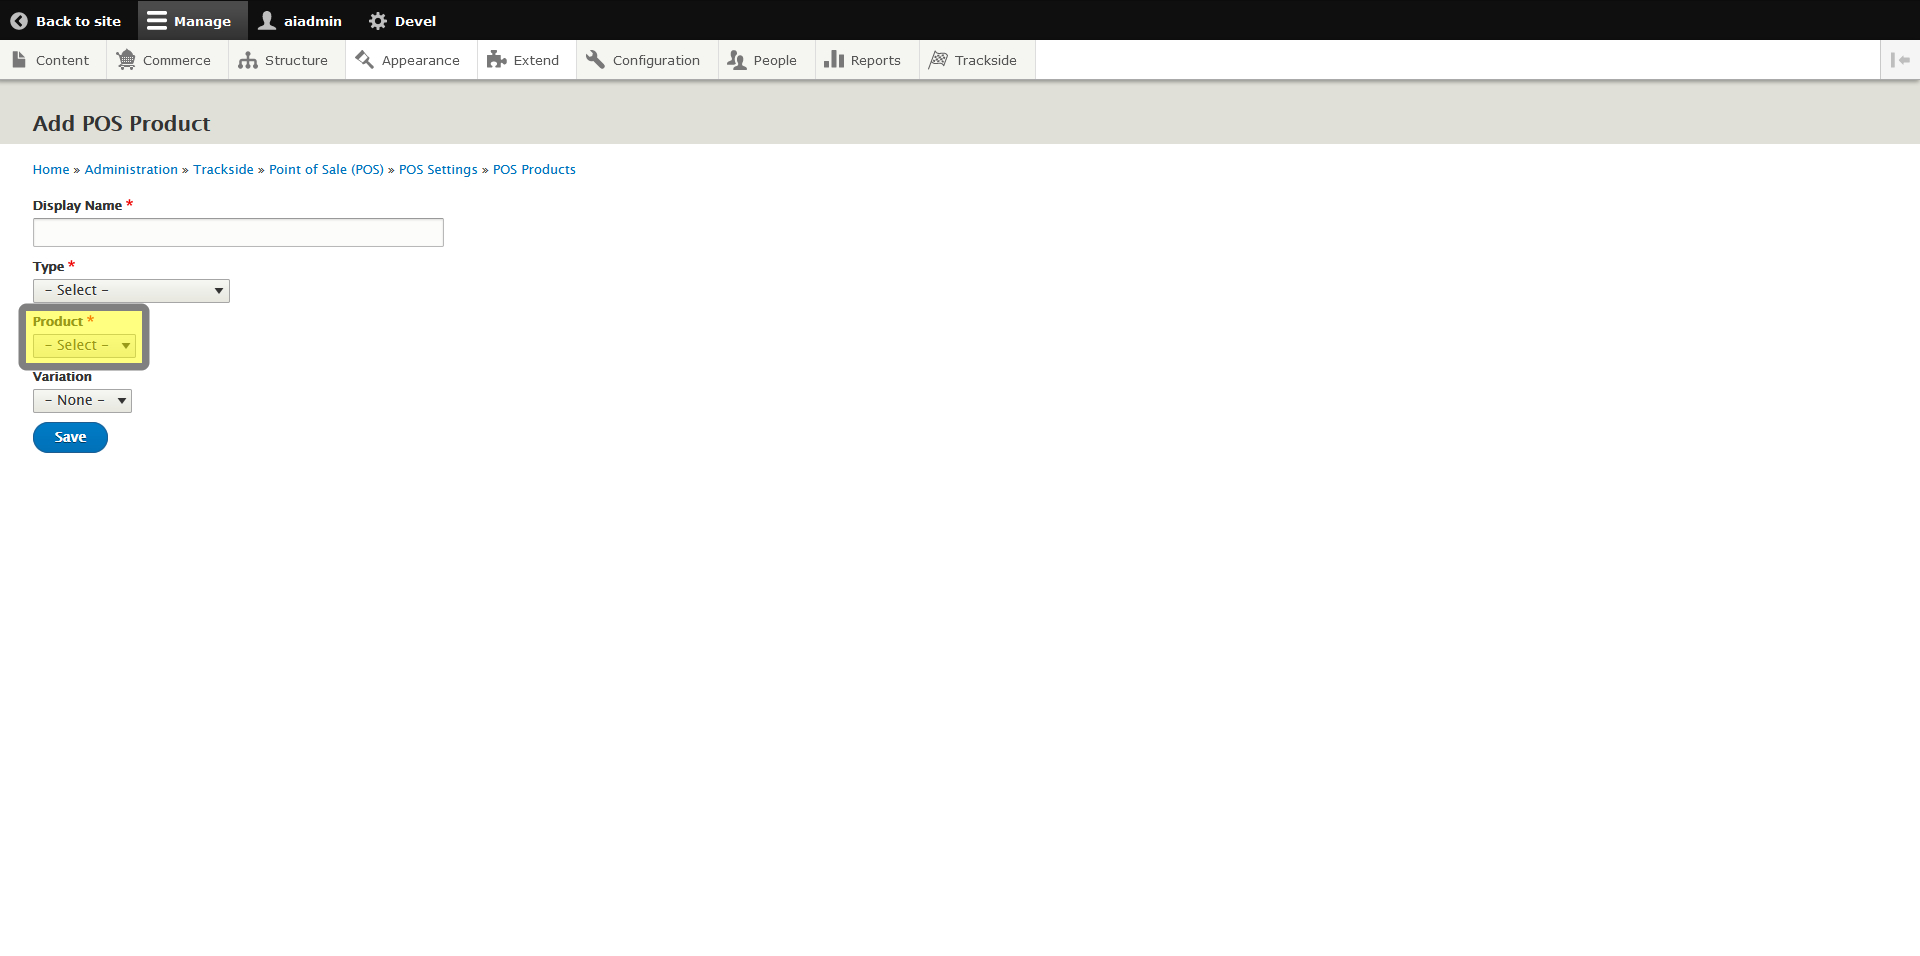
Step 7: Find Product
This will take us to the screen to set up our Mapping. You will want to start by selecting the Product type you wish to create a mapping for.
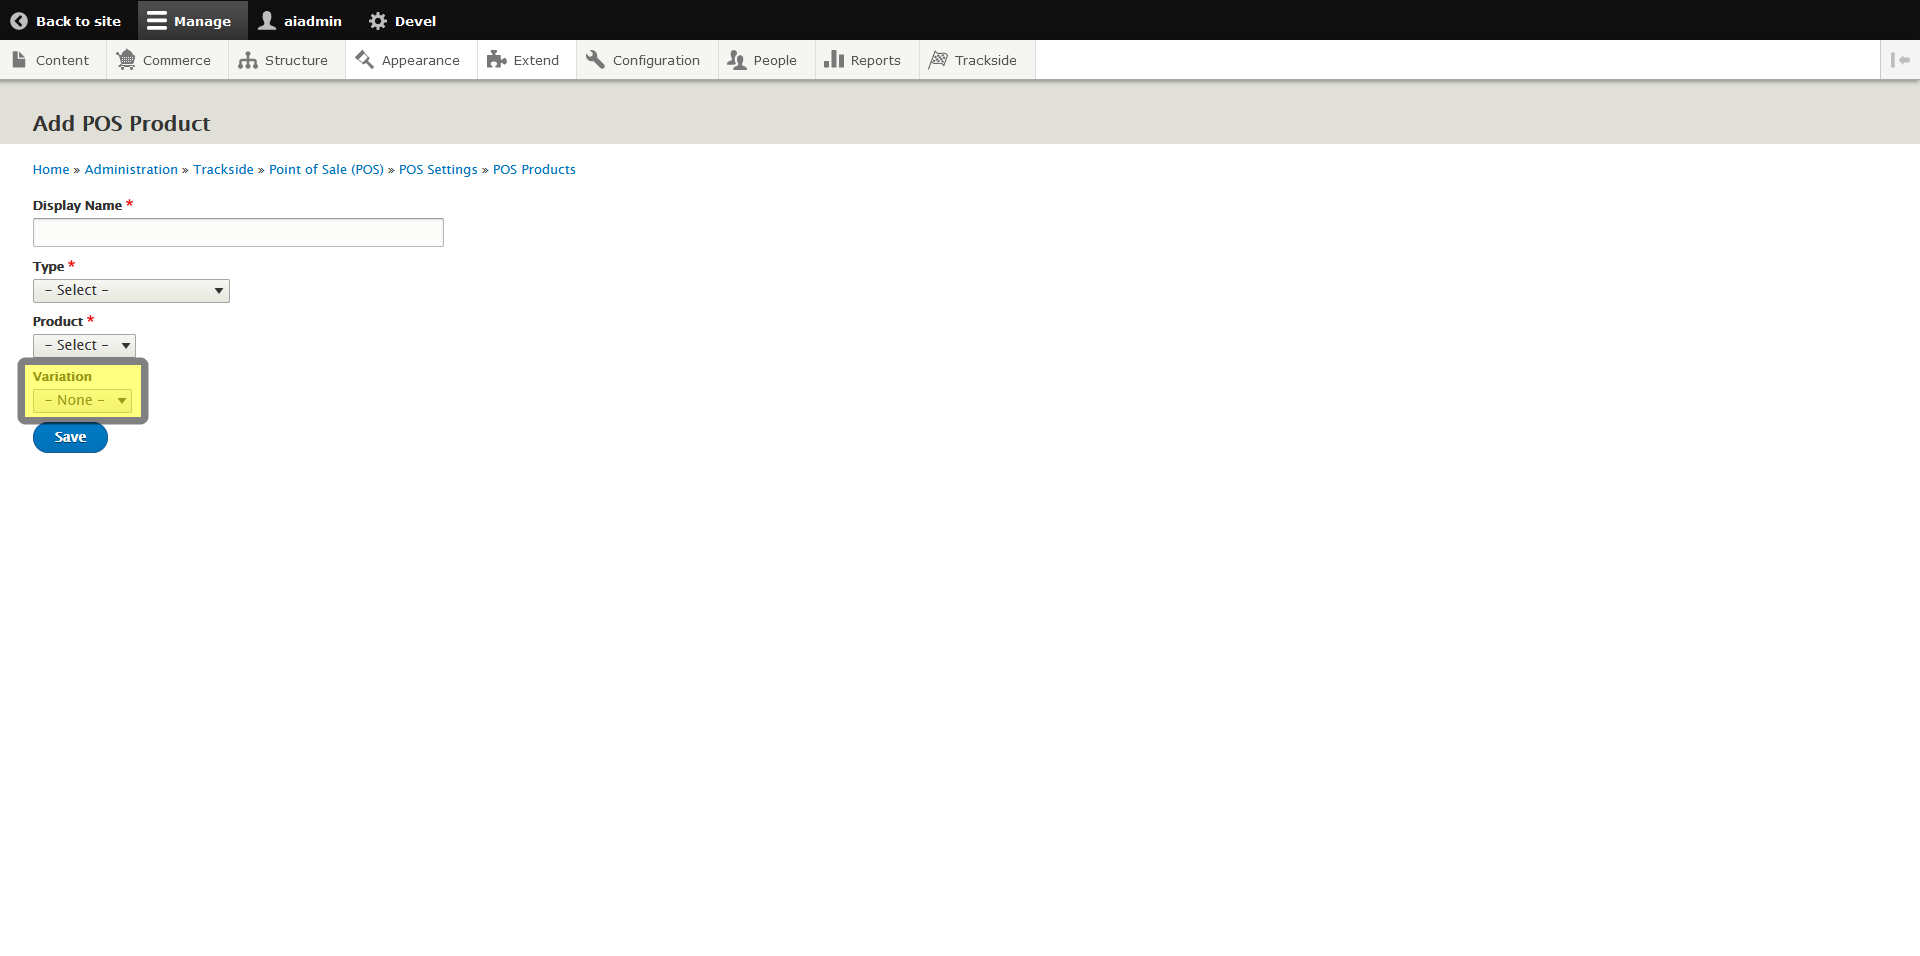
Step 8: Select Variation
You will then select the Variation of the product you wish to map if applicable. Note this step is not required and not every product will have variations. If this is the case, you may skip this step.
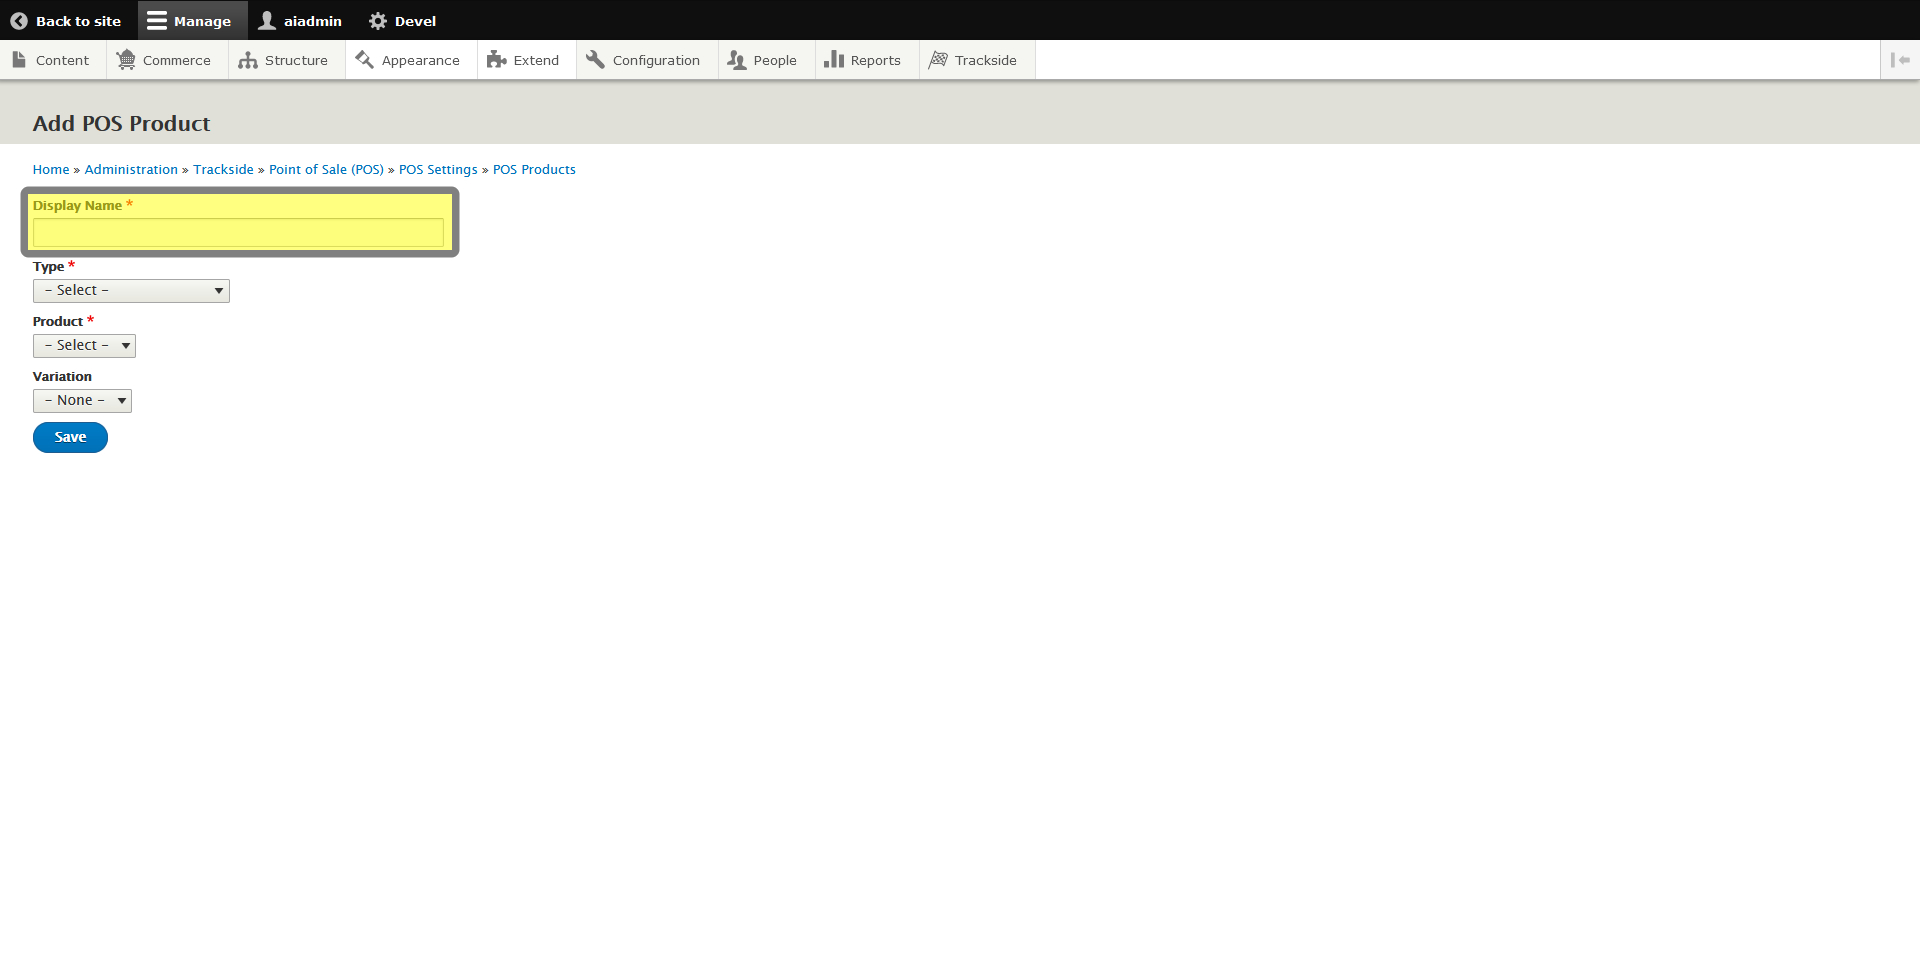
Step 9: Add Button Name
In the Display Name text box, you will enter the text you want displayed on the button, which doesn't have to exactly match the name of the product. Because of space, you will want to keep this somewhat short. You can come back and edit this later if needed.
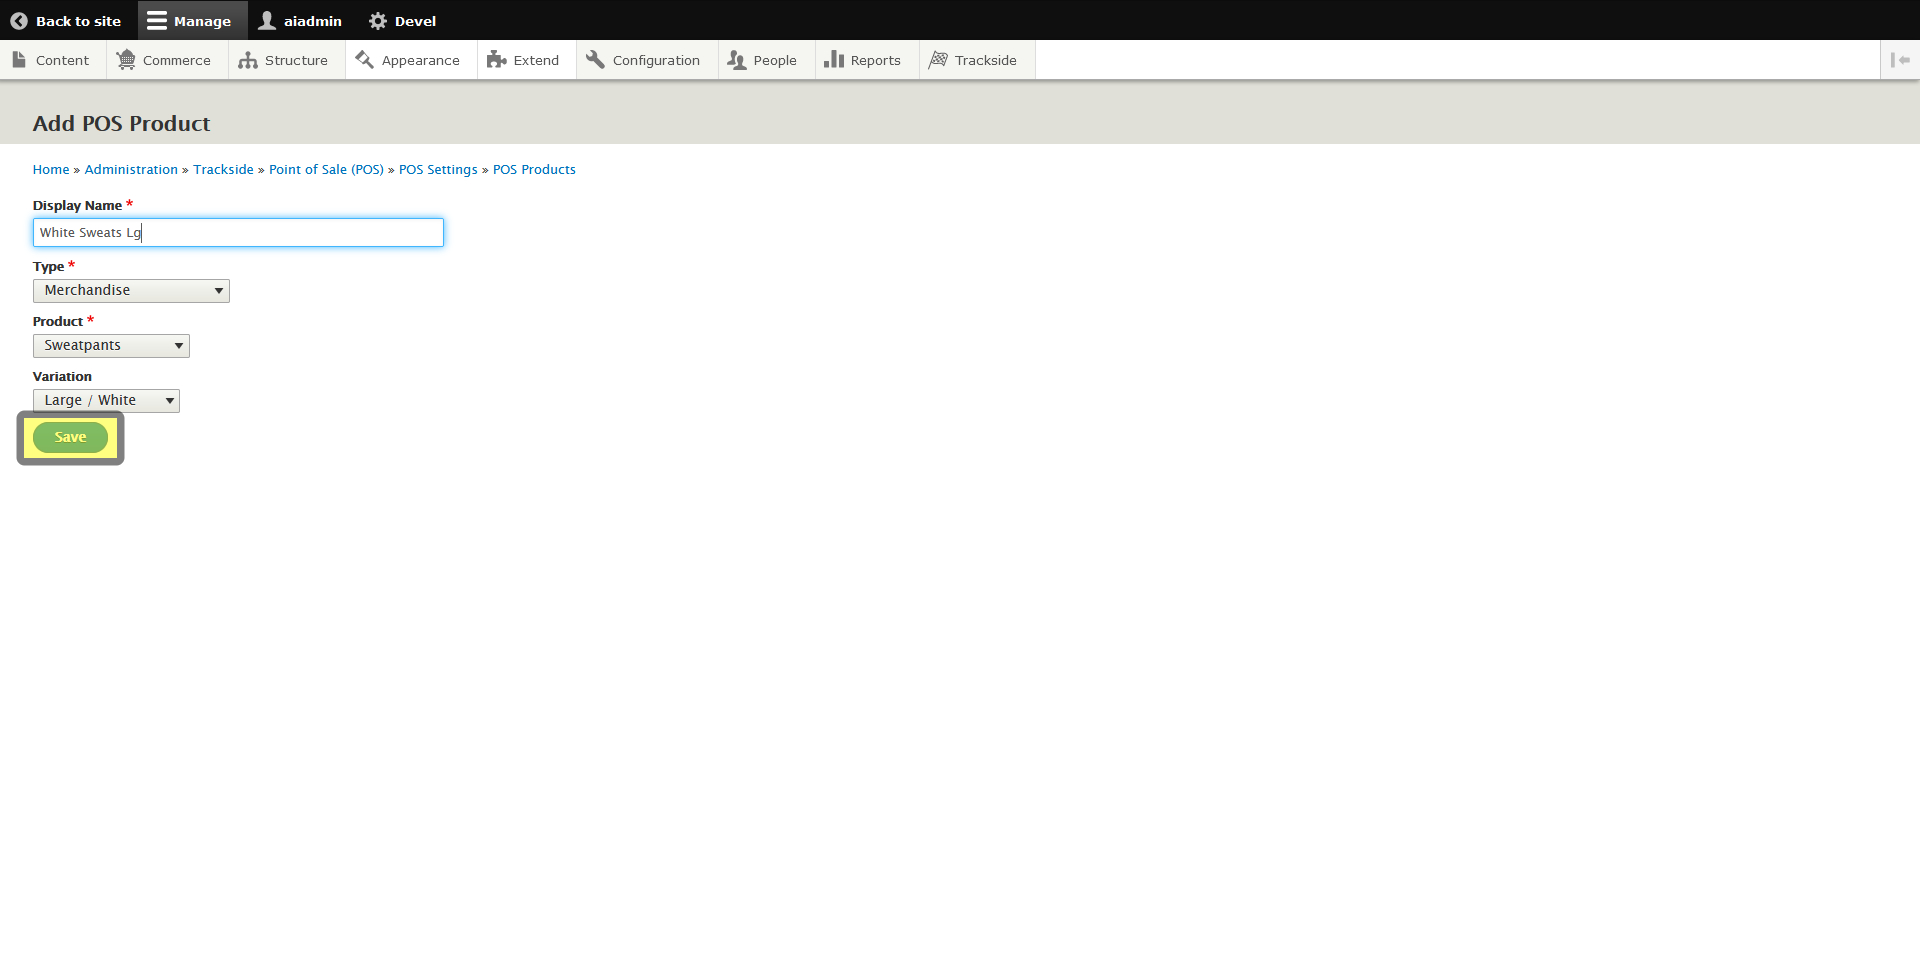
Step 10: Click Save
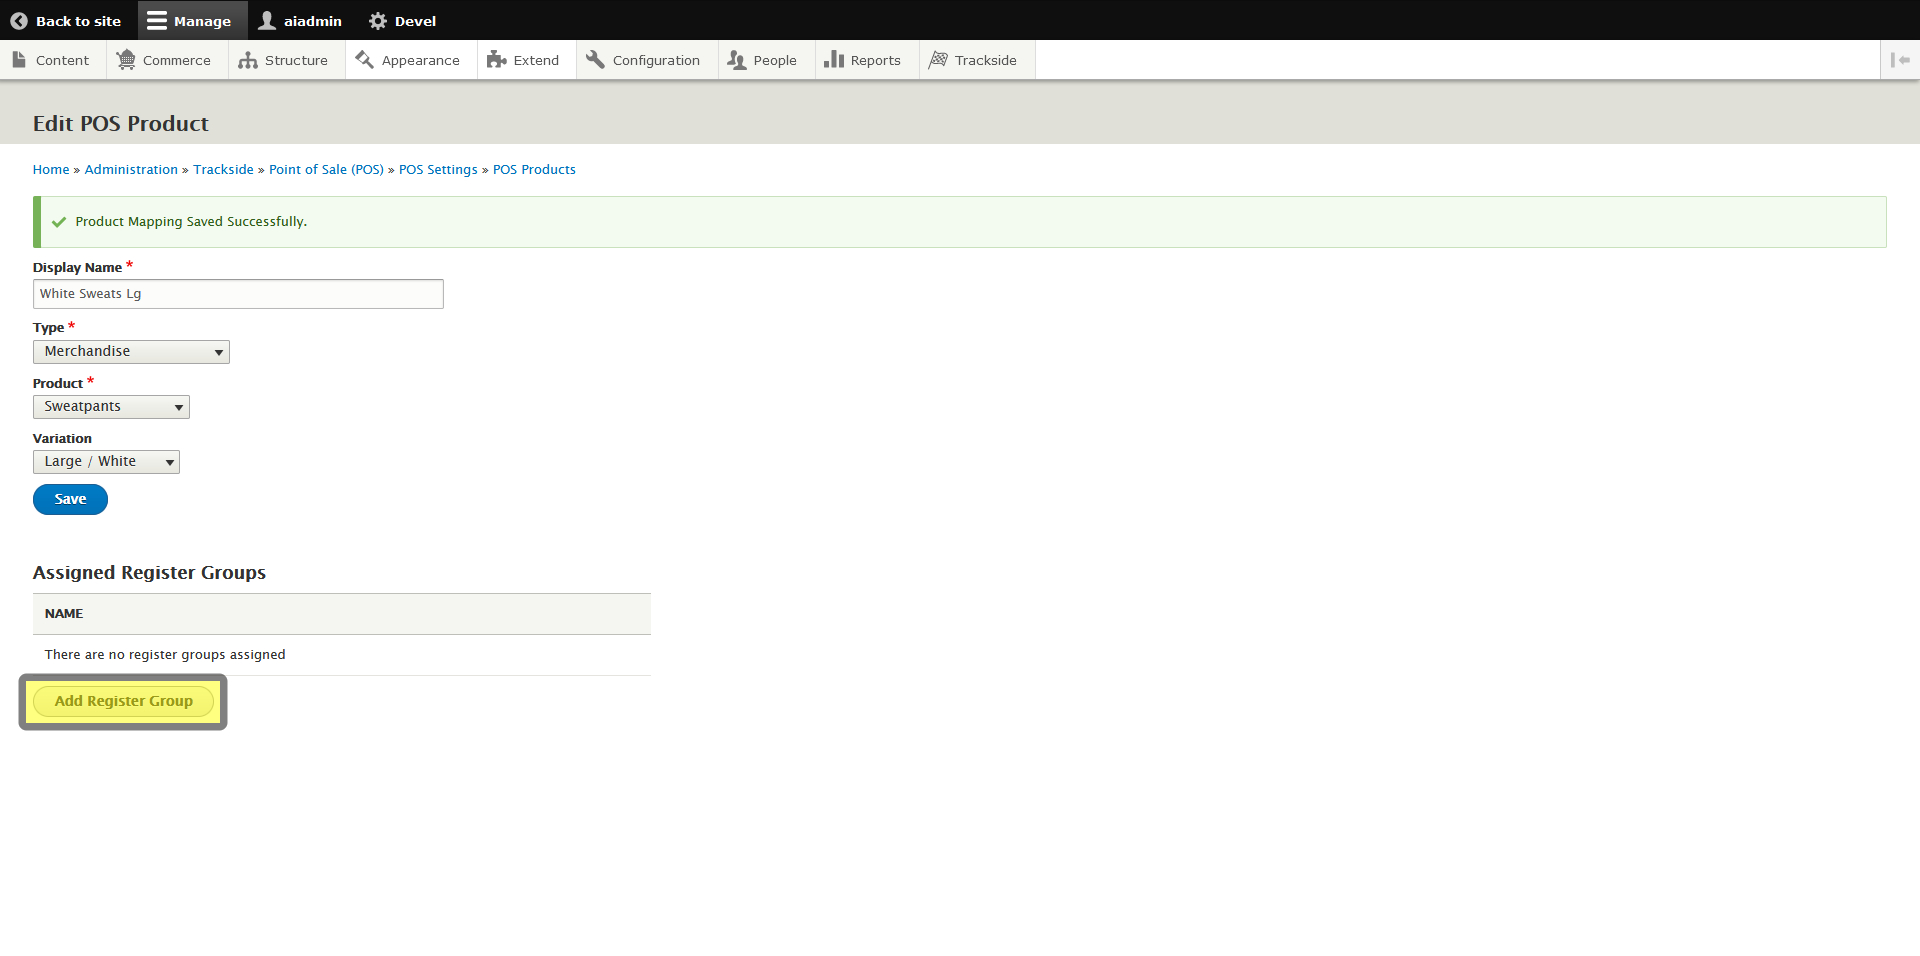
Now save your progress by clicking the Save button and this will establish a product button to be mapped.
Step 11: Click Add Register Group
This will open the option to add the button to a Register Group, and you will see it is currently unassigned. Go ahead and click Add Register Group.
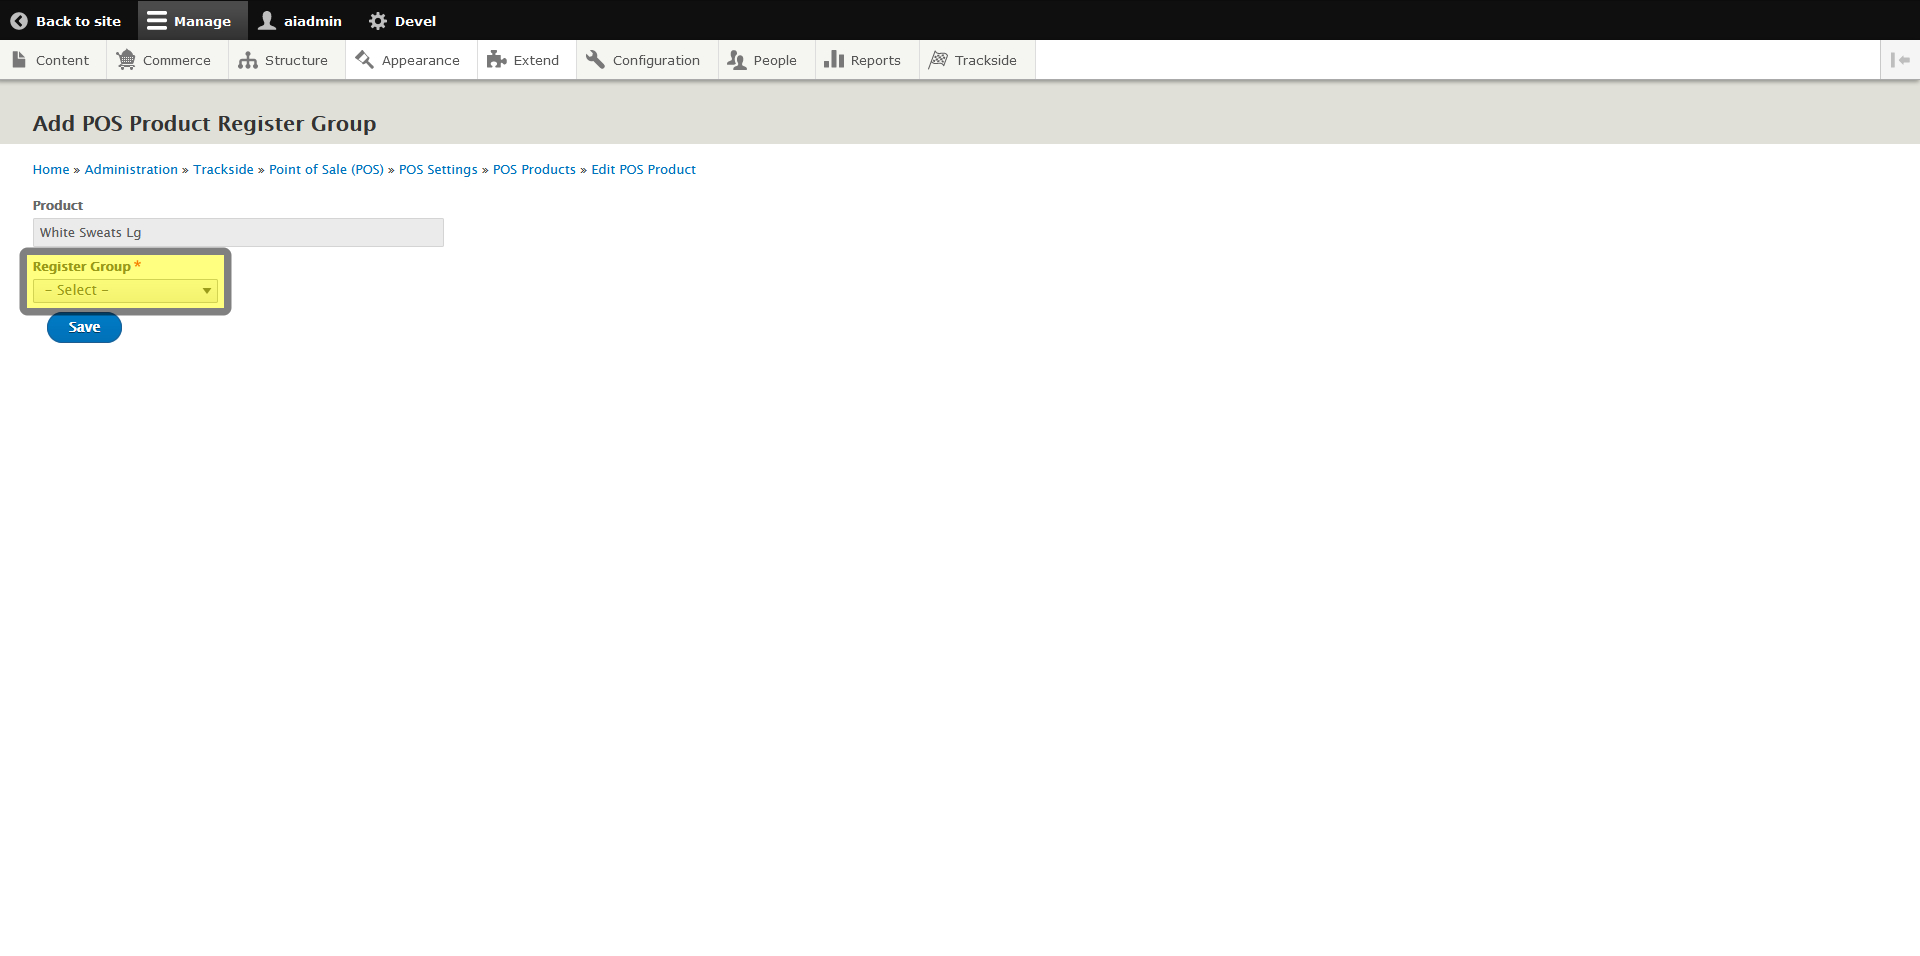
Step 12: Select Register Group
From here, you will select the Register Group to assign the button to, and your button will appear on all Registers within that Register Group.
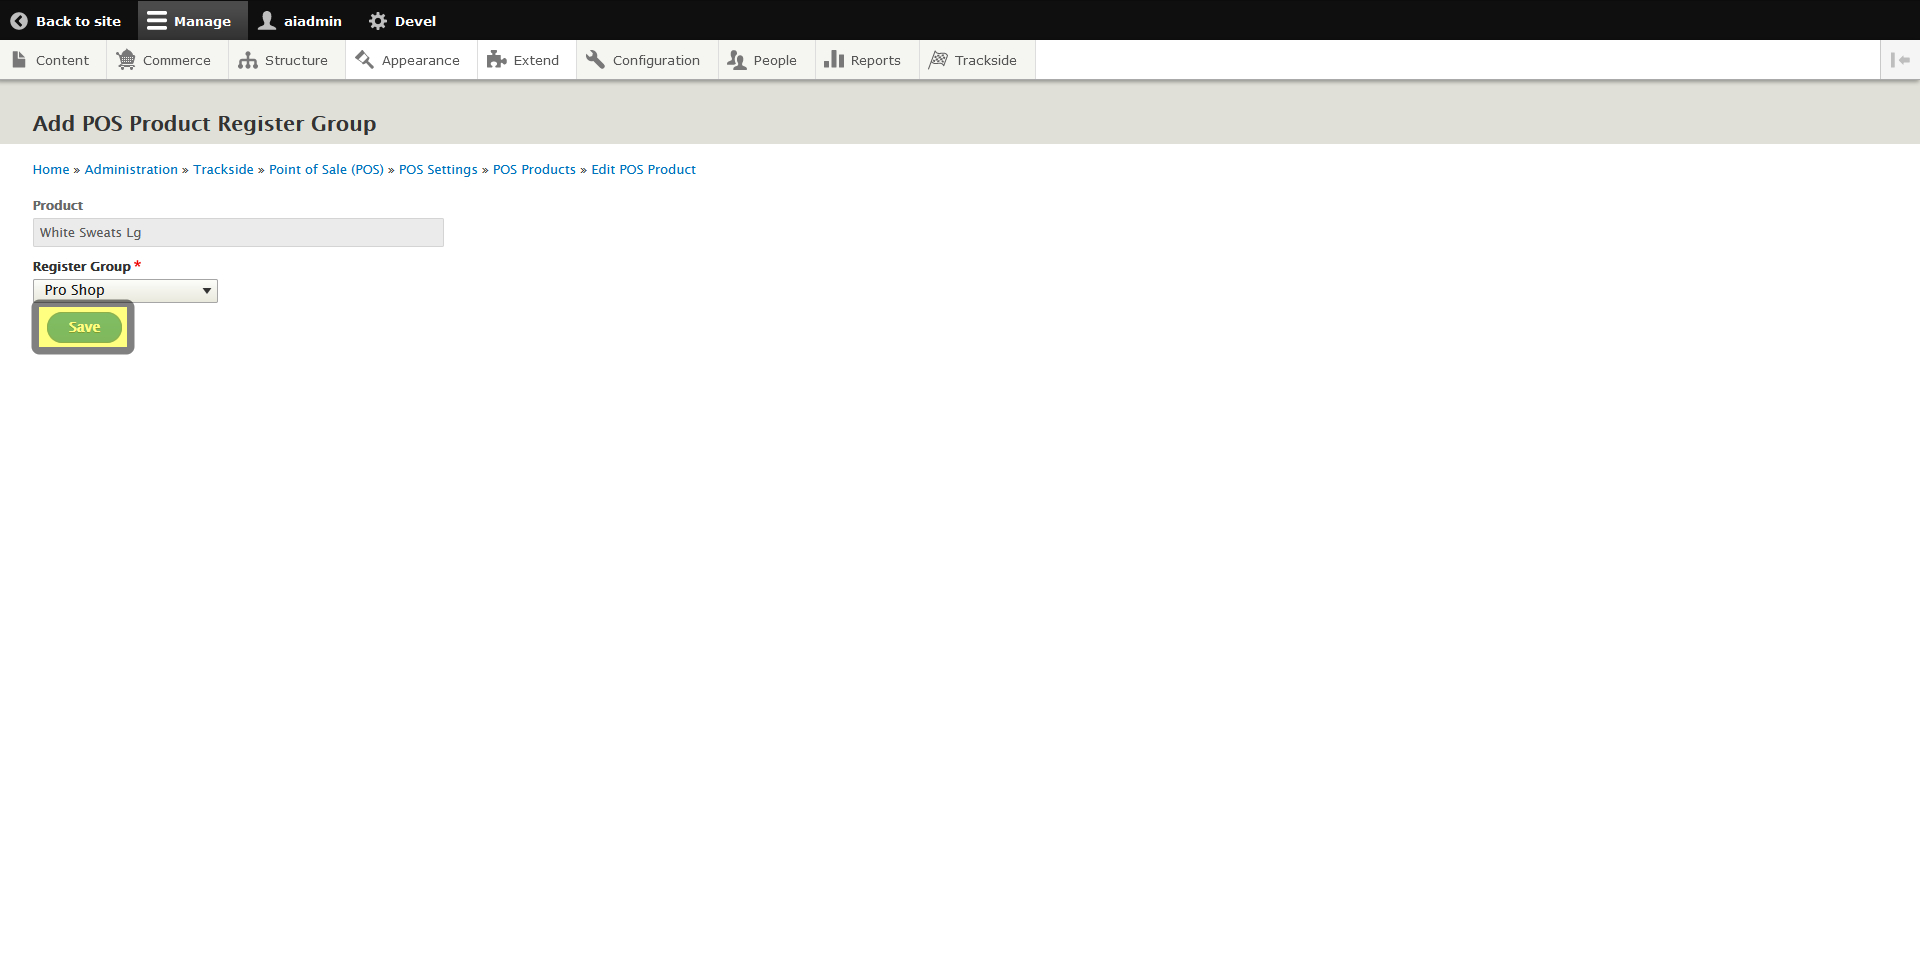
Step 13: Click Save
Once you have your Register Group selected, click Save once again to save your progress.
Step 14: Add Button to Additional Groups
Repeat from Step 11 for any additional Register Groups you may want the button assigned to.
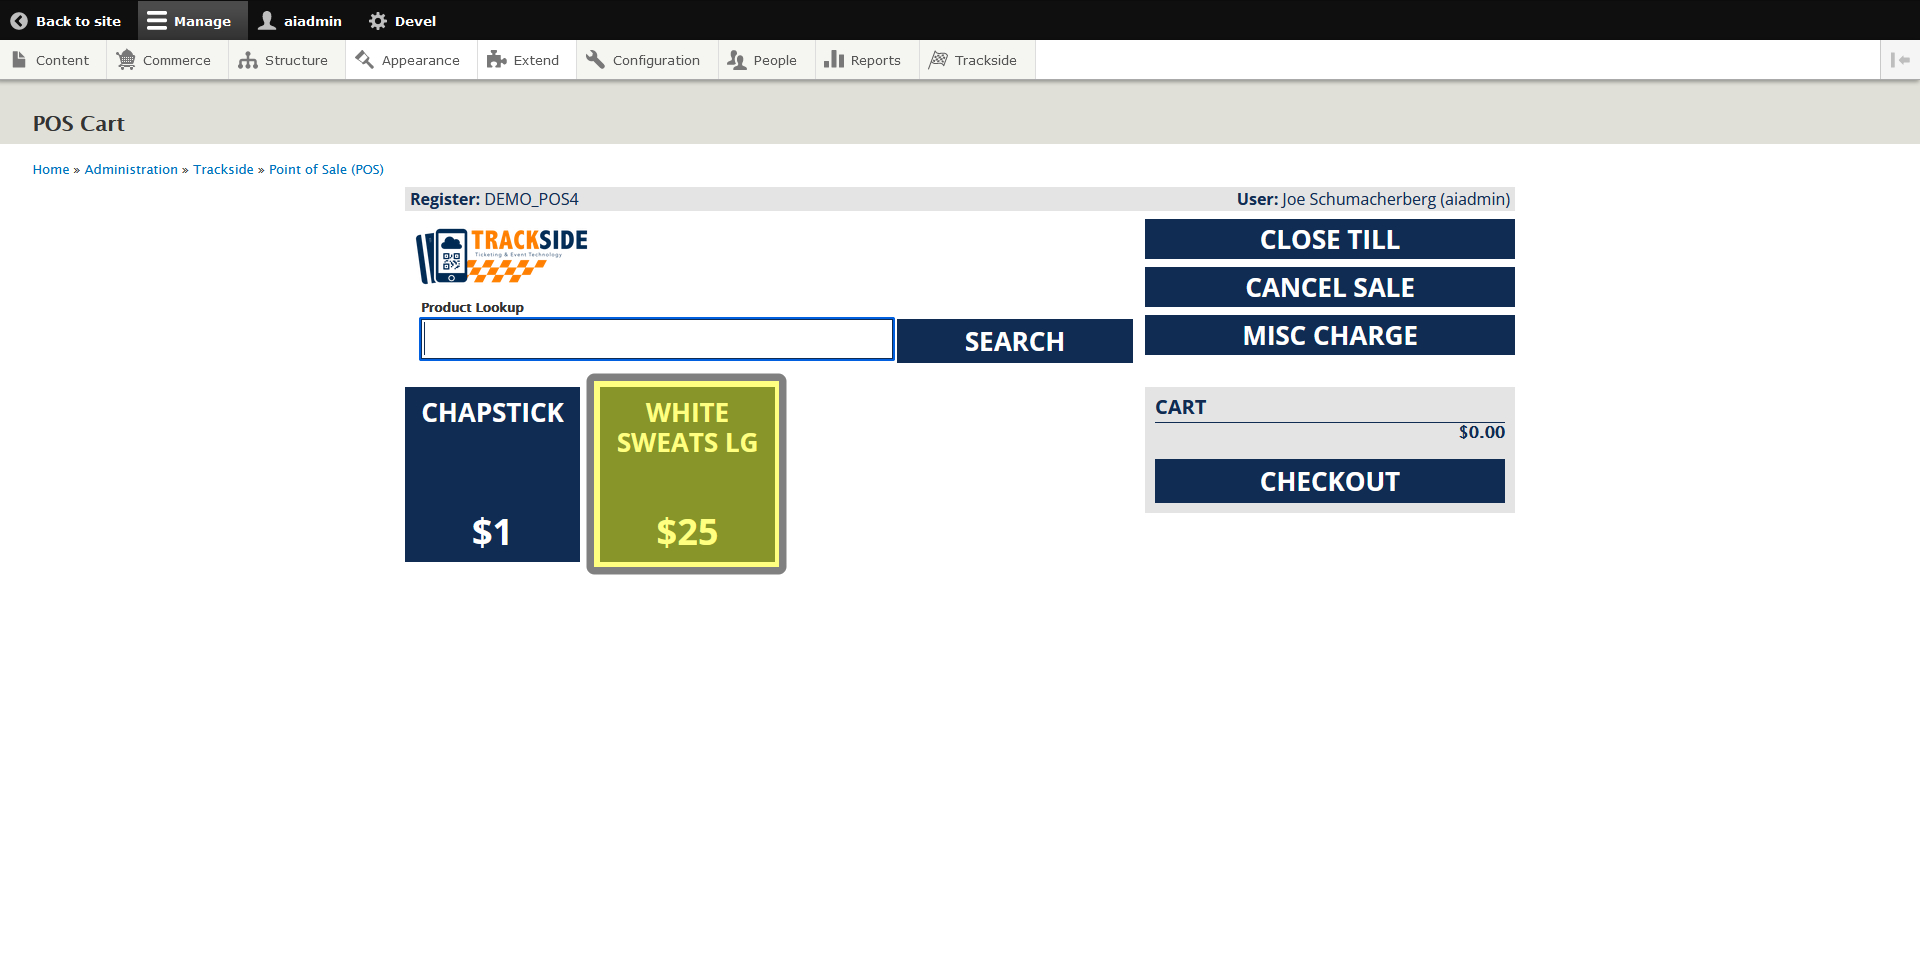
Admire Your Work
Once you start your Point of Sale in that Register Group and start your till, you will see your new button listed!