Base Product
The next few walkthroughs are going to take you from start to finish generating a product for sale with the Product Setup Assistant.
Step 1 - Navigate to Product Setup Assistant
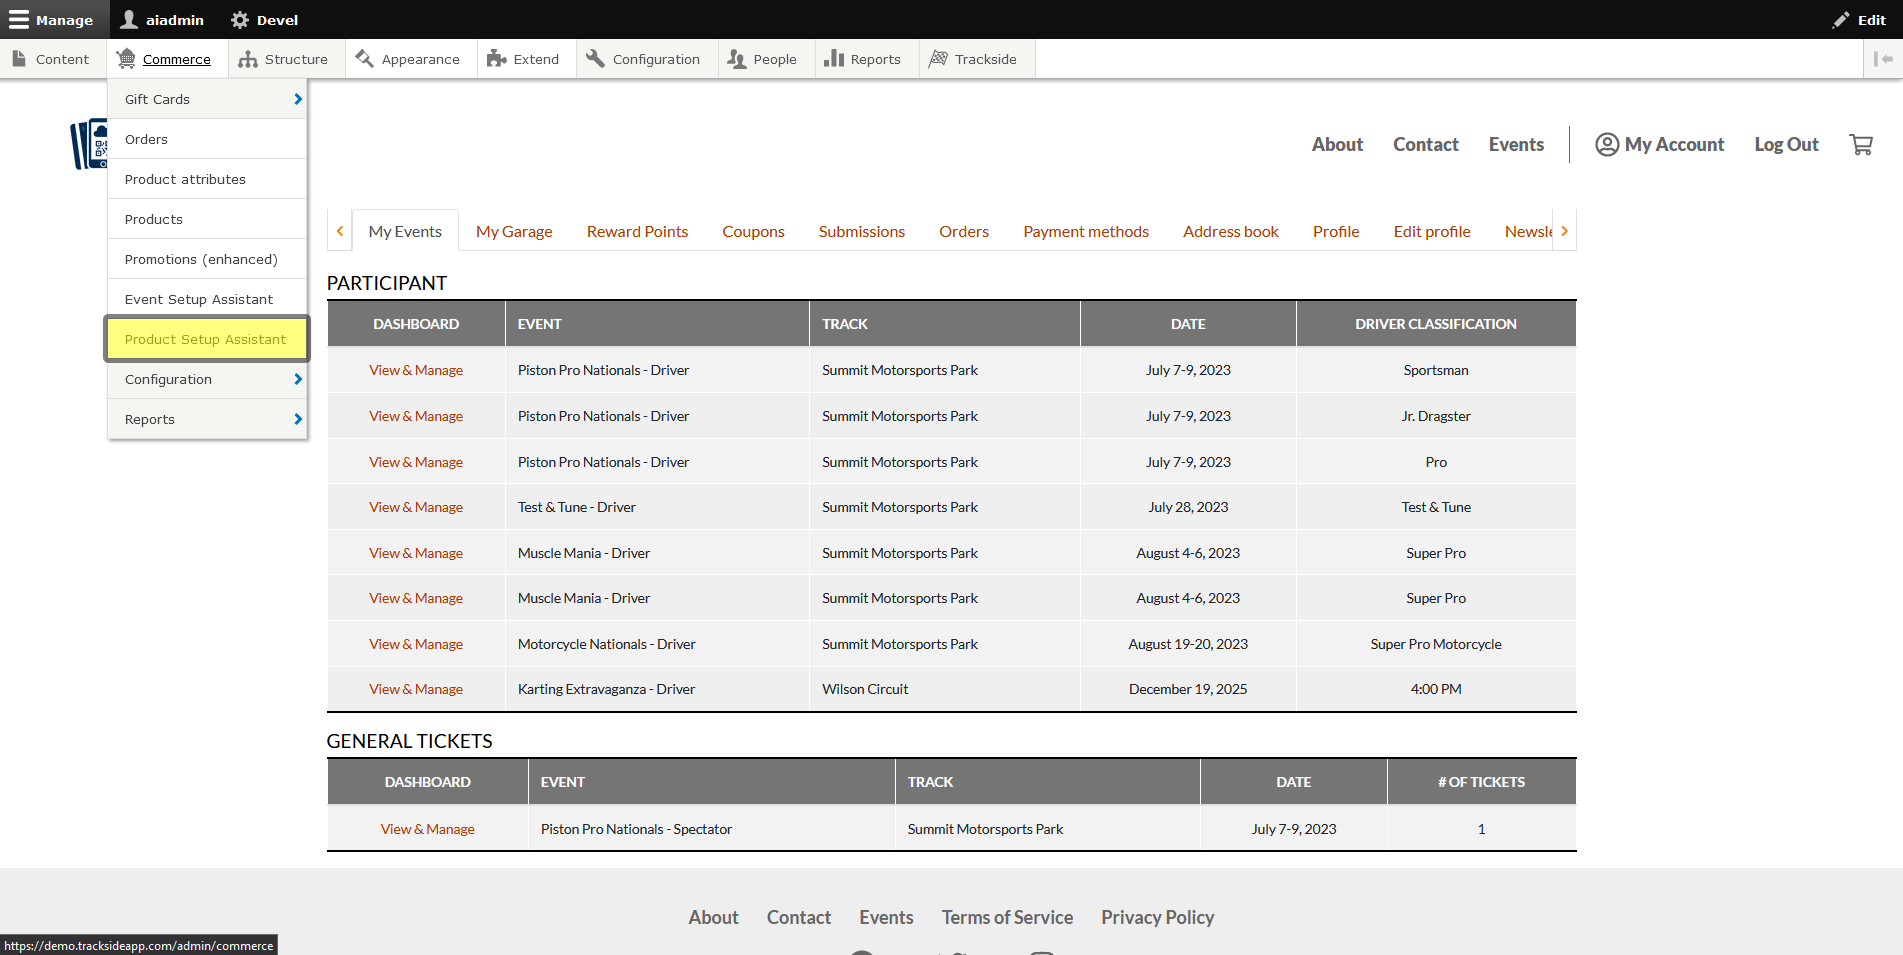
Once you're logged in, begin by hovering over Commerce in the Management Menu.
Then click on Product Setup Assistant.
Step 2 - Set up Your Base Product
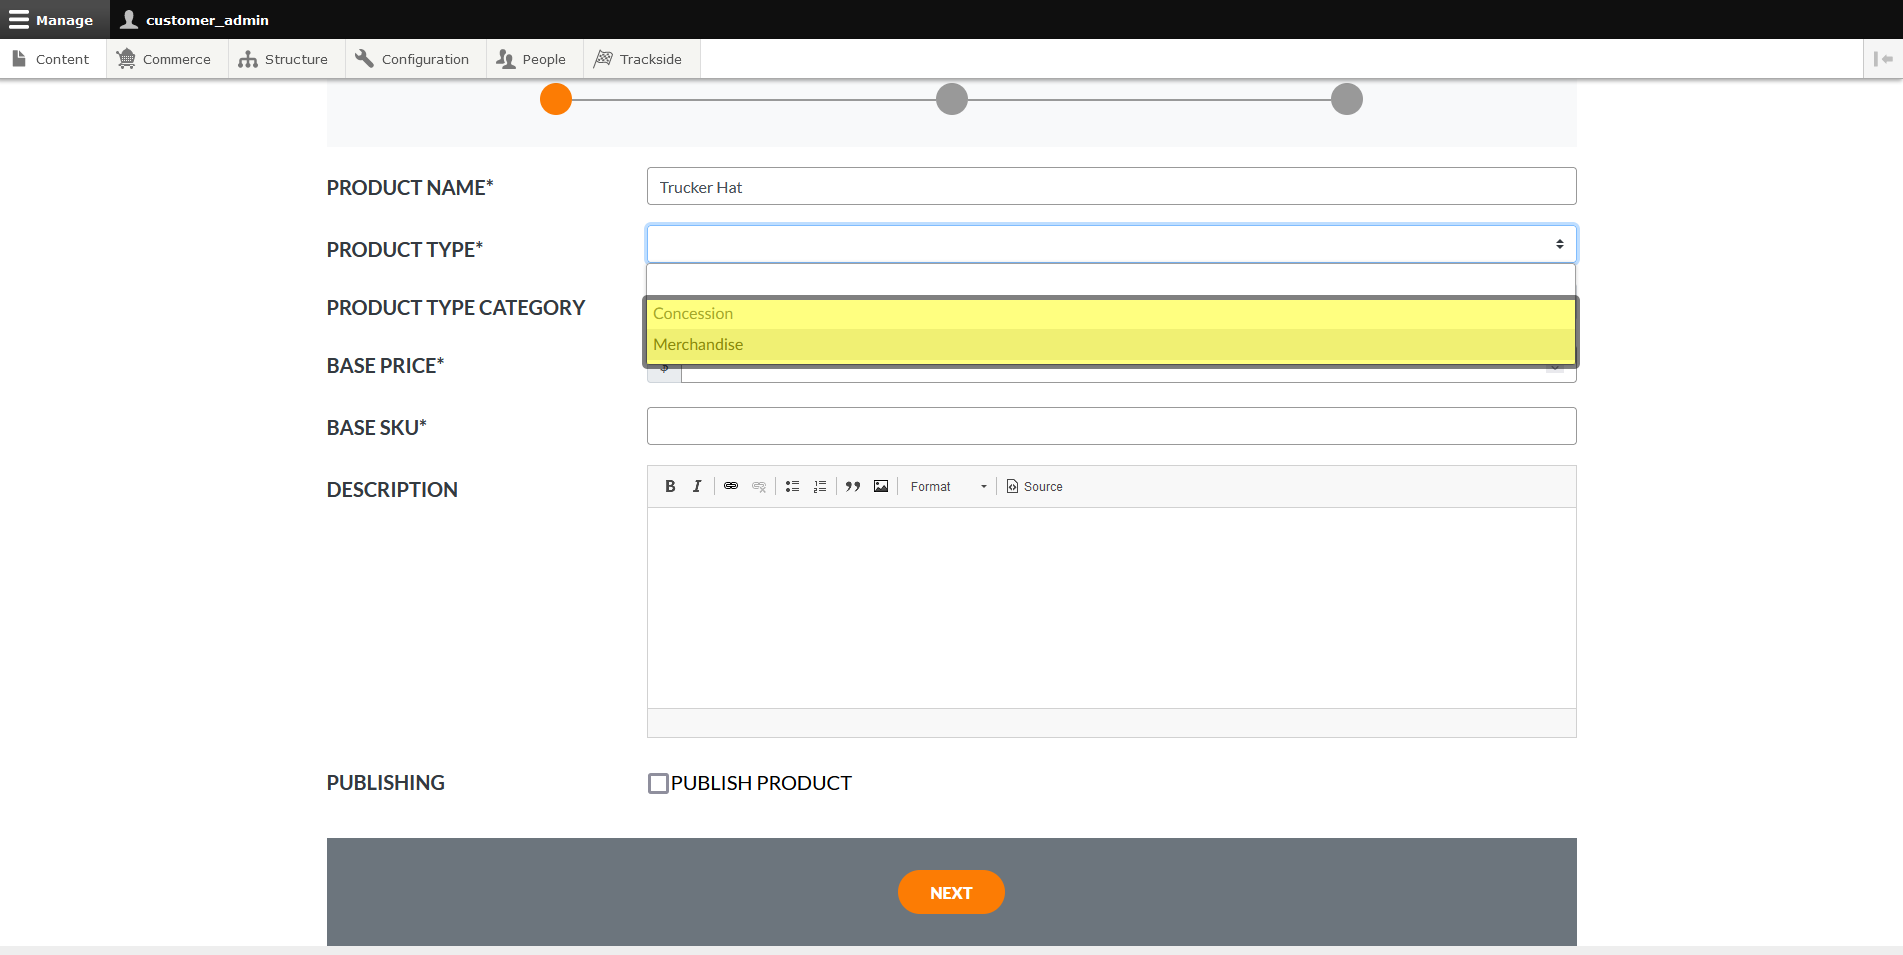
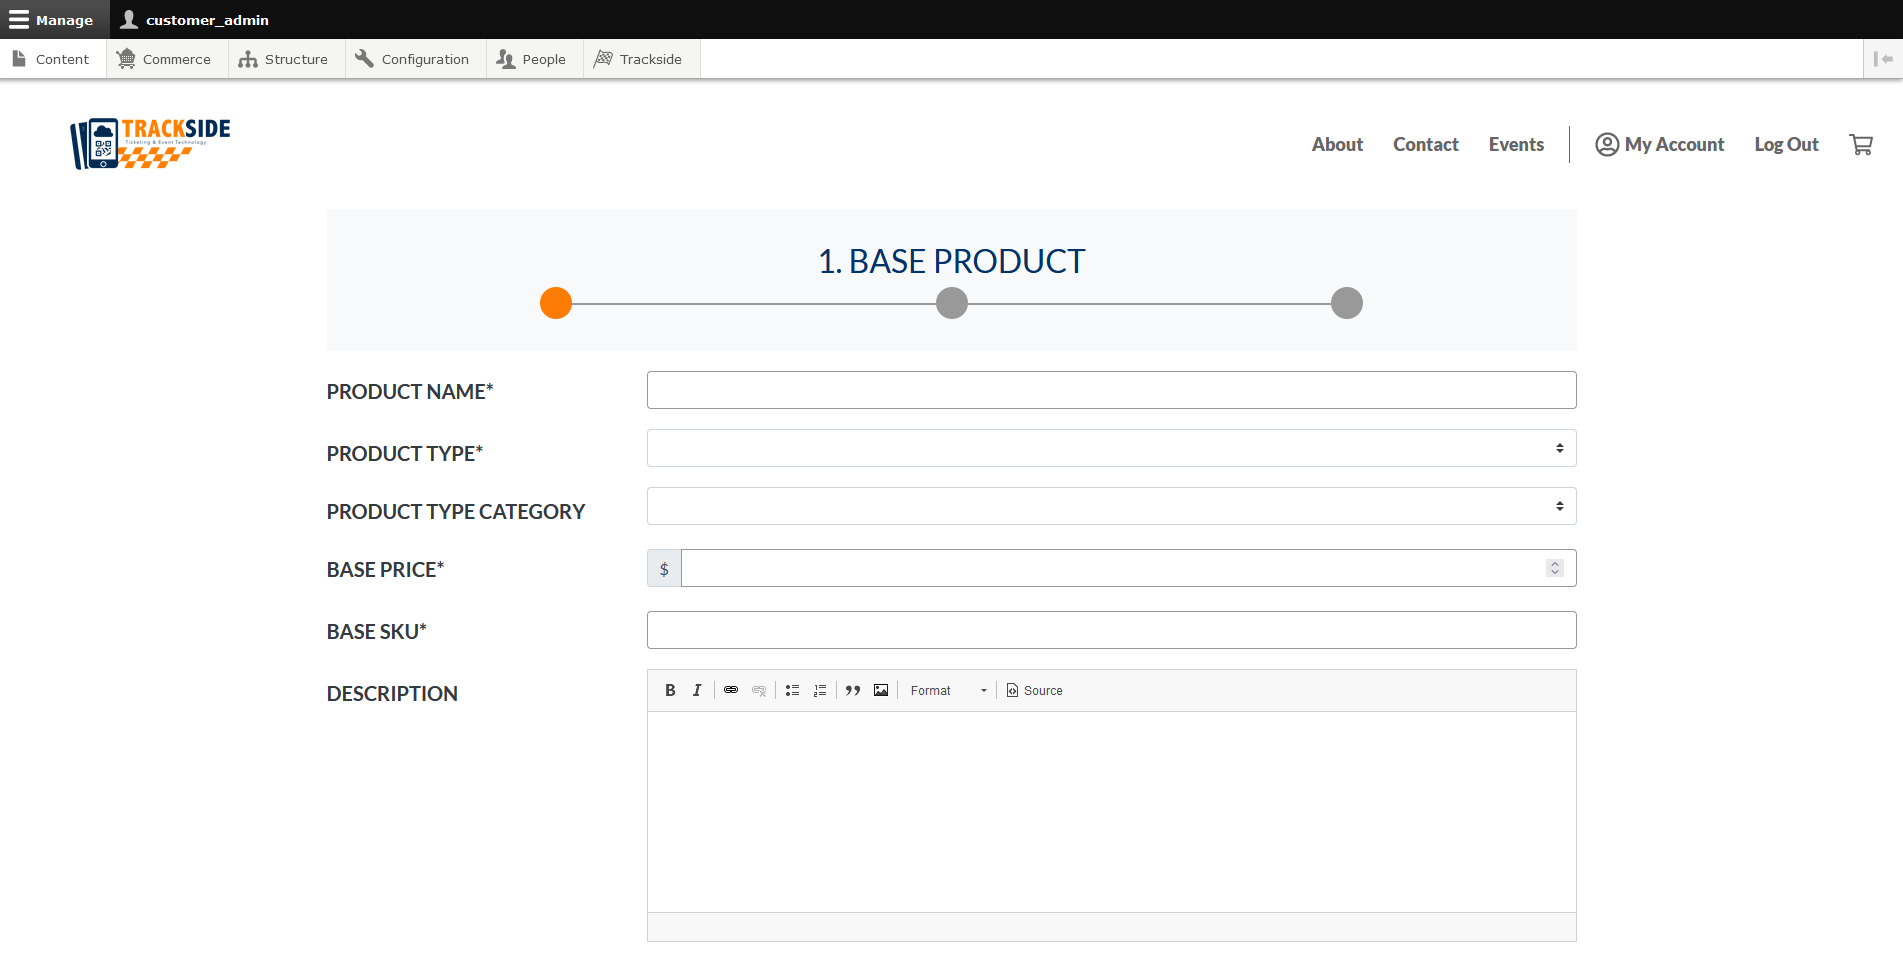
This will take you to the Product Setup Assistant. The first thing it's going to have you do is set up your Base Product. The two other steps represented by the bulbs in the picture at the top of the form are going to be Product Options and Product Stock, so we'll get to those in the next couple articles. If you have different colors or sizes you need to enter and track inventory separately on, those will be made easier there, but for now we're focused on the Base Product those variations stem from. This part of the form is for that Base Product.

We'll start by naming the product, and then we'll add the Product Type. Note that you have Merchandise and Concession to choose from.