
The Printer is Cutting My Receipt Off
If your printer is cutting off your receipt, you can use this guide to make sure the settings for it are correct. These settings comes preconfigured and you shouldn't have to mess with it, but sometimes a Windows update may cause these to need setup again.
To identify whether your system is using Windows 10 or 11, look at your task bar at the bottom. It's a good giveaway. Most of our systems are using Windows 11 now.
Windows 10
Step 1 - Search for Printers & Scanners Settings
We're going to start by searching for Printers & Scanners at the search bar at the bottom of the desktop. Once it comes up, click on it.
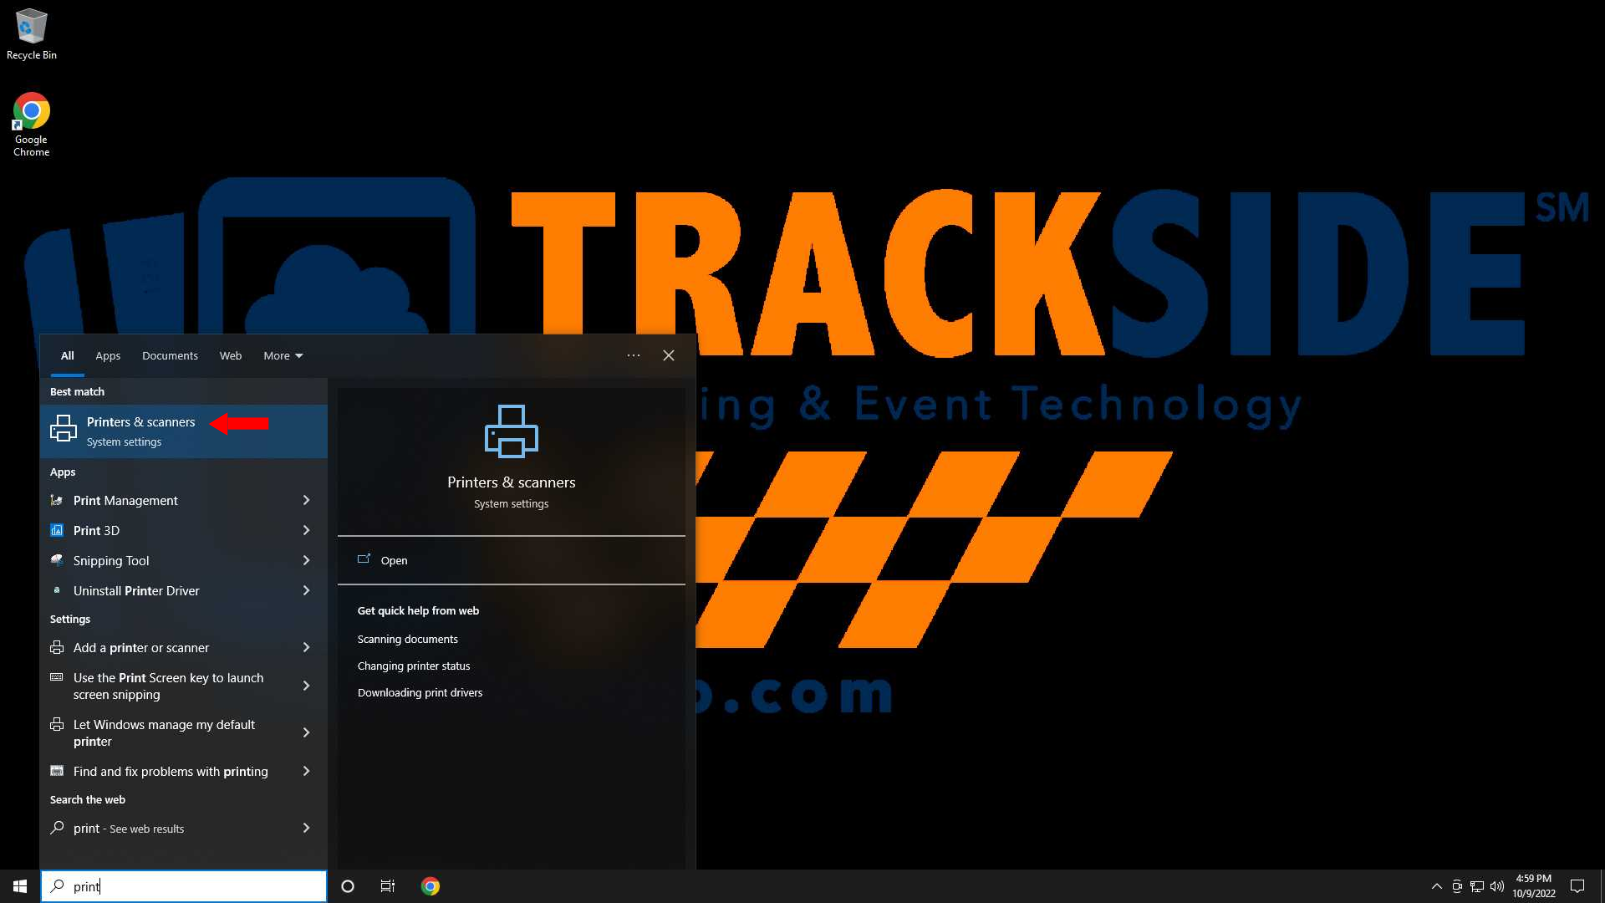
Step 2 - Click on POS Printer & Manage
This will open Printers & Scanners in the Control Panel. From here you will click on your point of sale printer, and then click on Manage.

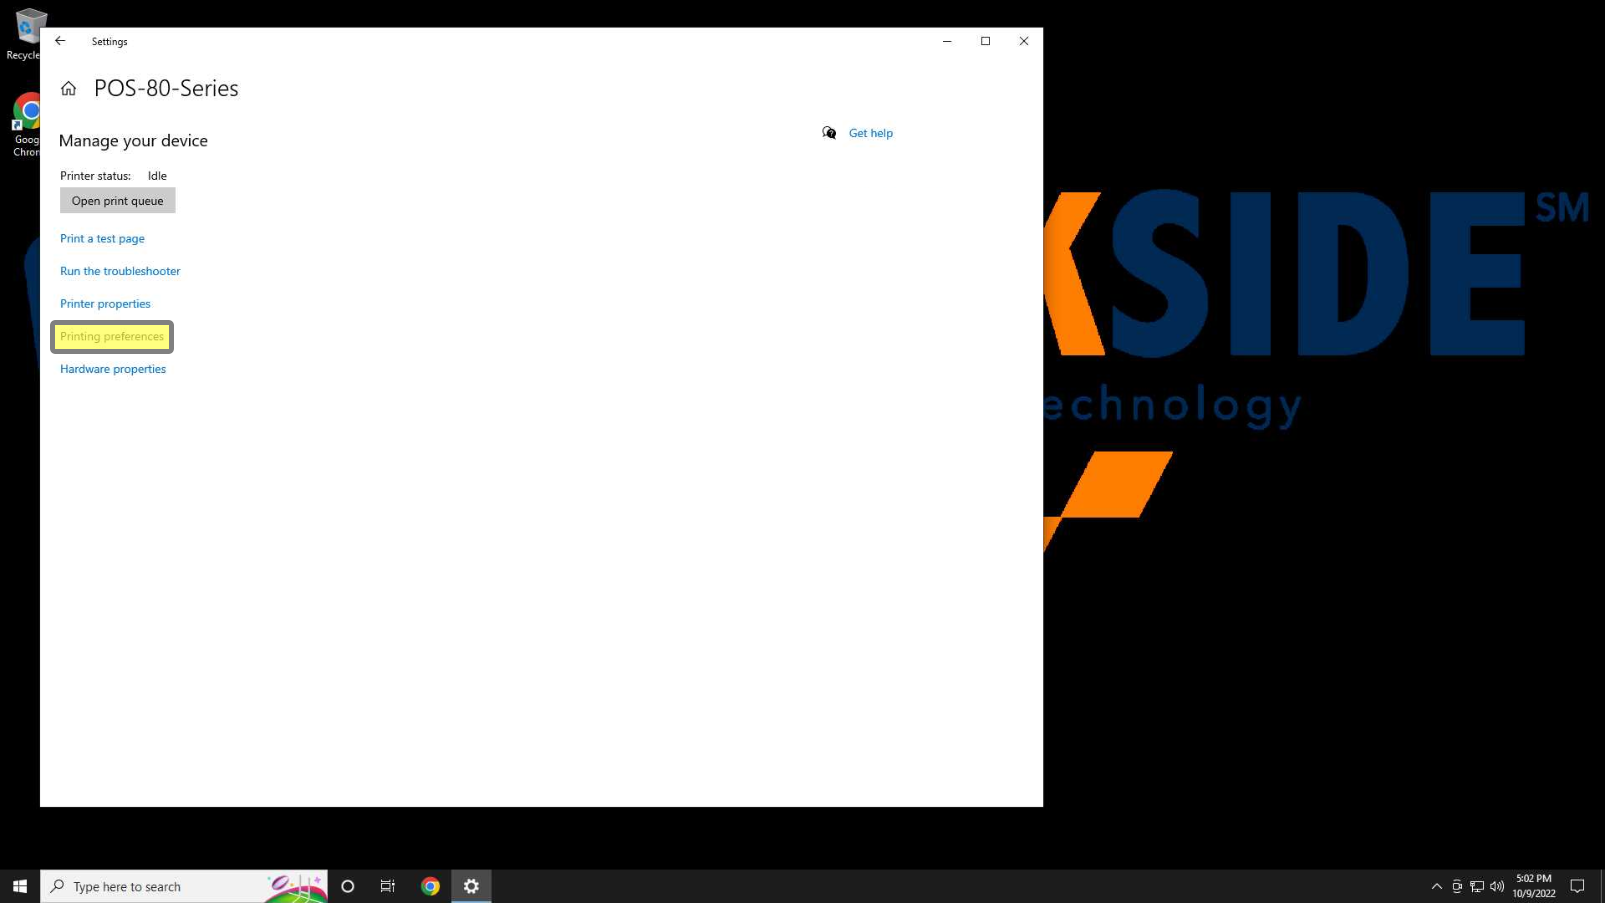
Step 3 - Click Printing Preferences
Then click on Printing Preferences on the left.
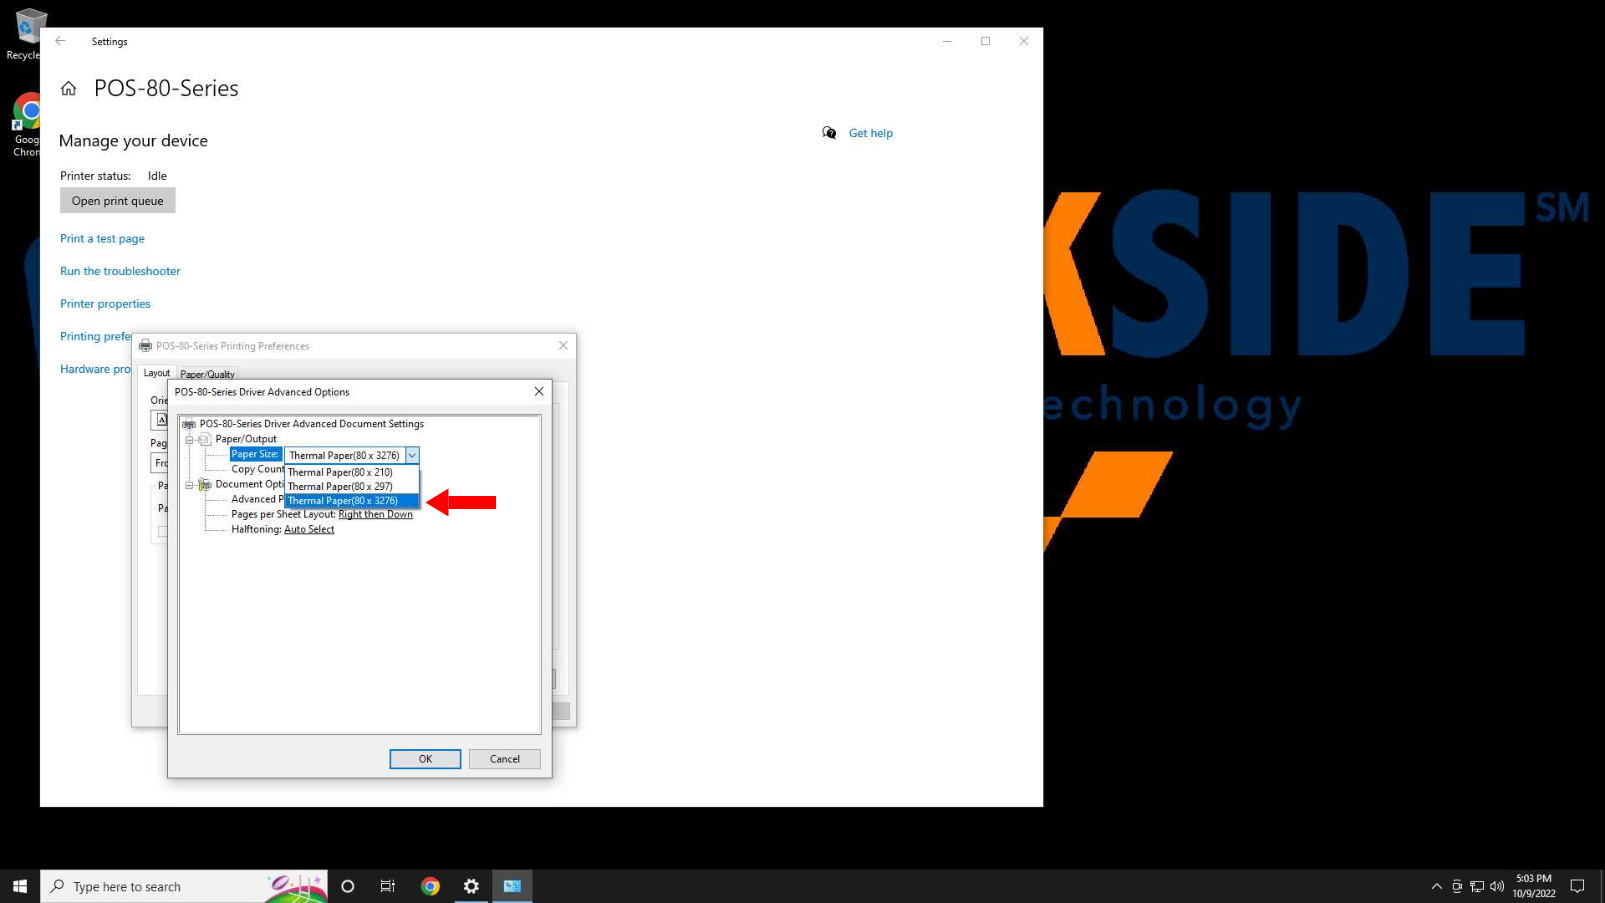
Step 4 - Click Advanced
This will open a separate window, and from there we will click on Advanced toward the bottom.

Step 5 - Change Printer Paper Size
This will open another window. From there you want to make sure paper size is set to Thermal Paper (80 x 3276). The other settings will cause the receipt to cut off early. If you need to change it, make sure you click on OK, and then apply on the Printing Preferences window. This should fix the paper being cut off.
Windows 11
If you just read through the Windows 10 steps and are using a Windows 11 system, don't worry, the two are very similar.