
Participant Event
Continuing from where Event Details left off, we'll now set up the Participant Registration Product aspect of our event.
Step 1 - Enter Participant Description
Here you have the chance to add a description that's pertinent to just your Participants.
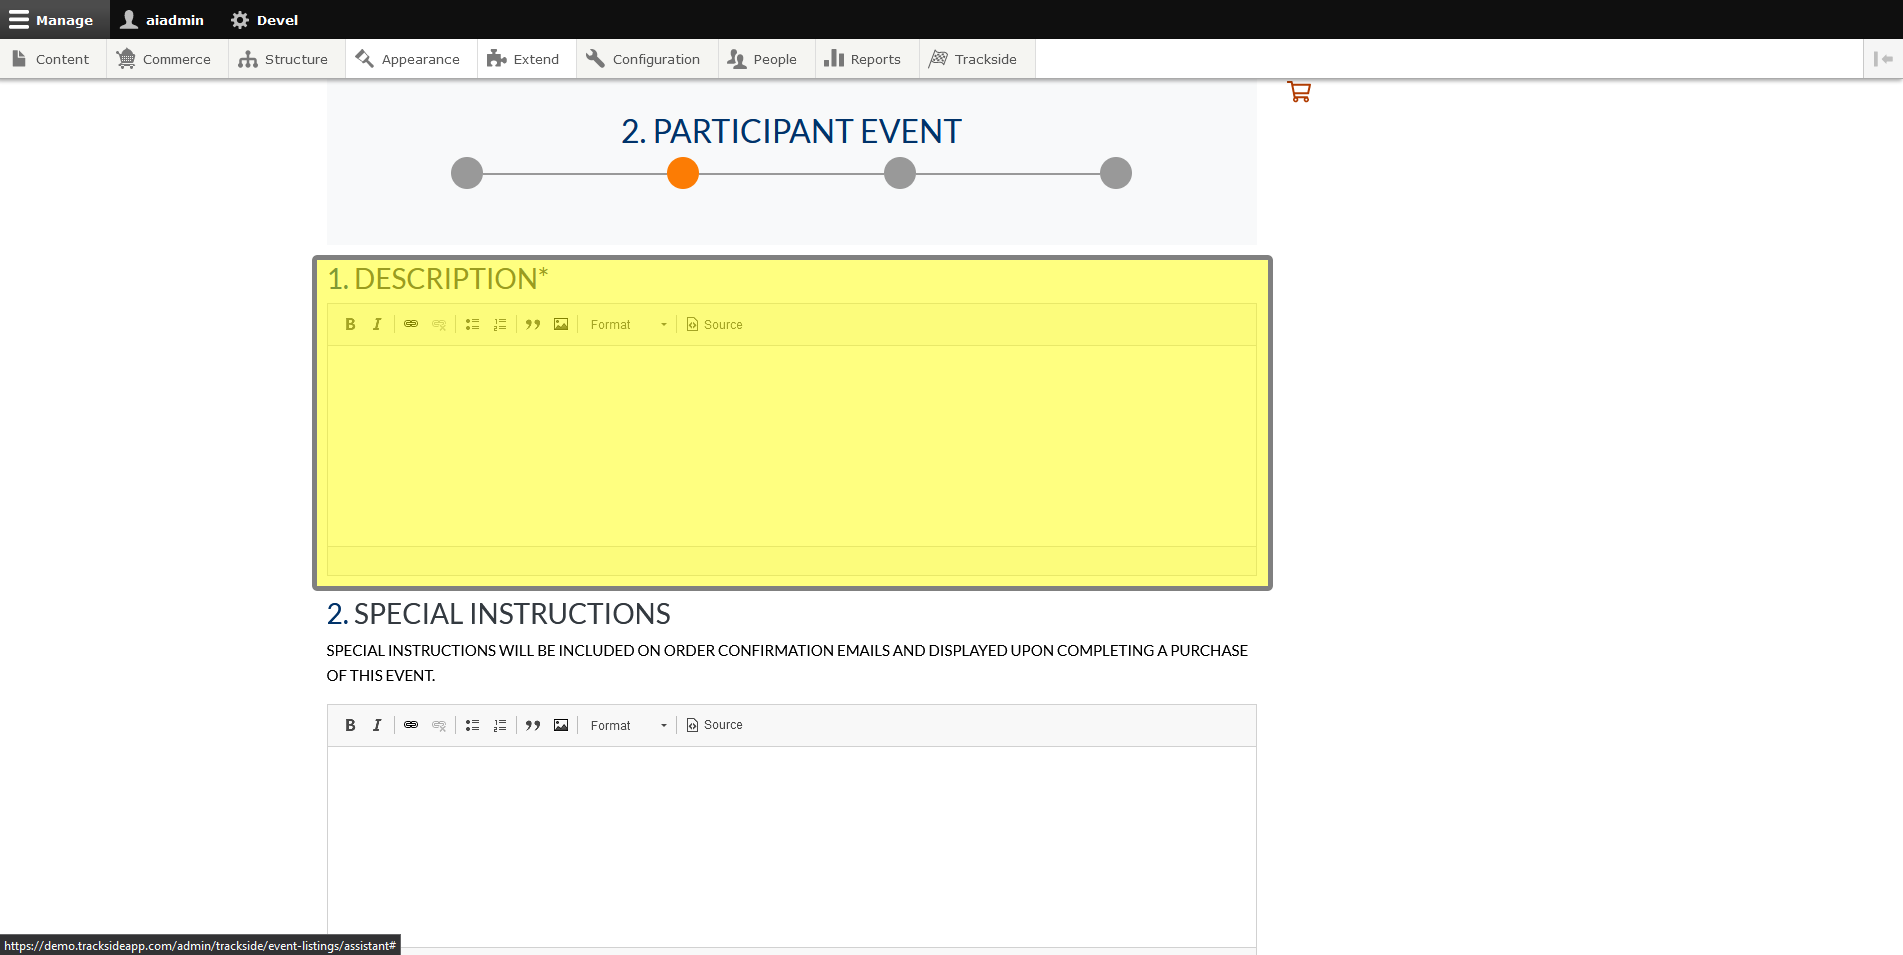
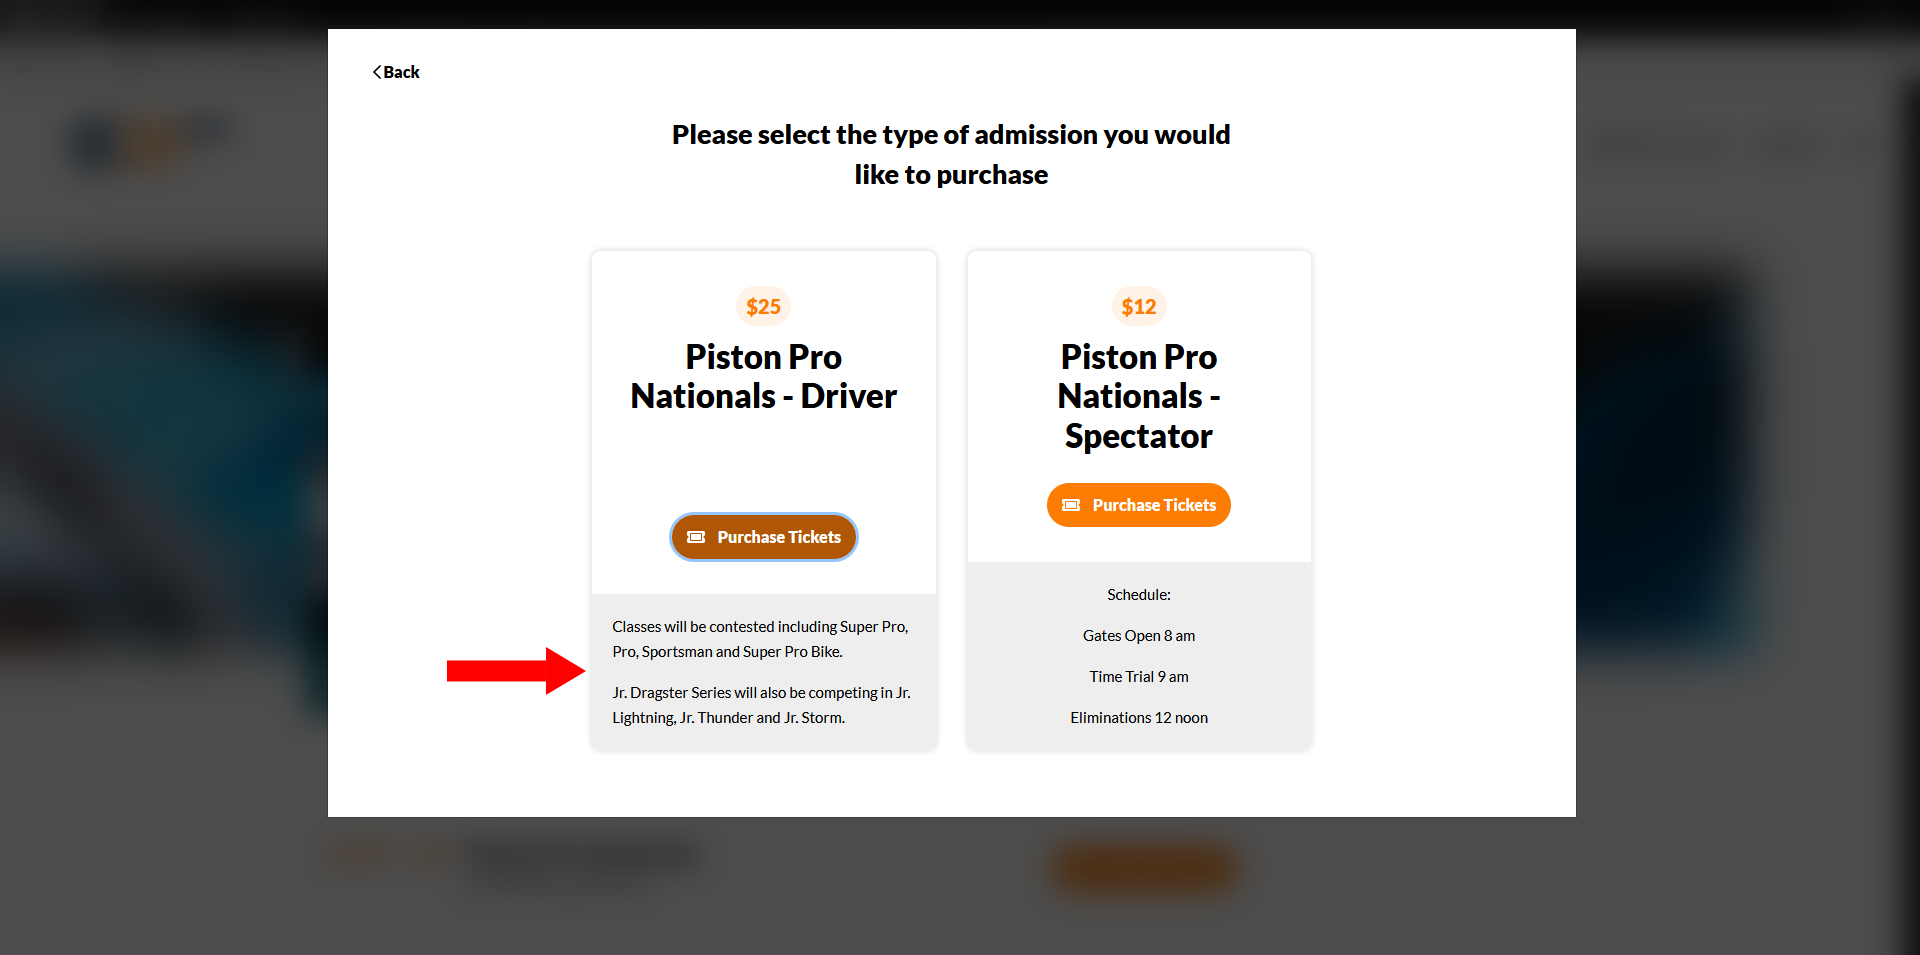
This will show up when your Participants click on Purchase Tickets from your Event Listing Page.
Step 2 - Enter Participant Special Instructions
This box will allow you to add special instructions for your event specific to the Participants. As stated in the assistant, these will be sent in the order confirmation email and displayed after ticket purchase on your Trackside site.
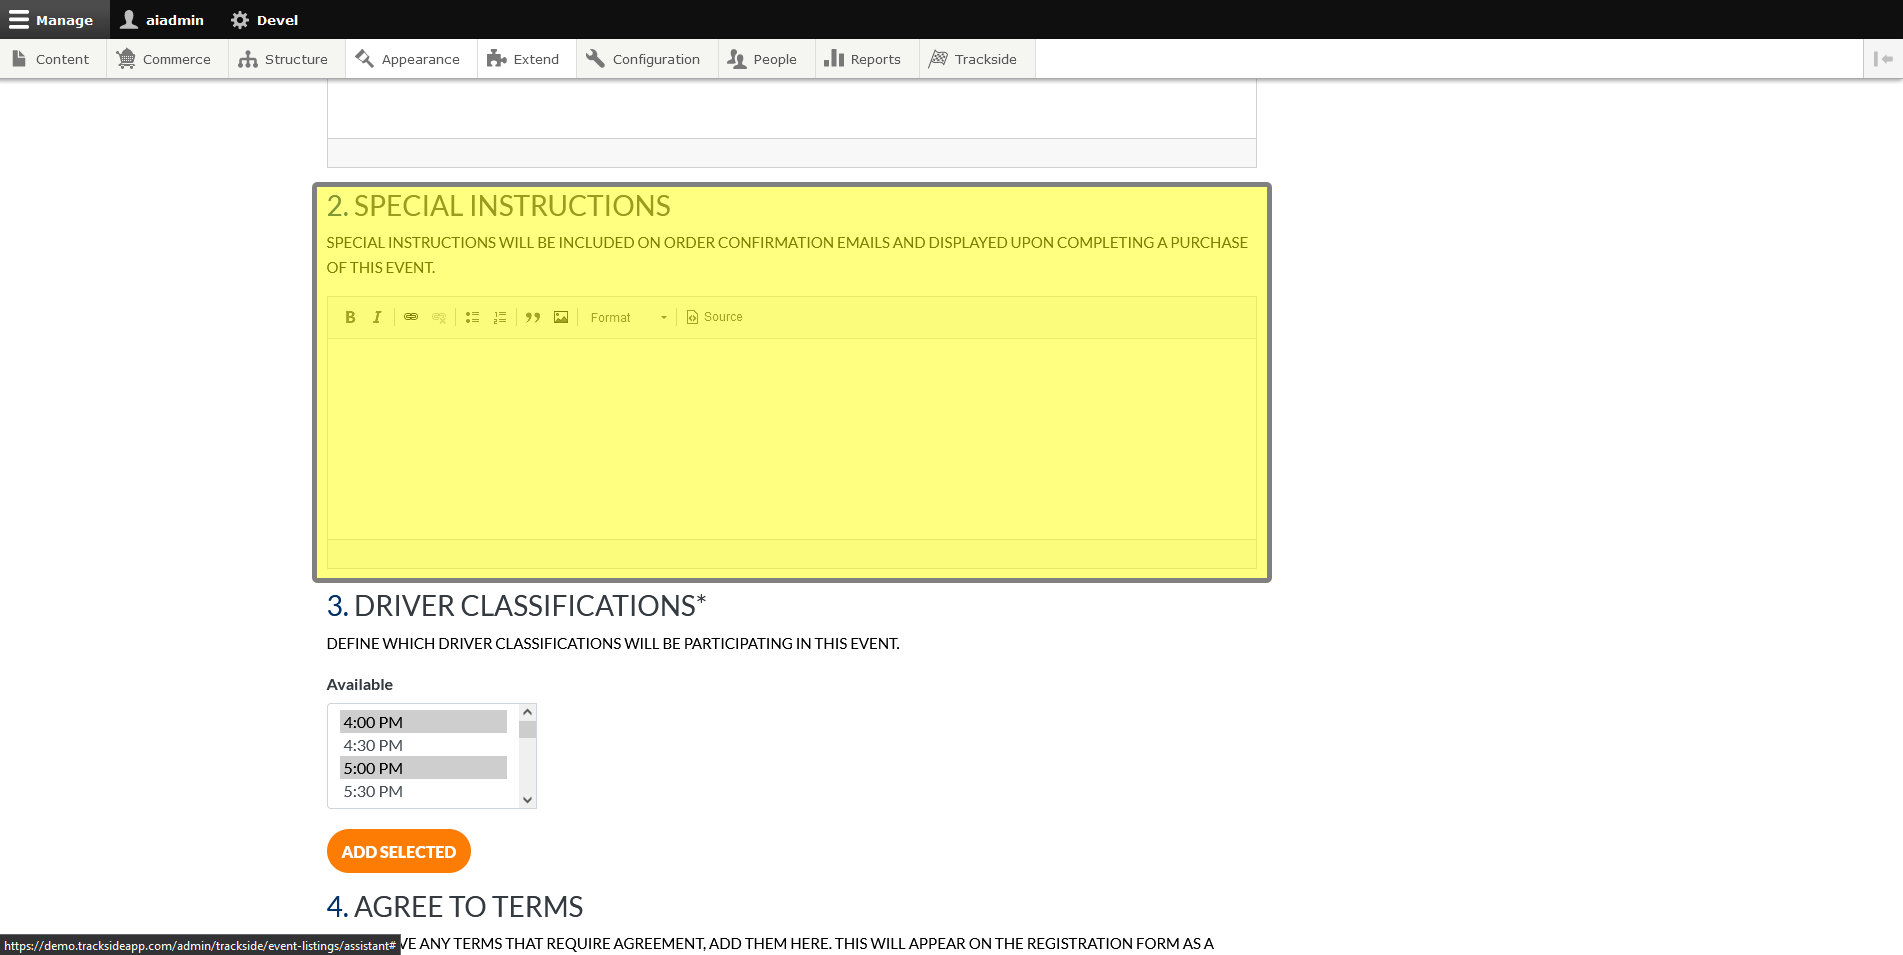
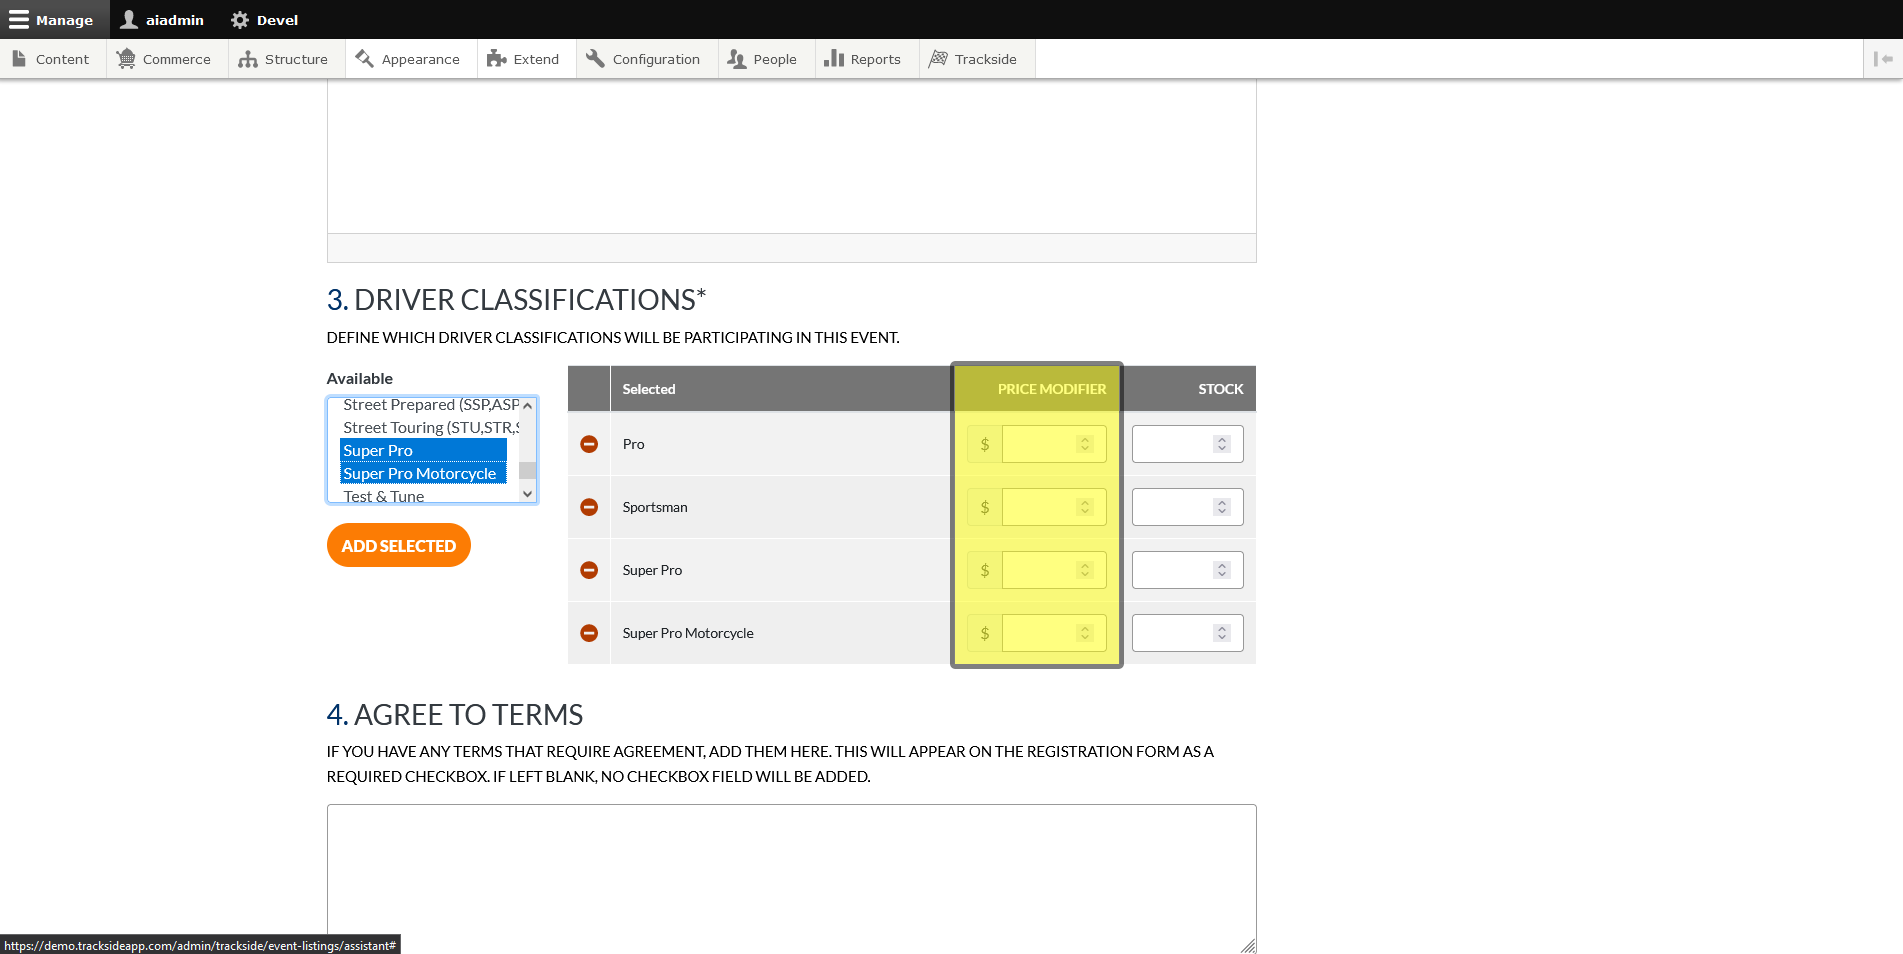
Step 3 - Select Driver Classifications
Next we'll reach the area where we'll select the Driver Classifications for your event.
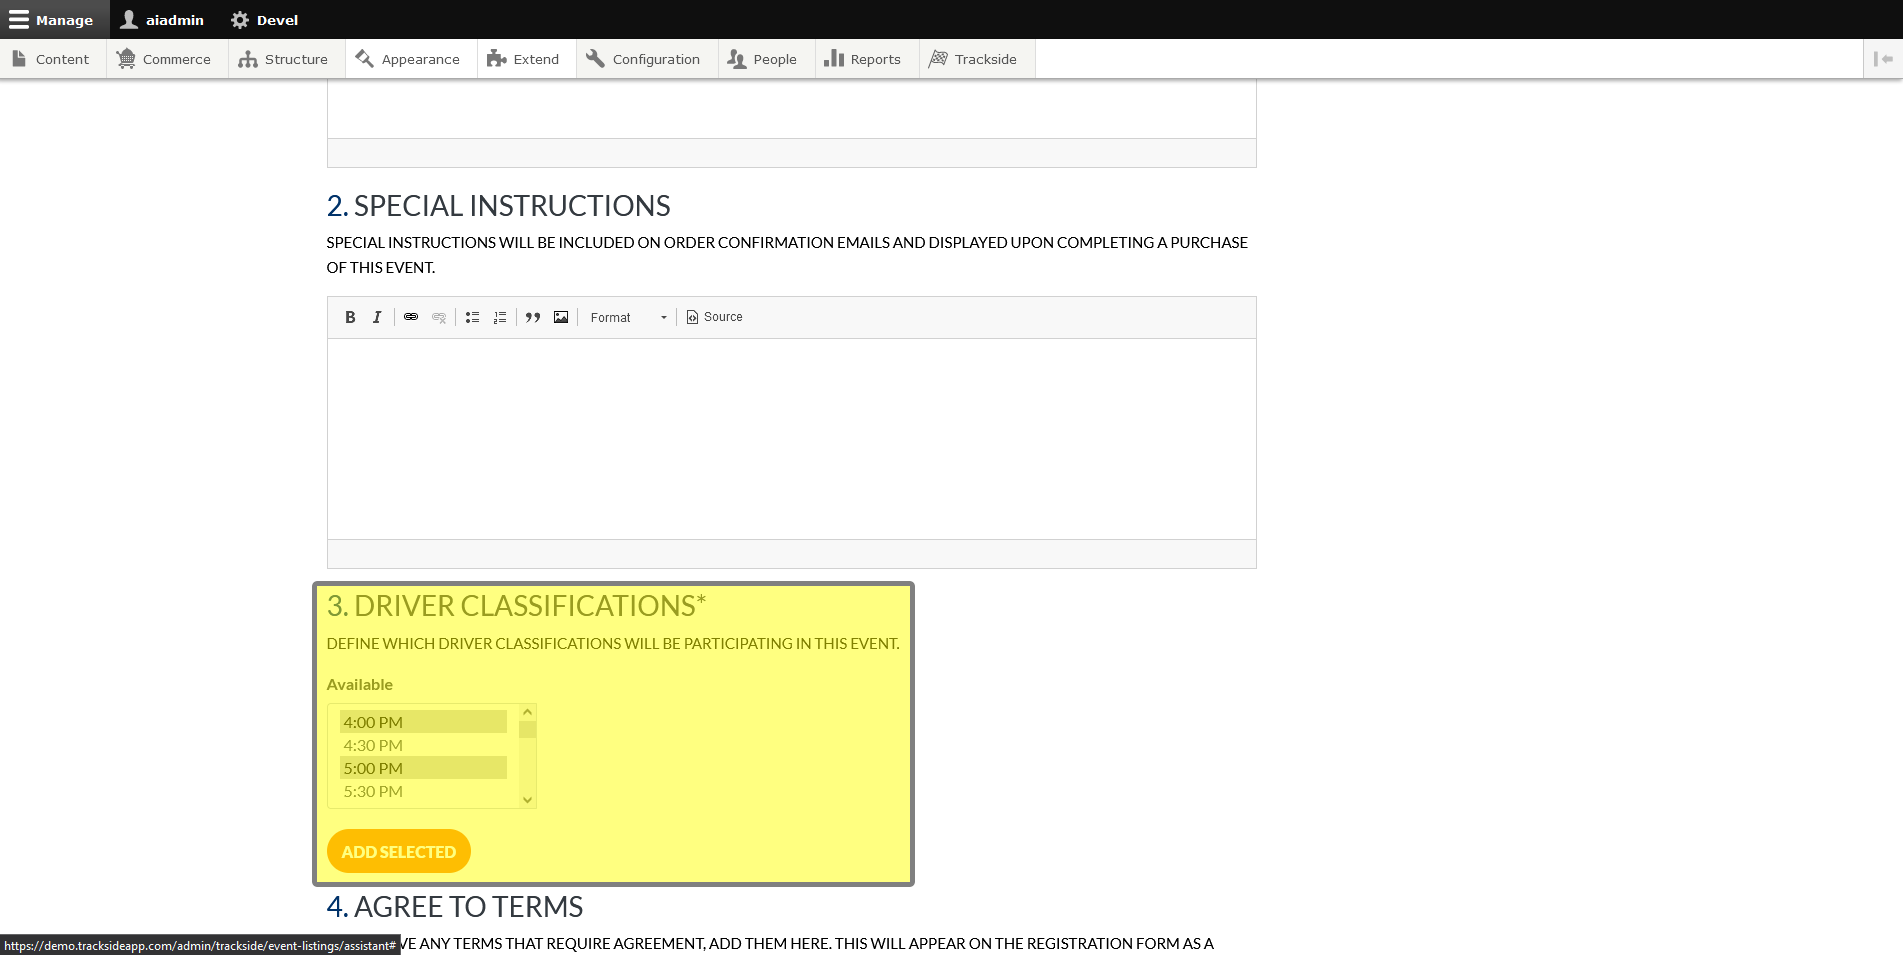
Select the Classes you want to offer for the event from the Available list. You can click one at a time, or you can select multiple classes to add at once by holding Ctrl before you click on the next one. If you don't see the class you need shown here, refer to Driver Classifications to verify your Class is active, and create it in Trackside if needed.

Click on Add Selected to add them to a list that will appear on the right.

Step 4 - Set Classification Price Modifiers
Remember when we set the base price for the Participant Registrations? This is where that matters. The assistant relies on price modifiers if you need to set different pricing per class. If your base registration price is $10, and you need a class to cost $20, you're going to add a $10 price modifier to it here. Note these values can also be negative if you need a class to cost less than the base price, but for more simple math, that's the cause for the suggestion to set base pricing at the cost of the cheapest registration.
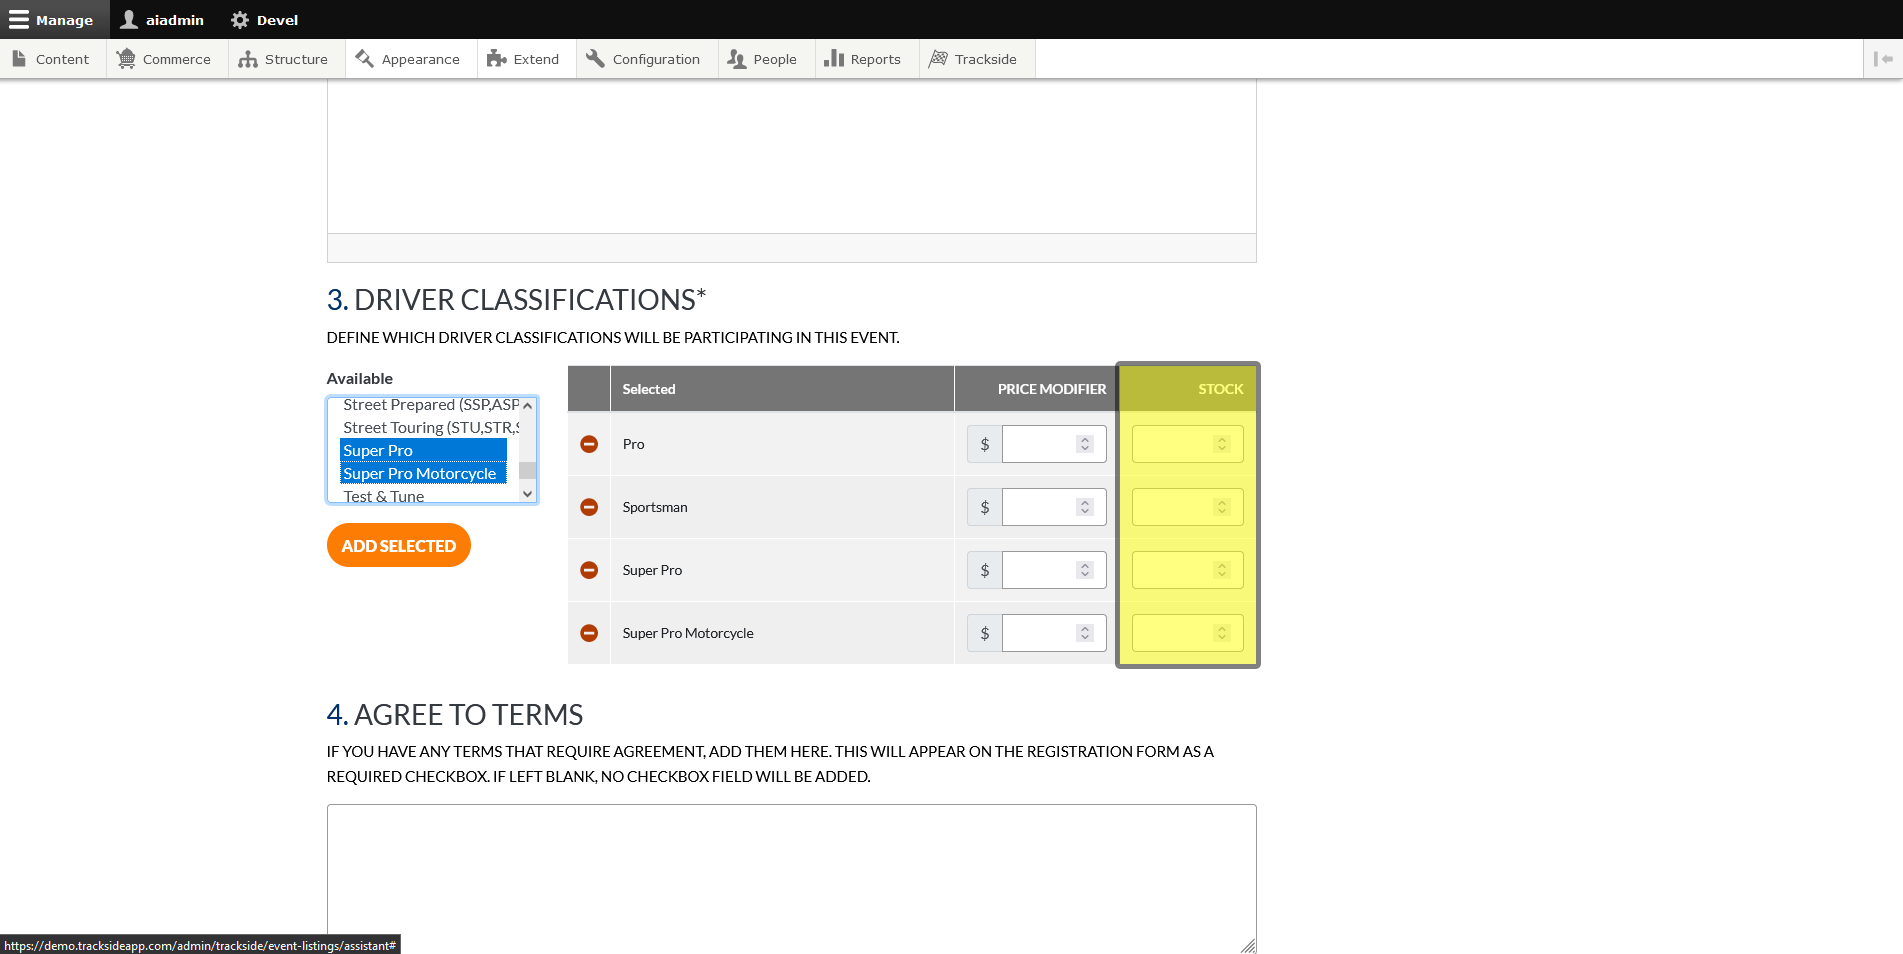
Step 5 - Set Participant Registration Stock
If you don't have an infinite paddock, you may desire to limit the number of Participant Registrations, which is done here. Leaving this blank will allow an infinite number of registrations to be sold. Entering a number sets a maximum limit to those registrations. If you need to change this number later, or you do want to have uncapped registrations, you have that option. That will be covered in Manage Stock.
Step 6 - Add Agree to Terms
This section is good for information the Participant must see. As shown on the Assistant, text entered into this box will create a text box the Participant must acknowledge by checking before they can purchase their registration. Do they have to pay for a weekend membership if they're not a club member? Do they need to know that they have to sign a separate waiver for the event site from the one they'll be signing for you? (You're planning on using our Digital Waivers & Tech Forms so you're not keeping all of those paper copies, right?) This is the place to add that information.

Step 7 - Click Next
Once you have the Participant Registration Product all set up, click Next at the bottom of the form, and we'll move on to the General Admission Ticket.
