Driver Classifications
Every event is going to have different classes for drivers to participate in. In this article, we're going to demonstrate the setup of a Driver Classification in Trackside.
Driver Classifications must be set up before creating an event using the Event Setup Assistant.
If you already have a Driver Classification established in Trackside that you wish to add to an existing event, see Add Driver Classifications. This article will only cover the initial establishment of Driver Classifications for use in those events.
Step 1 - Navigate to Driver Classifications
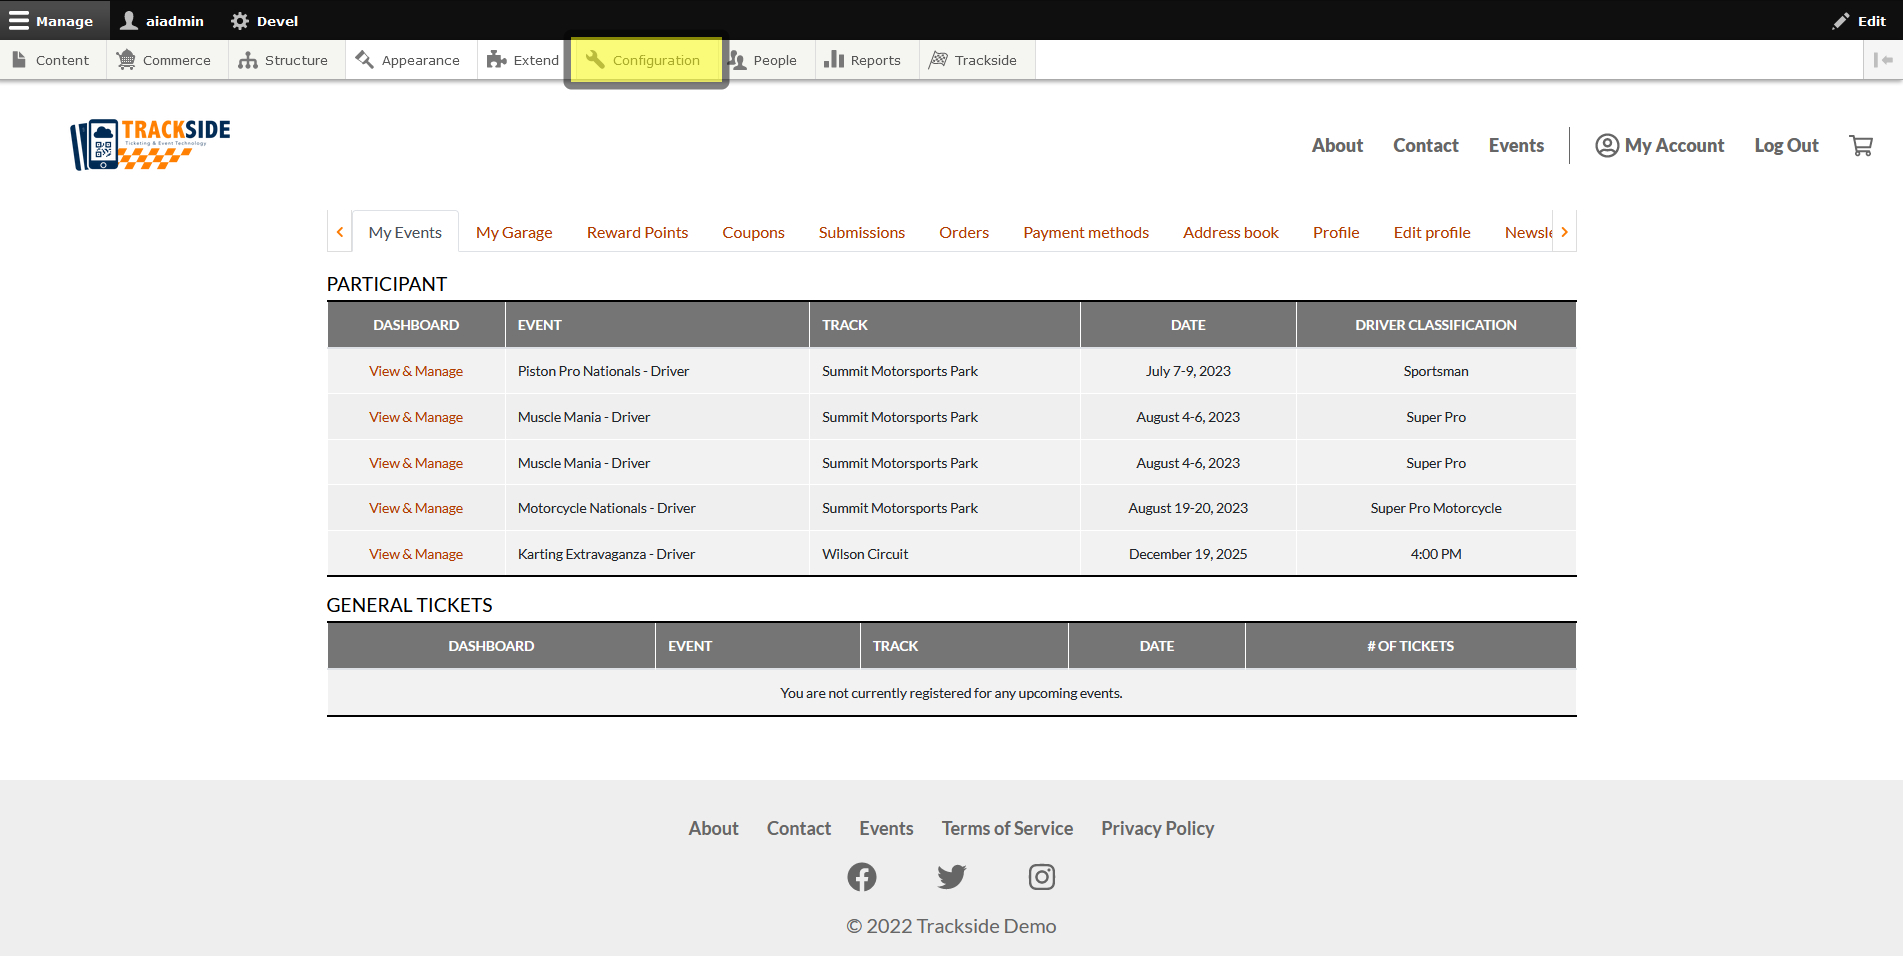
Once logged in, to navigate where the driver classifications are kept within Trackside, first hover over Configuration in the Management Menu. If you don't see the menu listed, click Manage in the top left. Alternatively for these navigation steps, you may click on the steps indicated as well. They'll just take you to a separate page where you can also click on the next step. You'll end up in the same place either way.
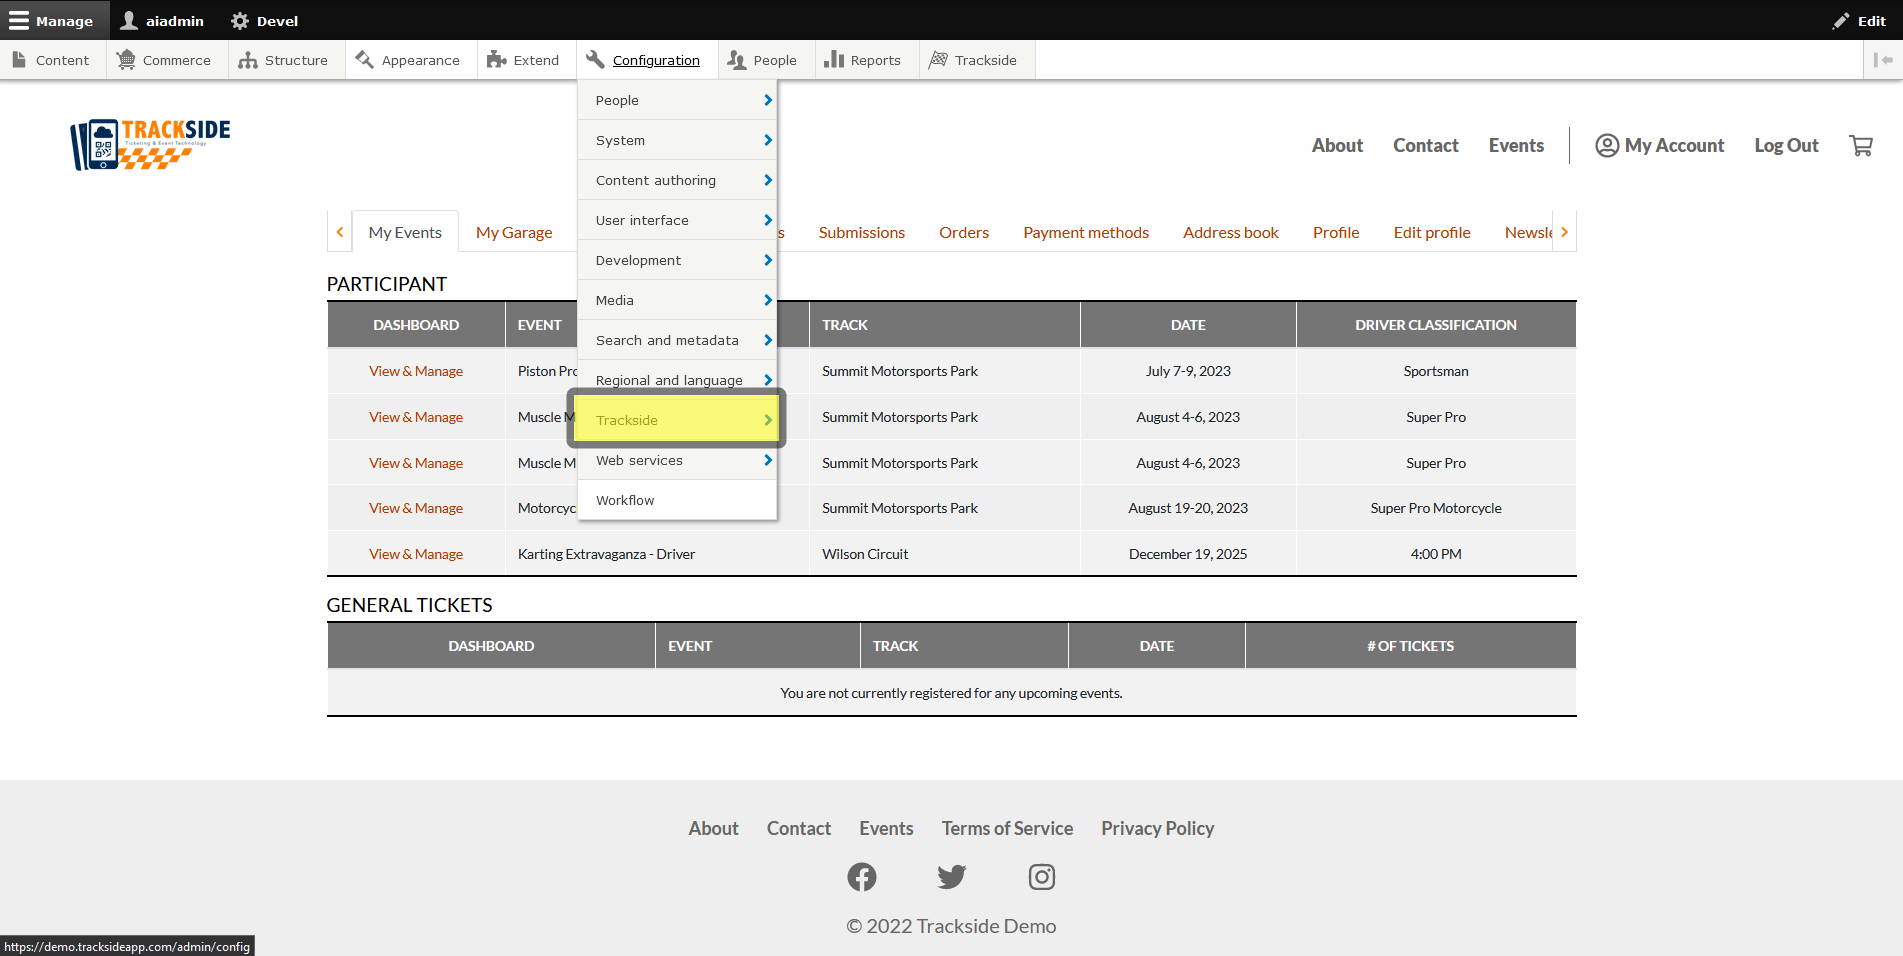
Next, hover over the Trackside option in the Configuration menu.
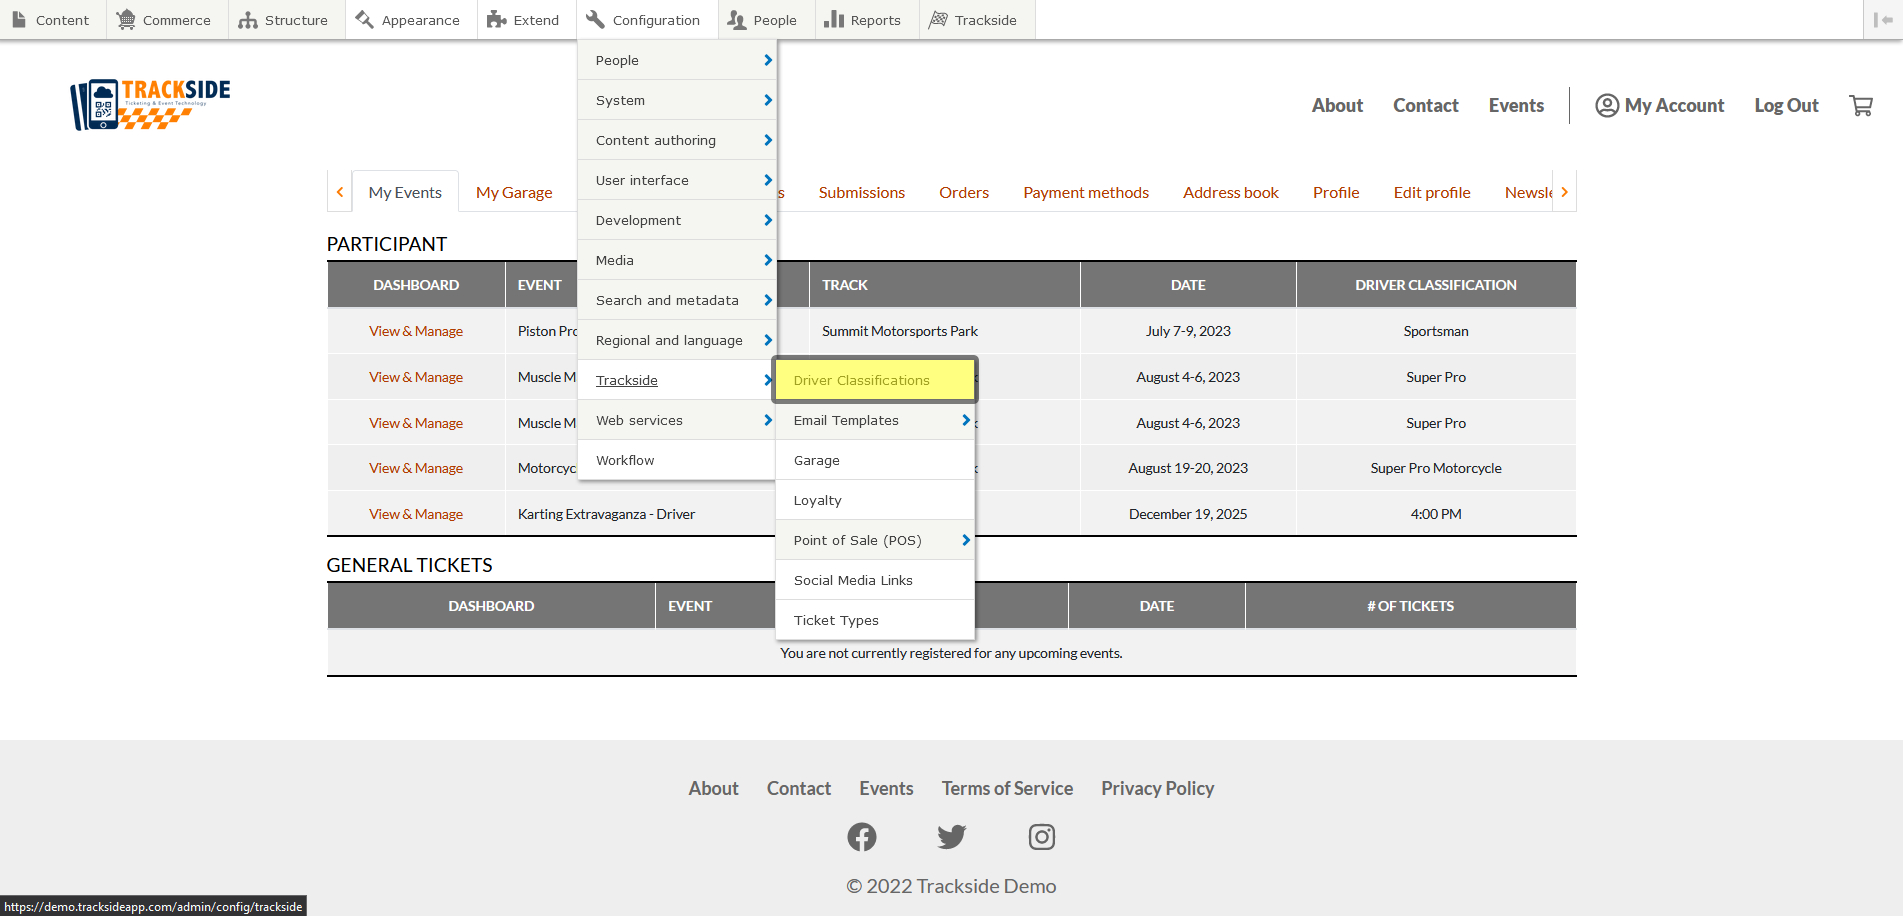
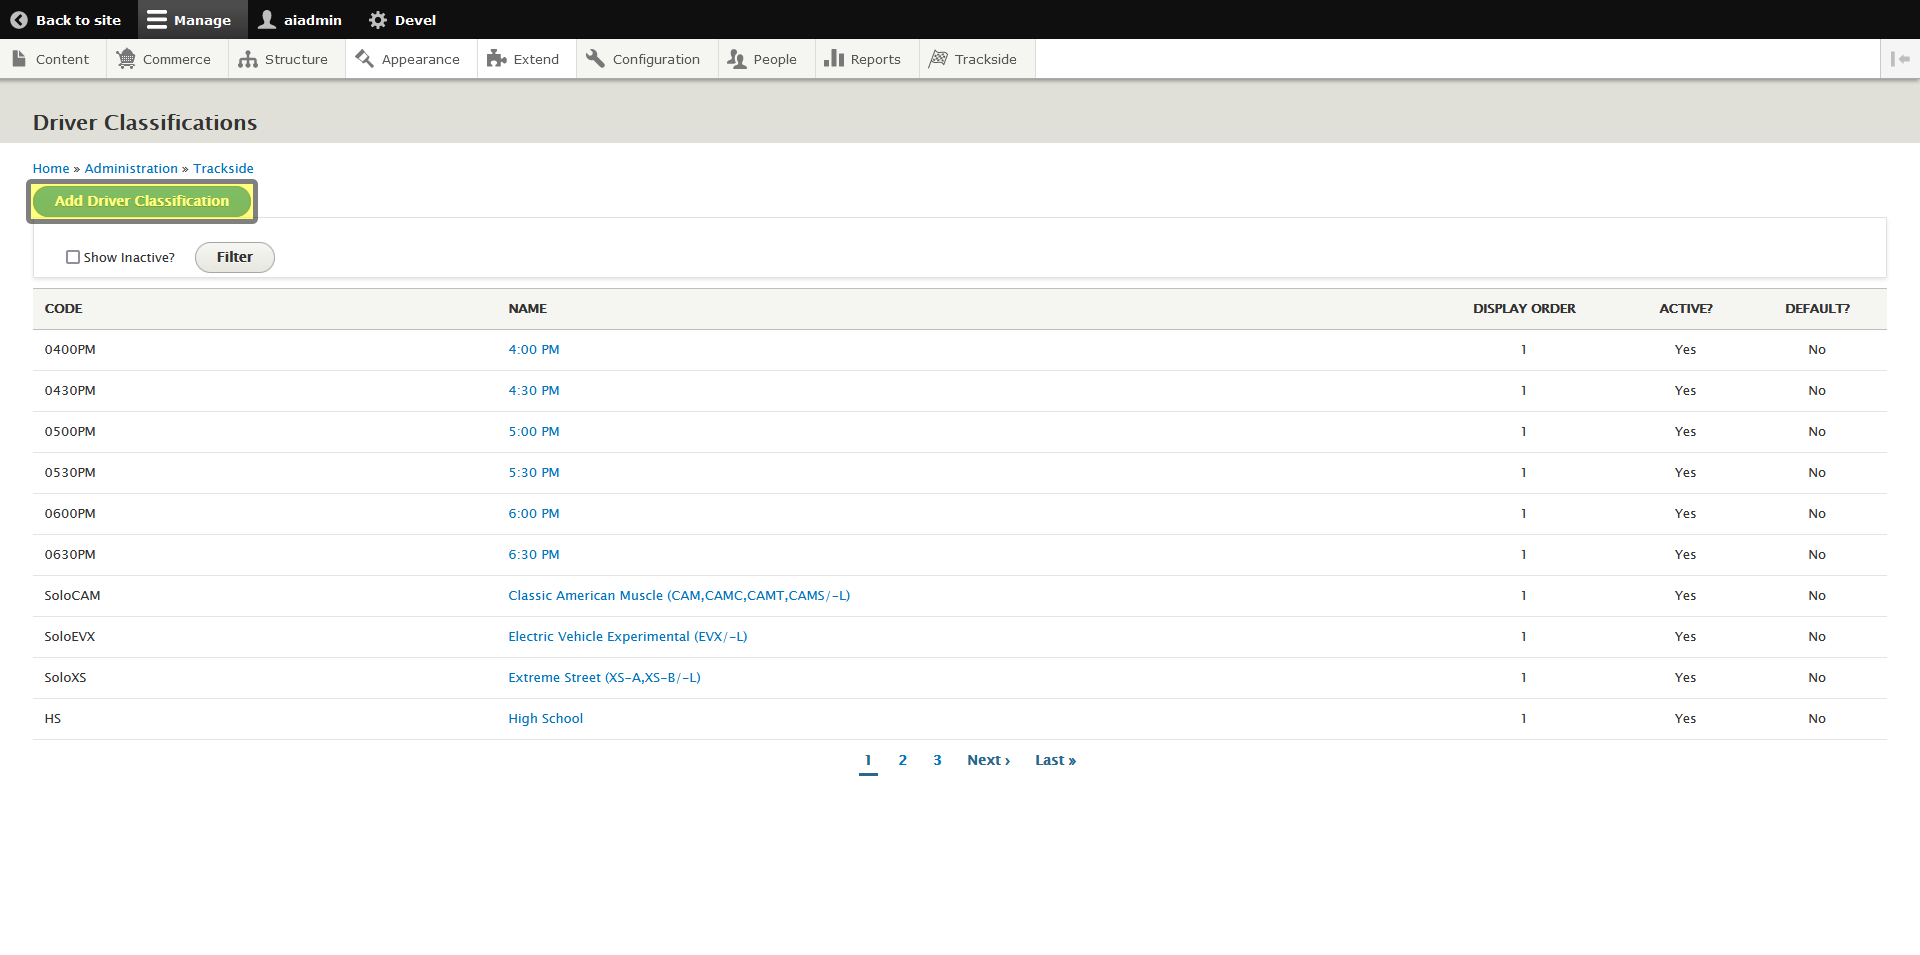
Once the Trackside menu expands, click on Driver Classifications.
Step 2 - Click Add Driver Classification
For initial Trackside setup, this list will be blank. To add your first class, or any class after, click Add Driver Classification. This will take you to a small form to fill out for establishing your class.
Step 3 - Fill out & Save the Form
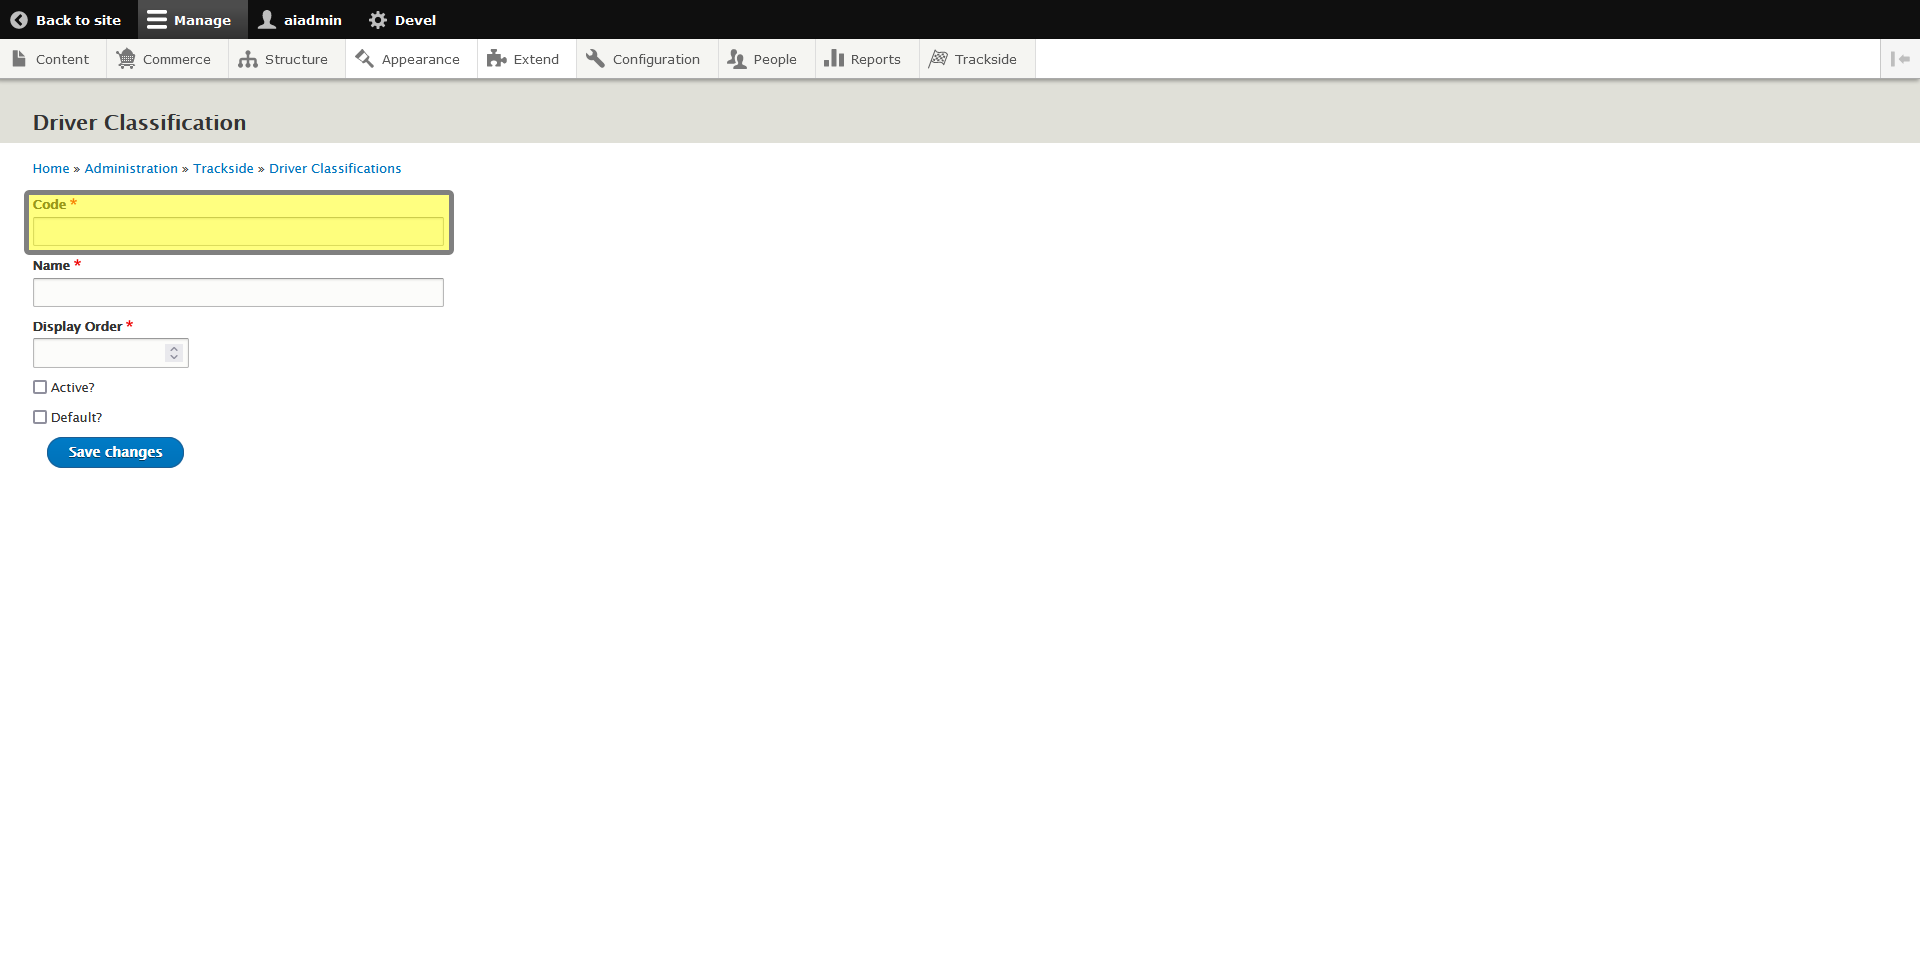
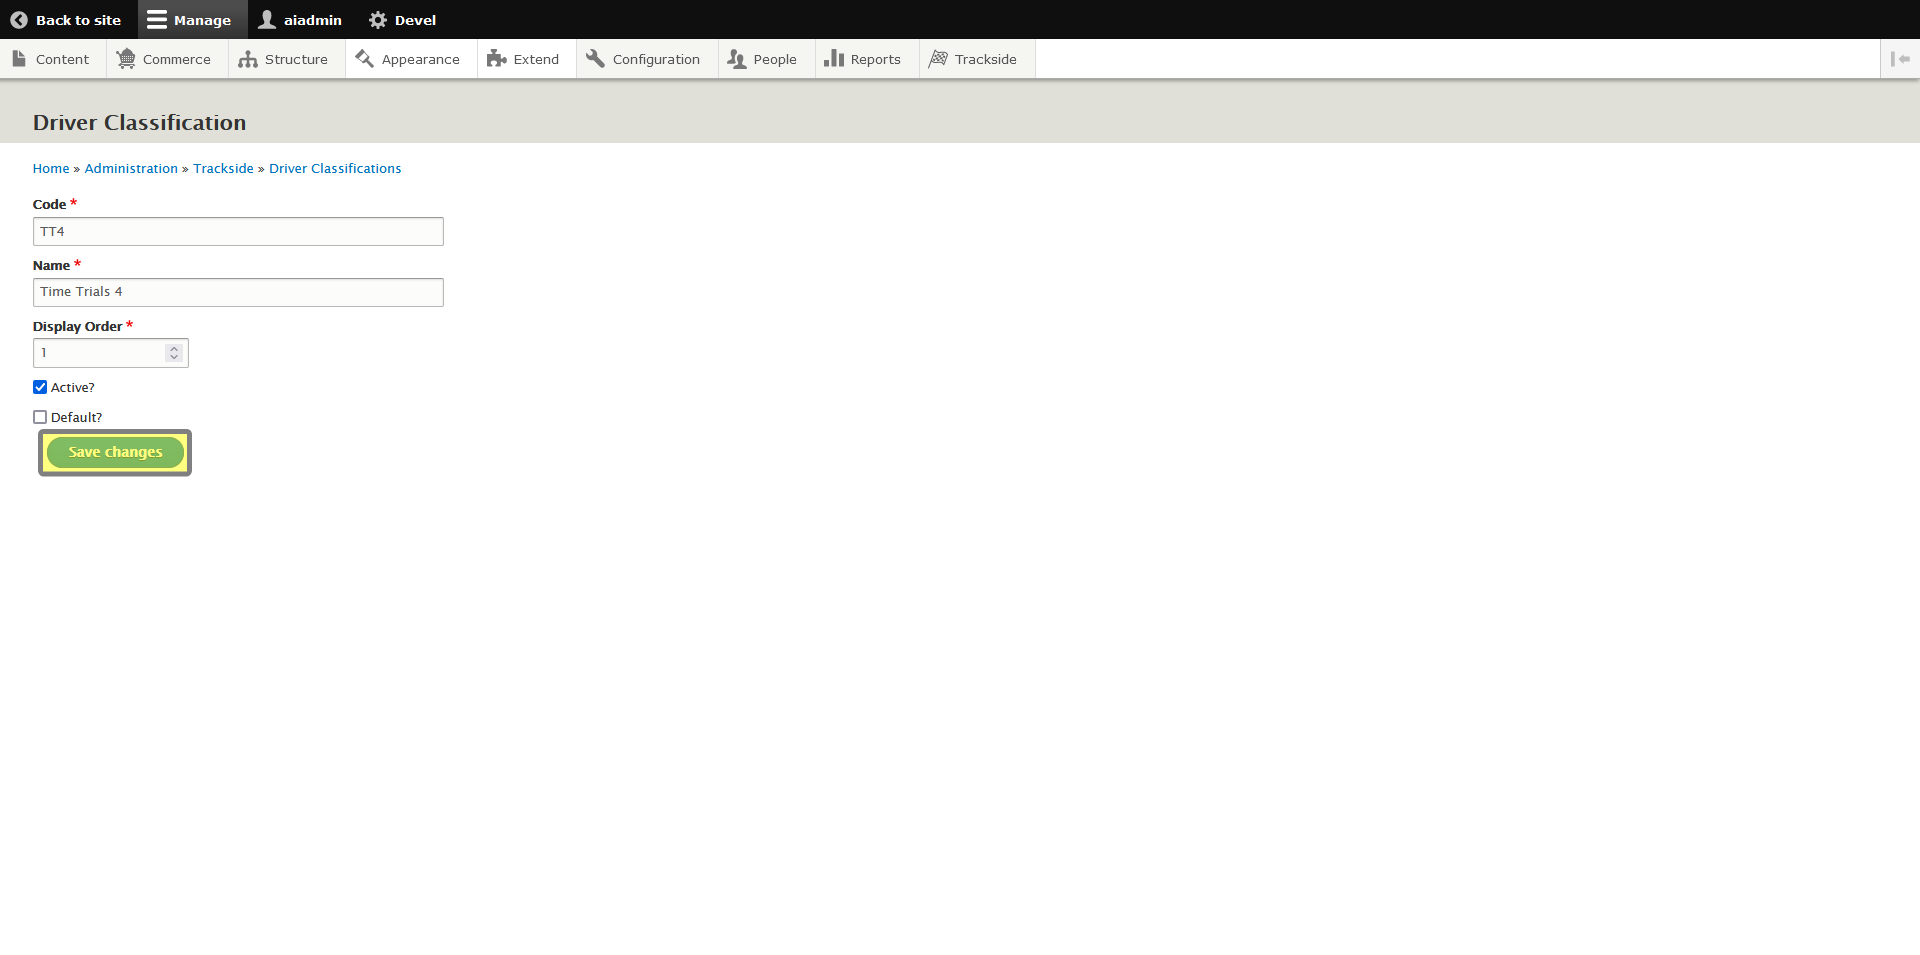
Enter Class Code
We now have a short form to fill out to establish our class. We're going to start with the Class Code. This is what the system will use when auto-generating SKUs. It is helpful to choose something short, but also that makes sense to you. For example, if your Driver Classification is "Test and Tune", make your code "TNT". Or if your Driver Classification is "Super Pro", make your code "SPRPRO".
The key here is to keep it short but clear. Codes can not contain spaces or special characters. Codes must be unique and can not be repeated. Codes can not be changed later.
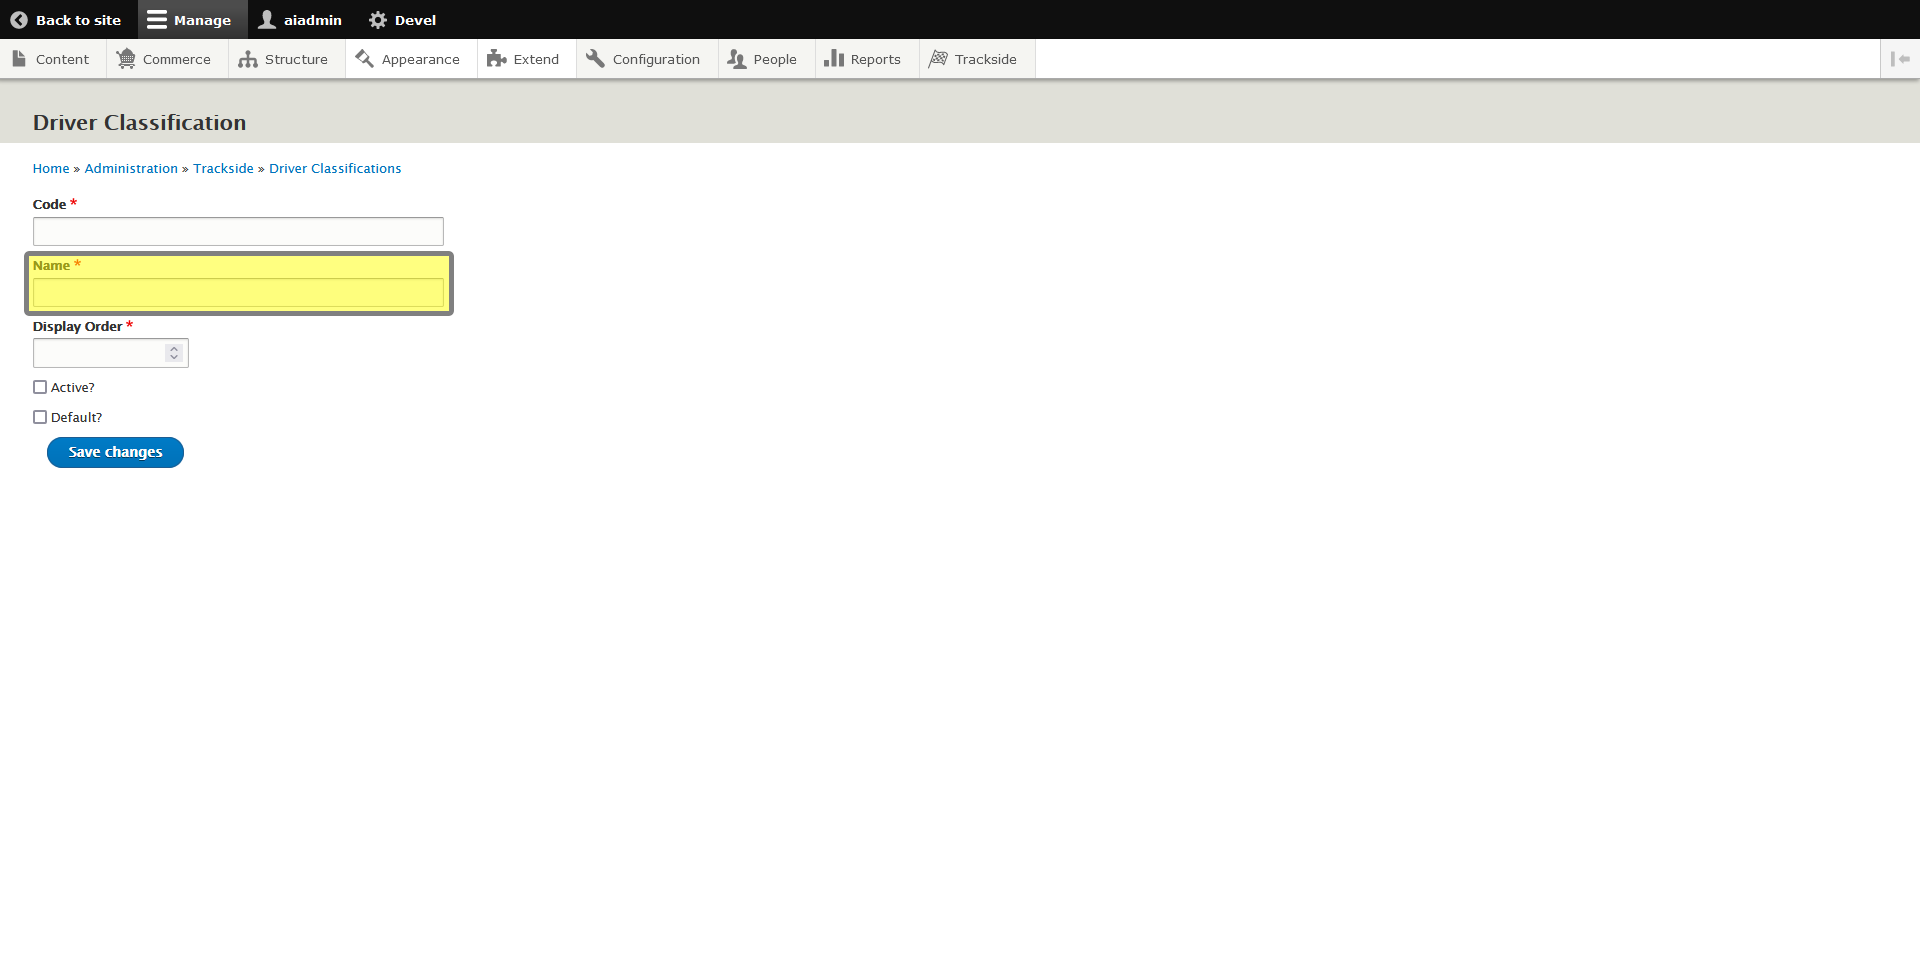
Enter Class Name
Here's where you'll enter the full name of the class - the Sportsman, Pro, Super Pro, Junior Dragster, etc.
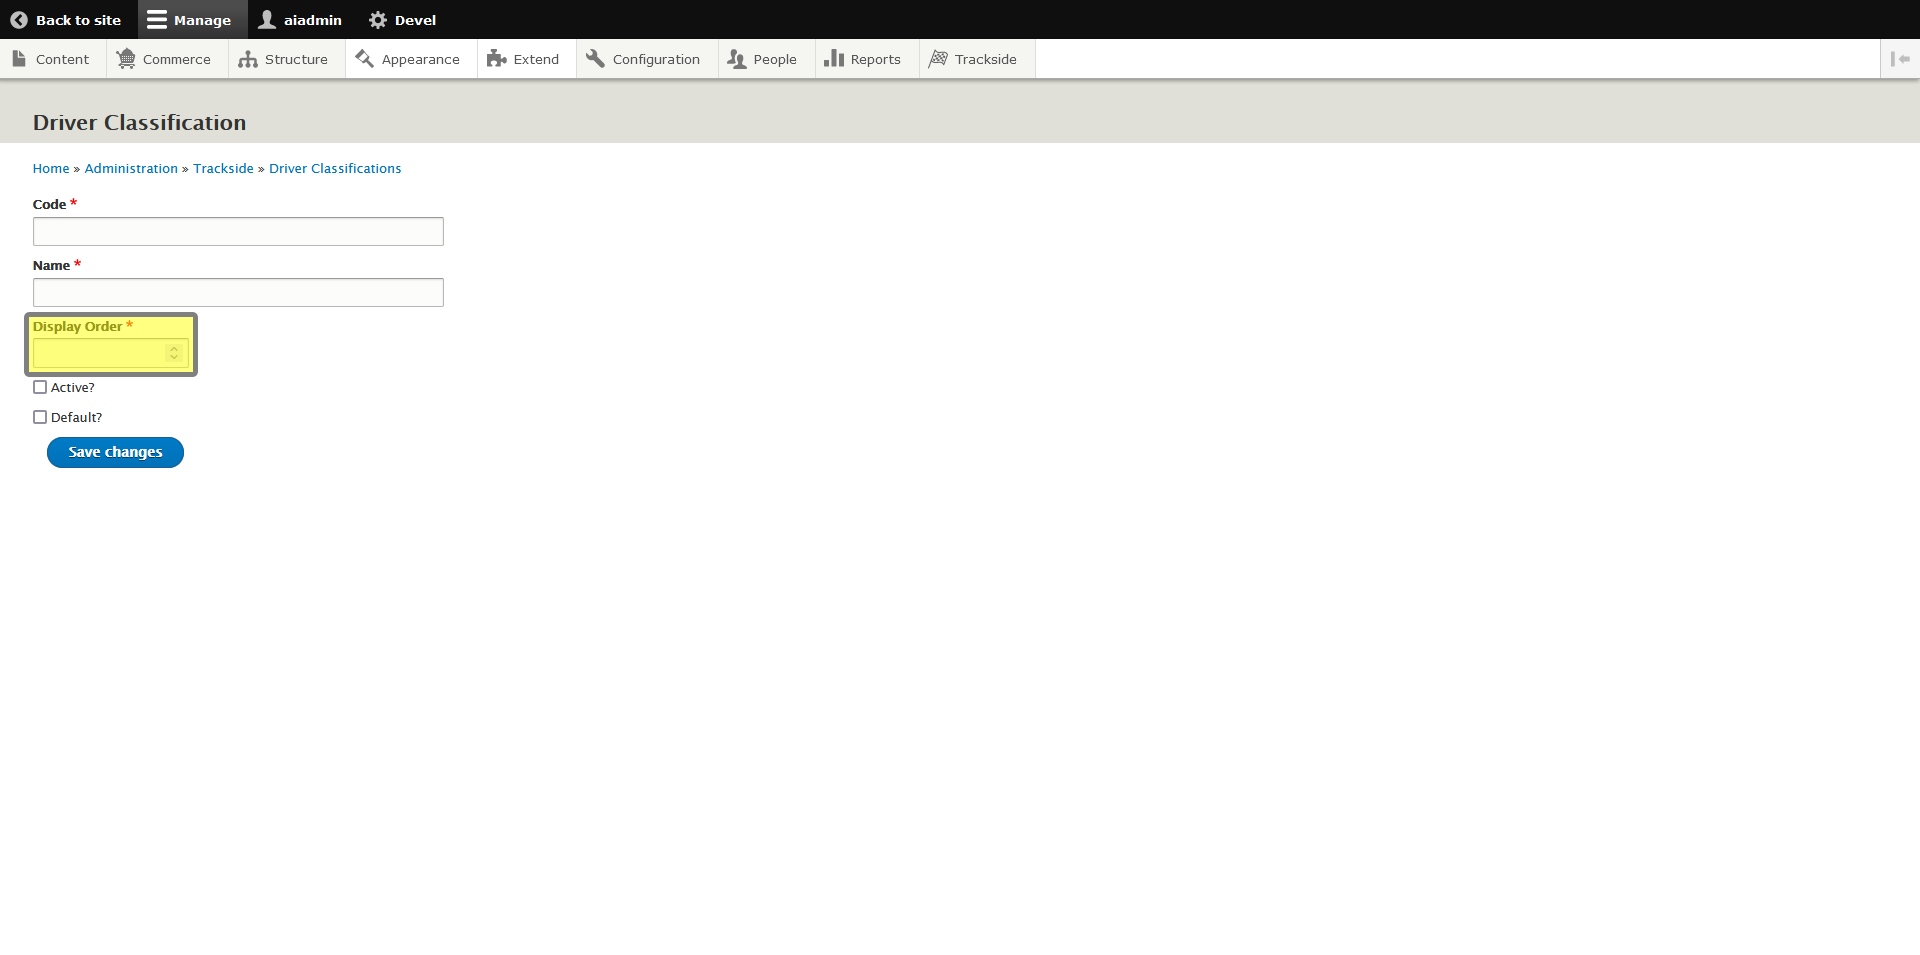
Display Order
For Display Order, we'll just enter the number 1.
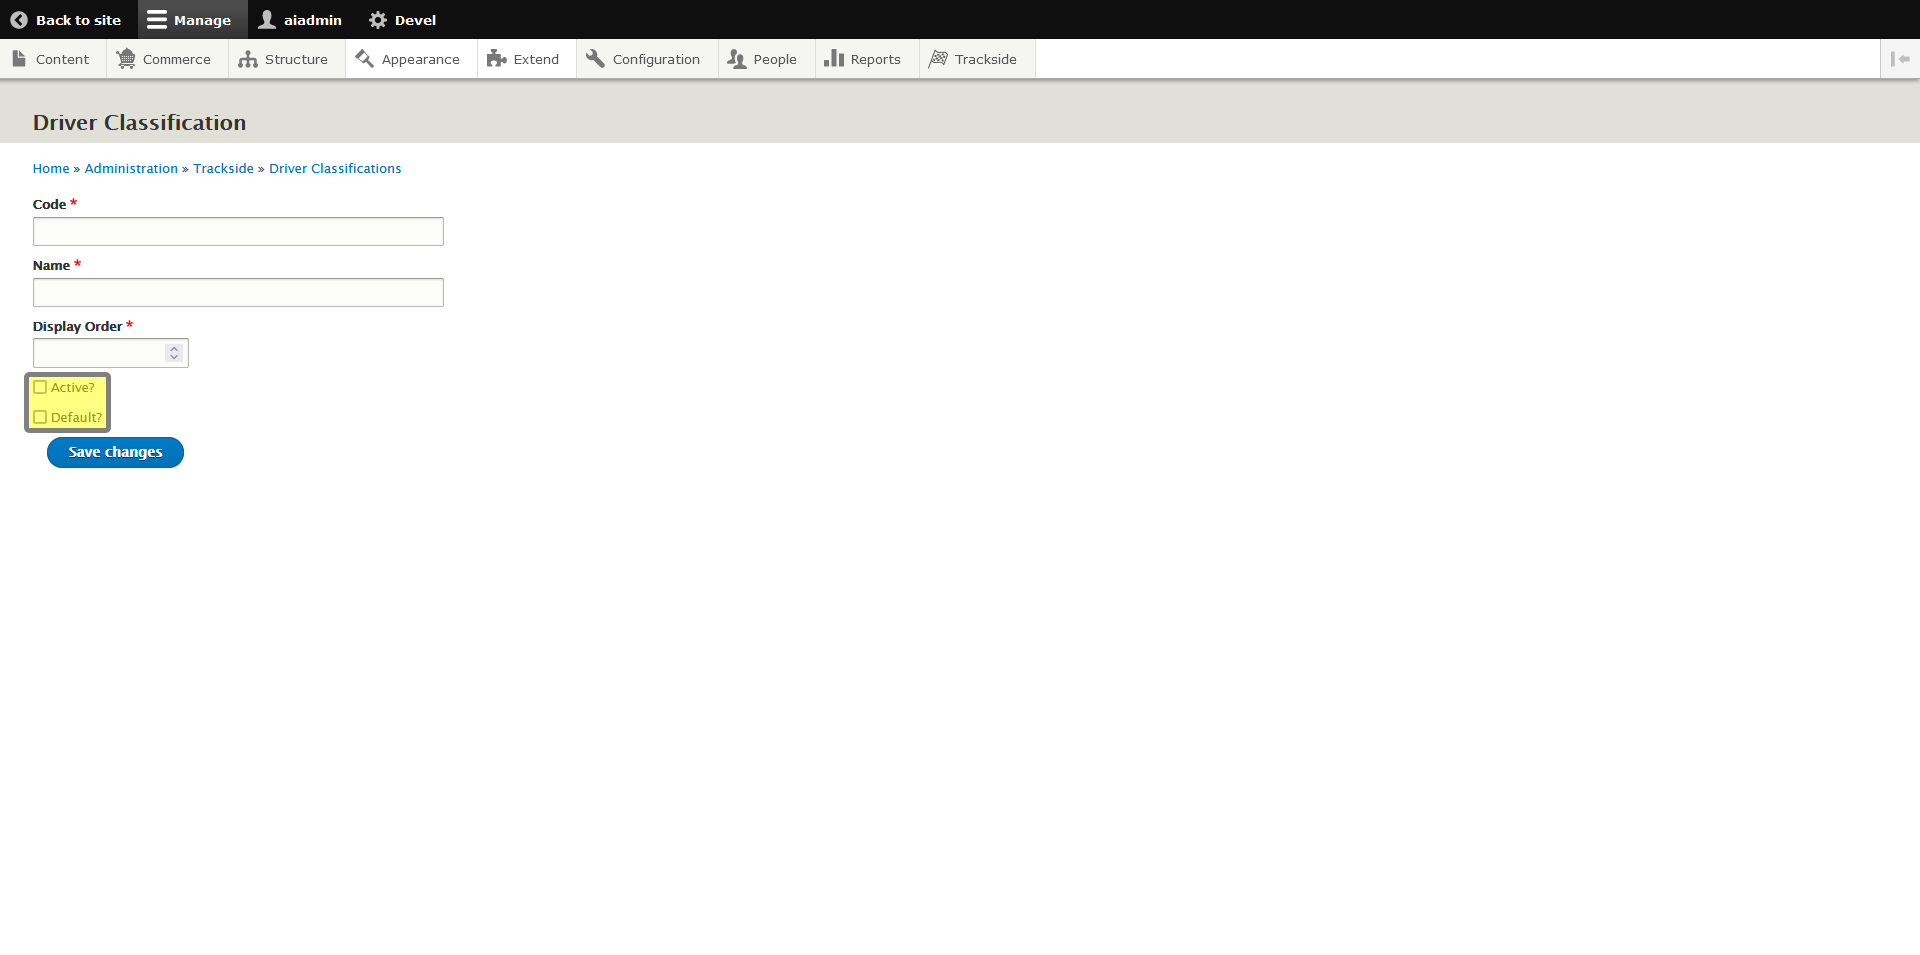
Active & Default
ACTIVE
IMPORTANT: This box must be checked in order for this Driver Classification to be added to events. If the class gets dissolved, you may come back and uncheck that box later.
DEFAULT:
One Driver Classification must be checked as Default. Just check this box for the first one you create.
Click Save Changes
Once your form is filled out the way you want it, click on Save Changes to add the class to your available classes.
Step 4 - Completion & Editing an Established Class
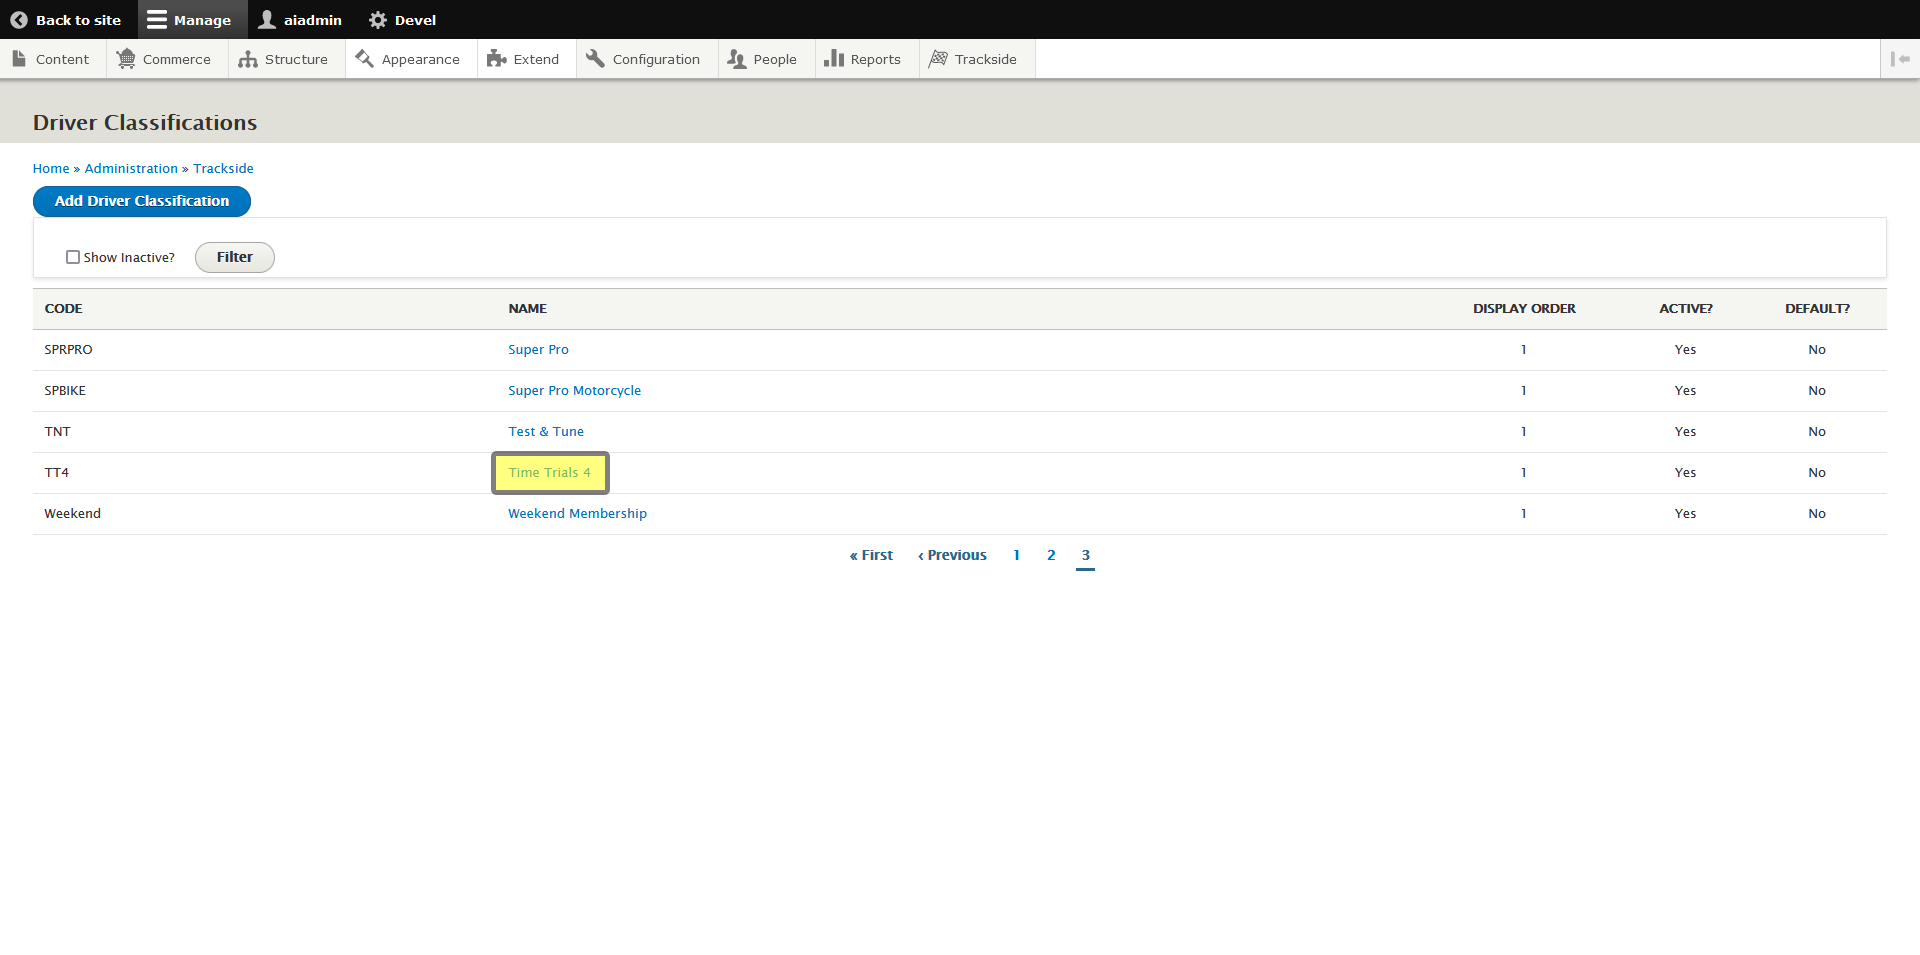
Once you save your changes, you'll be taken back to the Driver Classifications list. You should now see your class listed. If you don't see it right away, it may be listed on another page (use the page links towards the bottom to navigate).
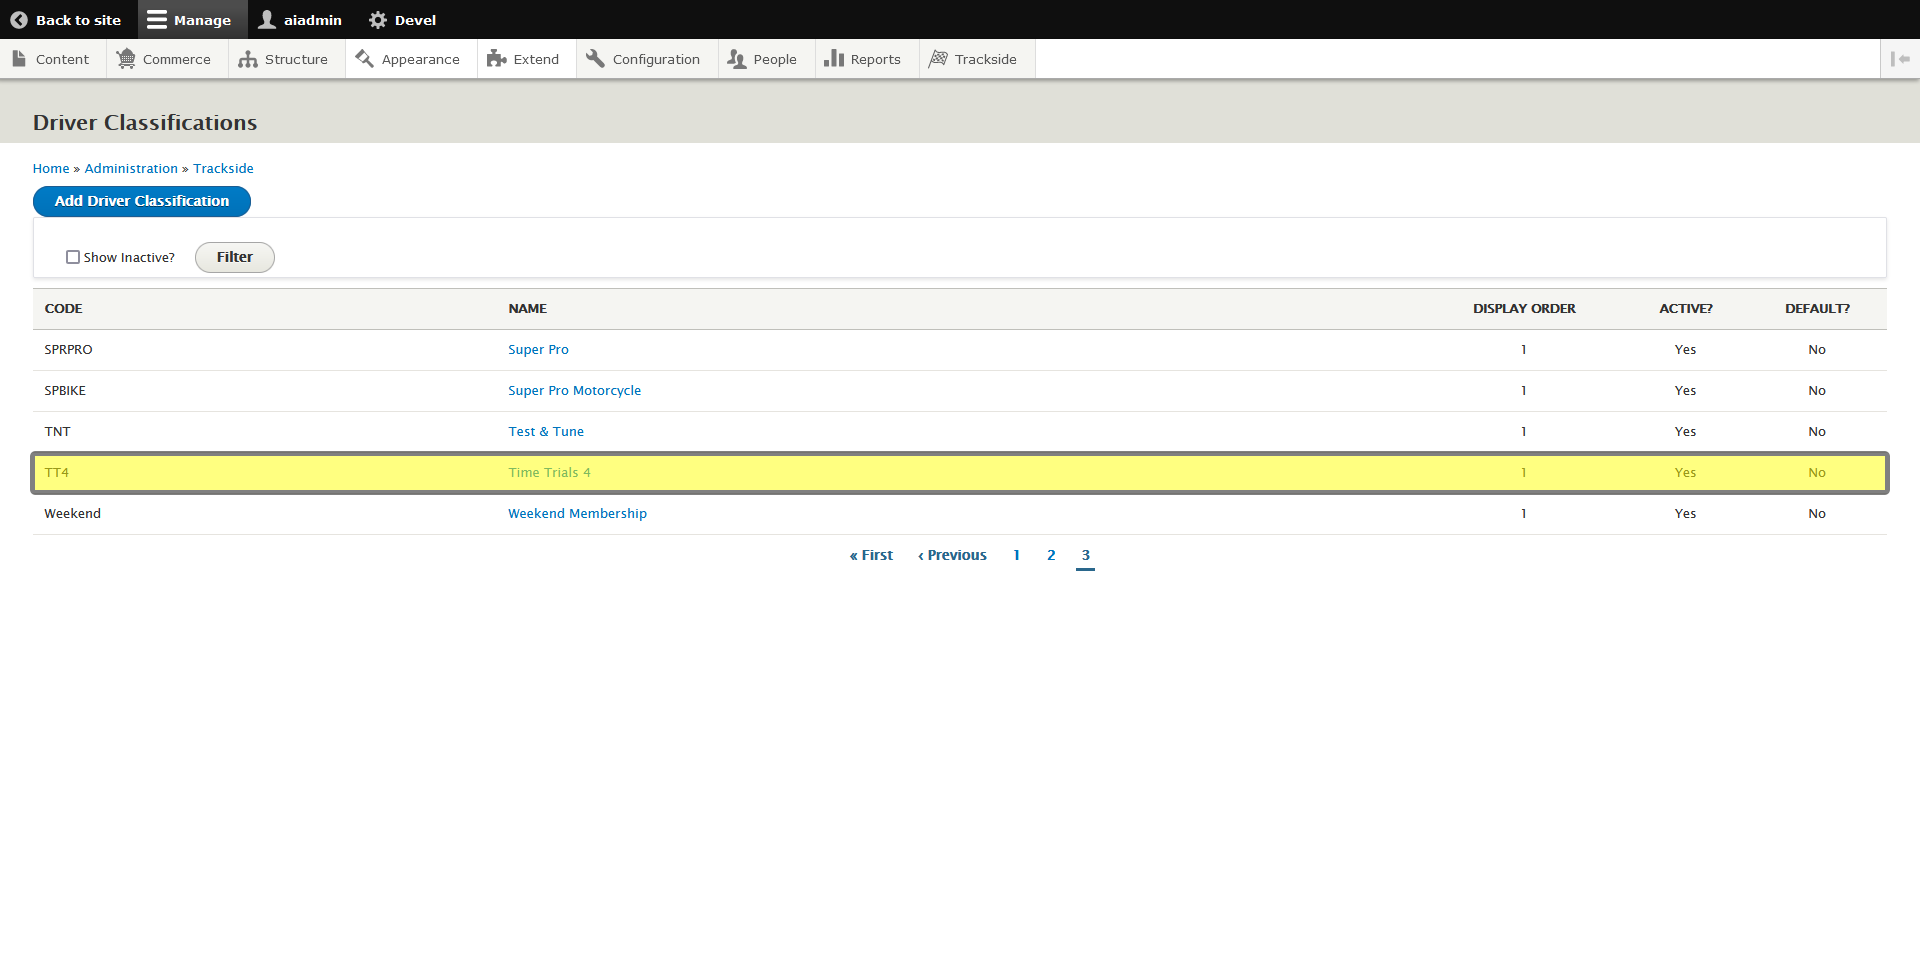
If you need to go back and edit a class you've previously established, you can just click on the Driver Classification name, and it will return you to the same form you first filled out to establish the class where you can make your changes.
IMPORTANT: DO NOT change the Driver Classification code if you have created events and sold tickets with this Driver Classification!