Ticket Types
This article will help you set up new (or edit existing) Ticket Types for General Admission Ticket Products.
Step 1 - Navigate to Ticket Types
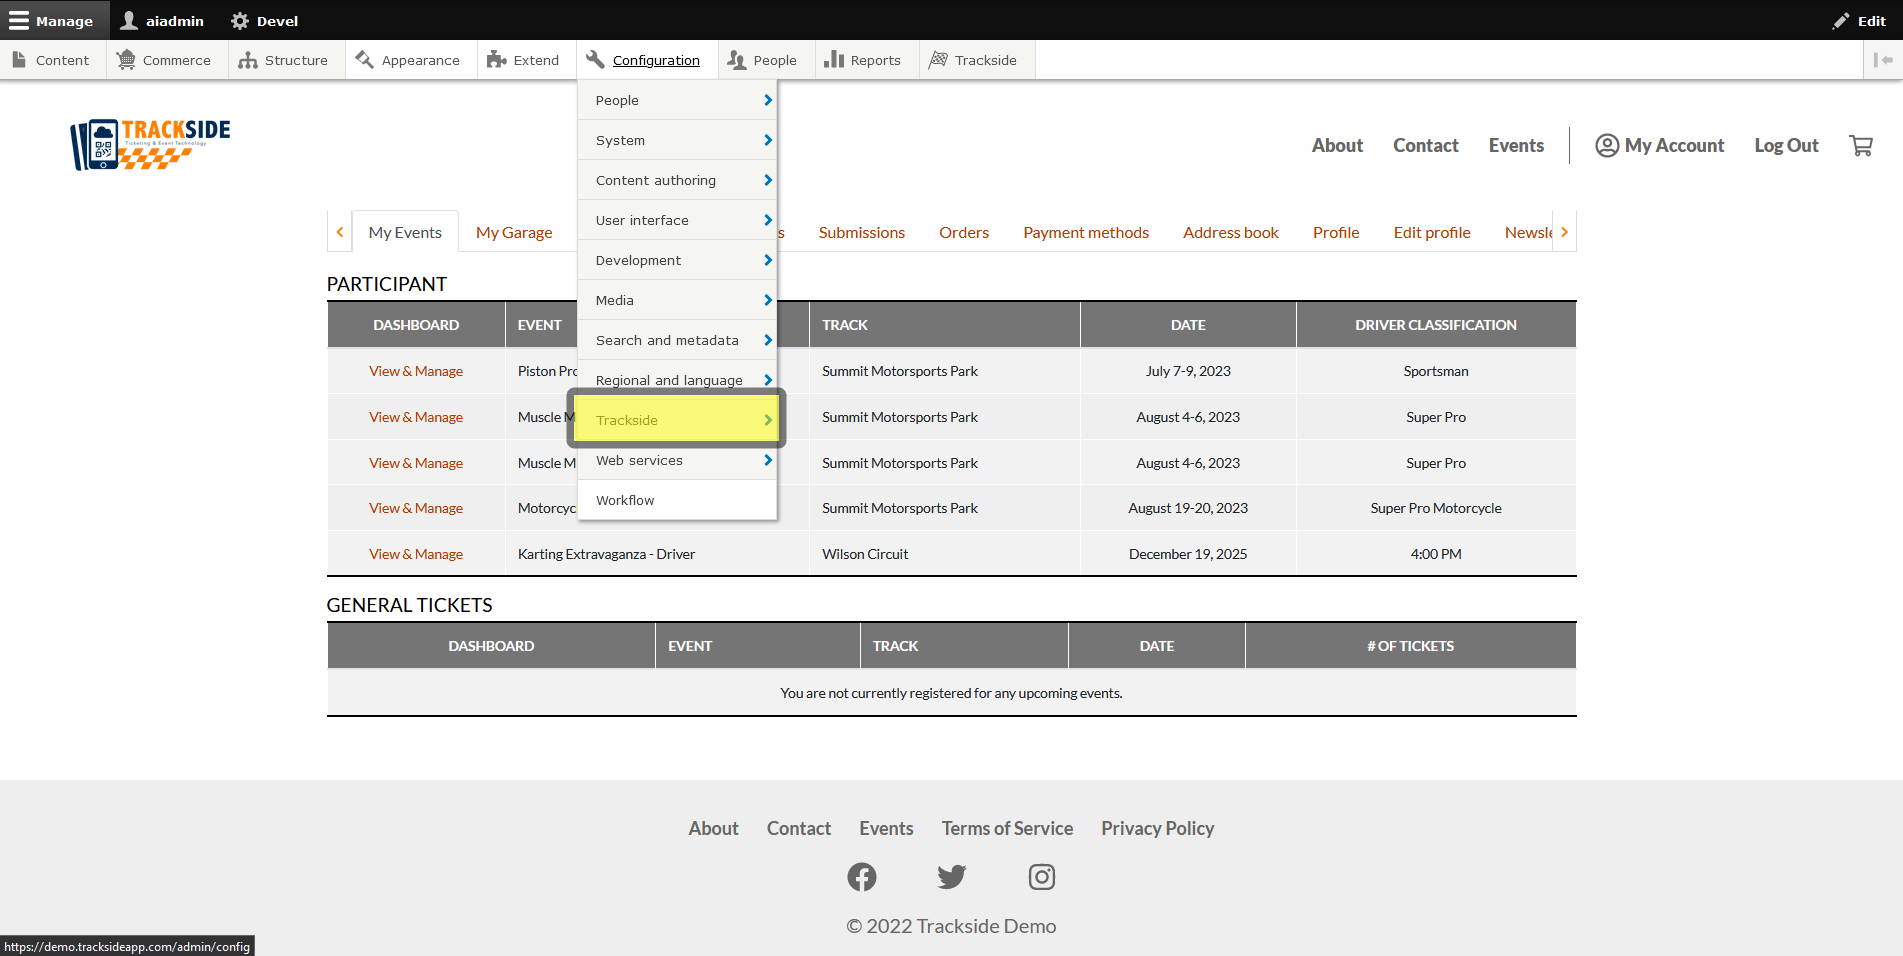
Once you're logged in, hover your cursor over Configuration in the Management Menu. If you don't see this menu, click Manage in the top left of the window. Alternatively, you may also click Configuration, which will take you to a separate page where you can continue following the steps ahead by clicking as well.
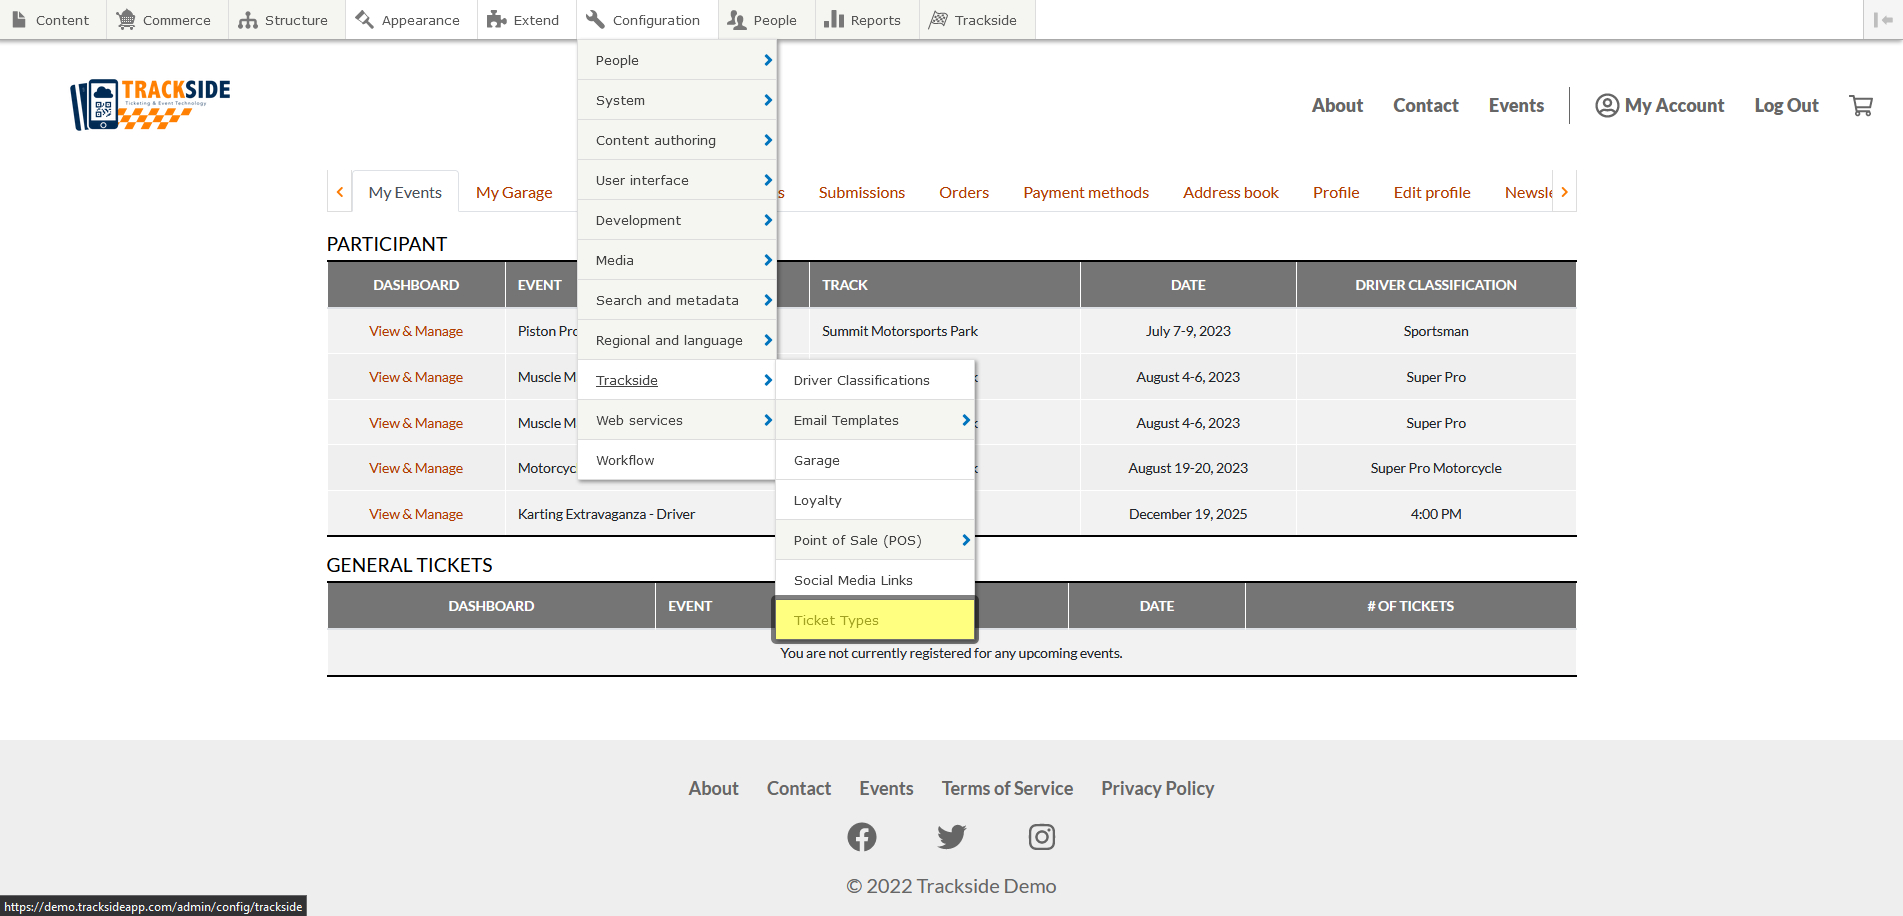
In the Configuration menu, hover over Trackside.
Once in the Trackside menu, click on Ticket Types.
Step 2 - Create New Ticket Type
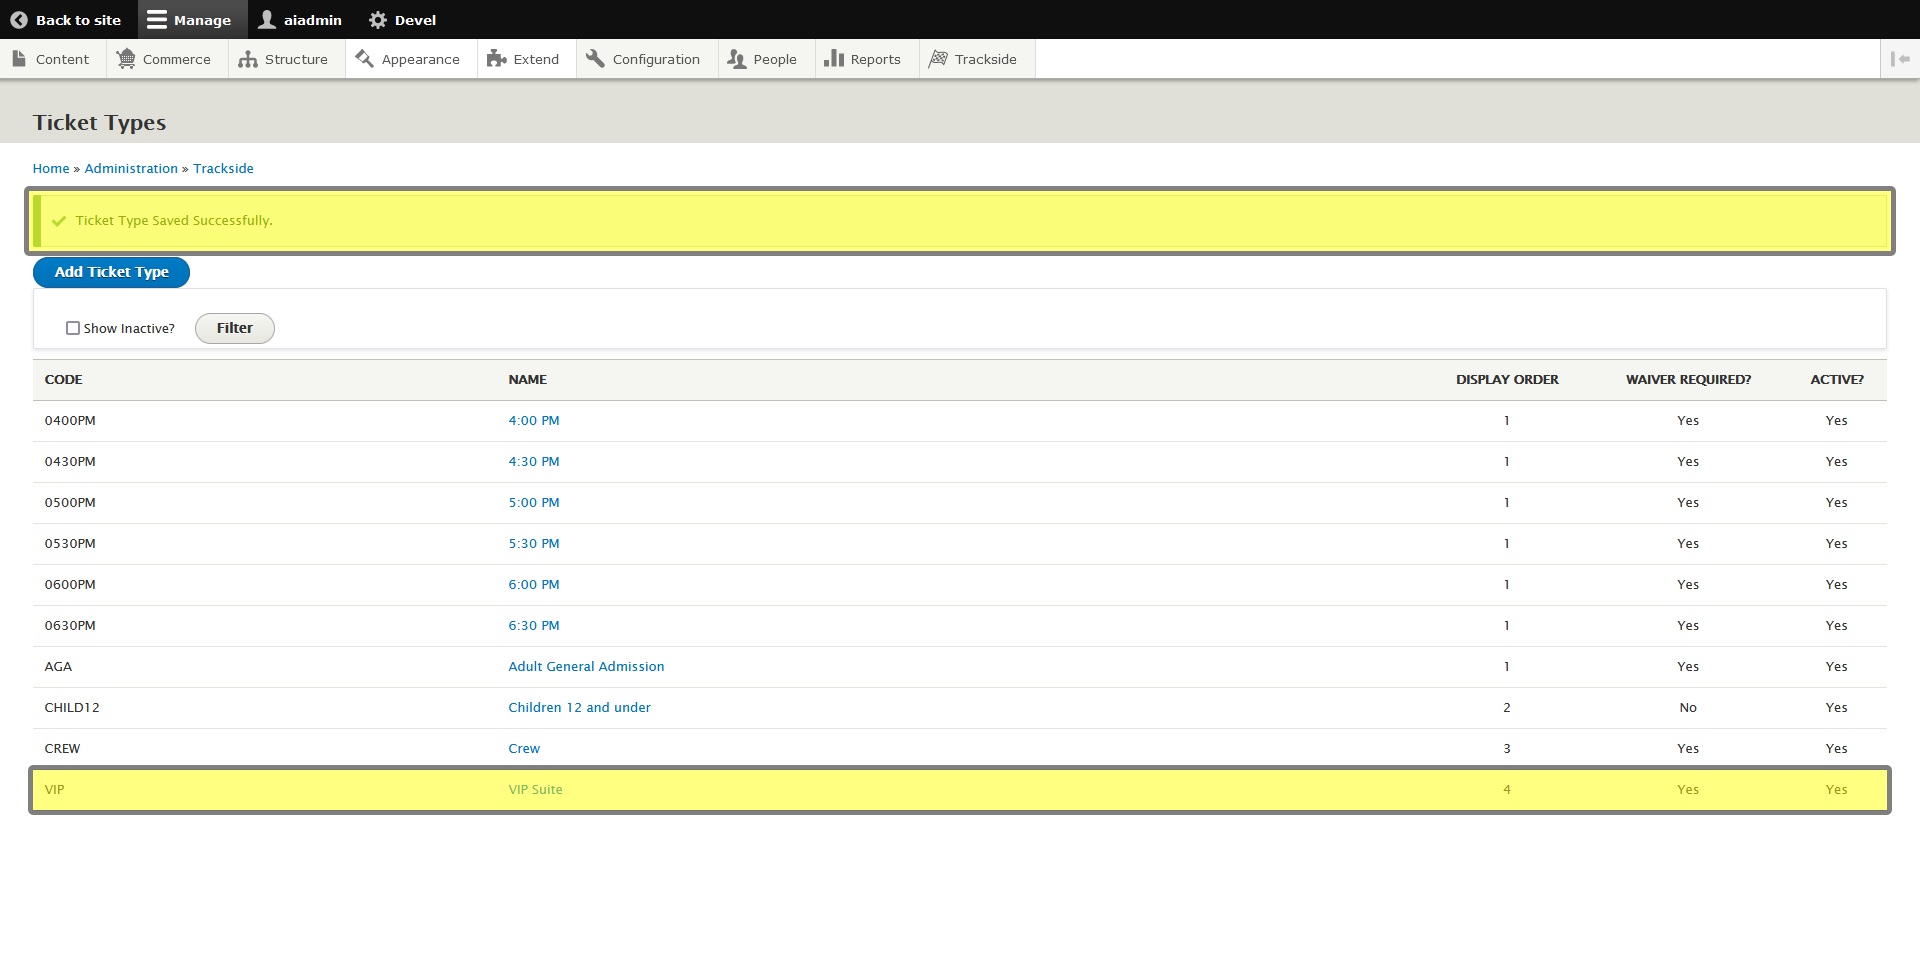
This page lists all Ticket Types for your General Admission Ticket Product, as well as the statuses of them. If you need to edit an already existing type, you will click on the Ticket Type name.
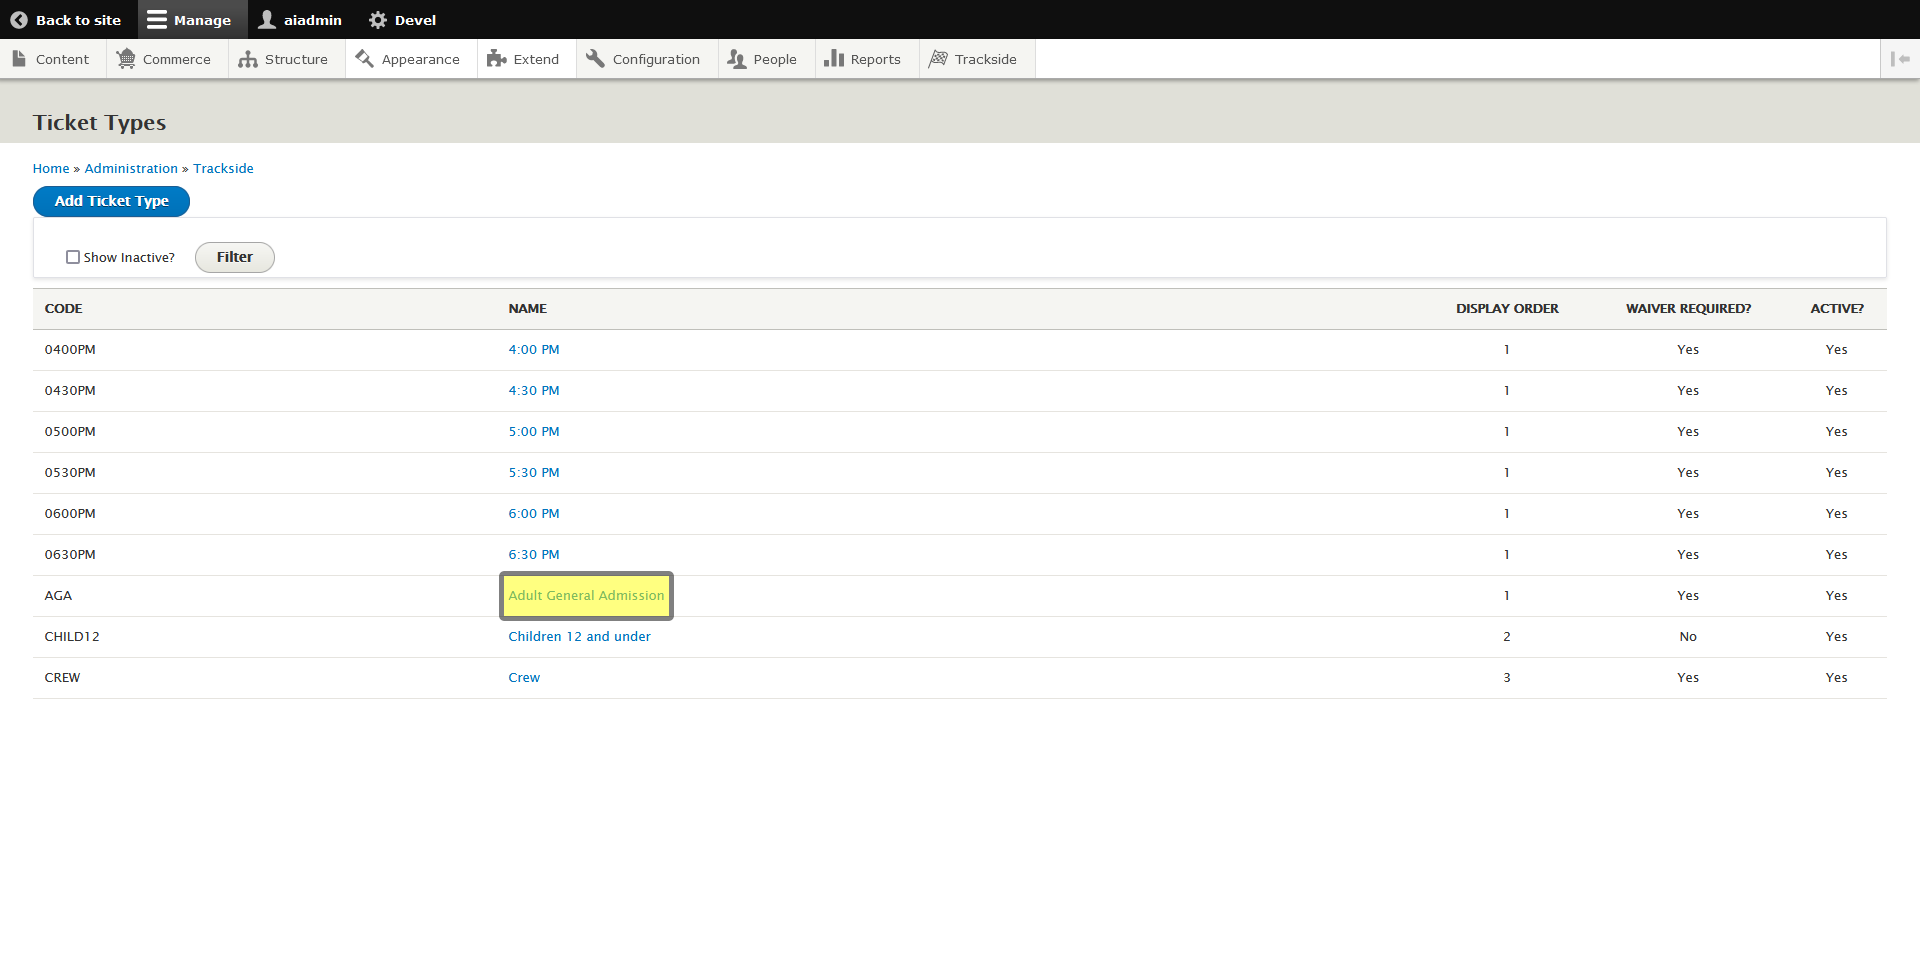
If you're ready to add a new Ticket Type, click Add Ticket Type.
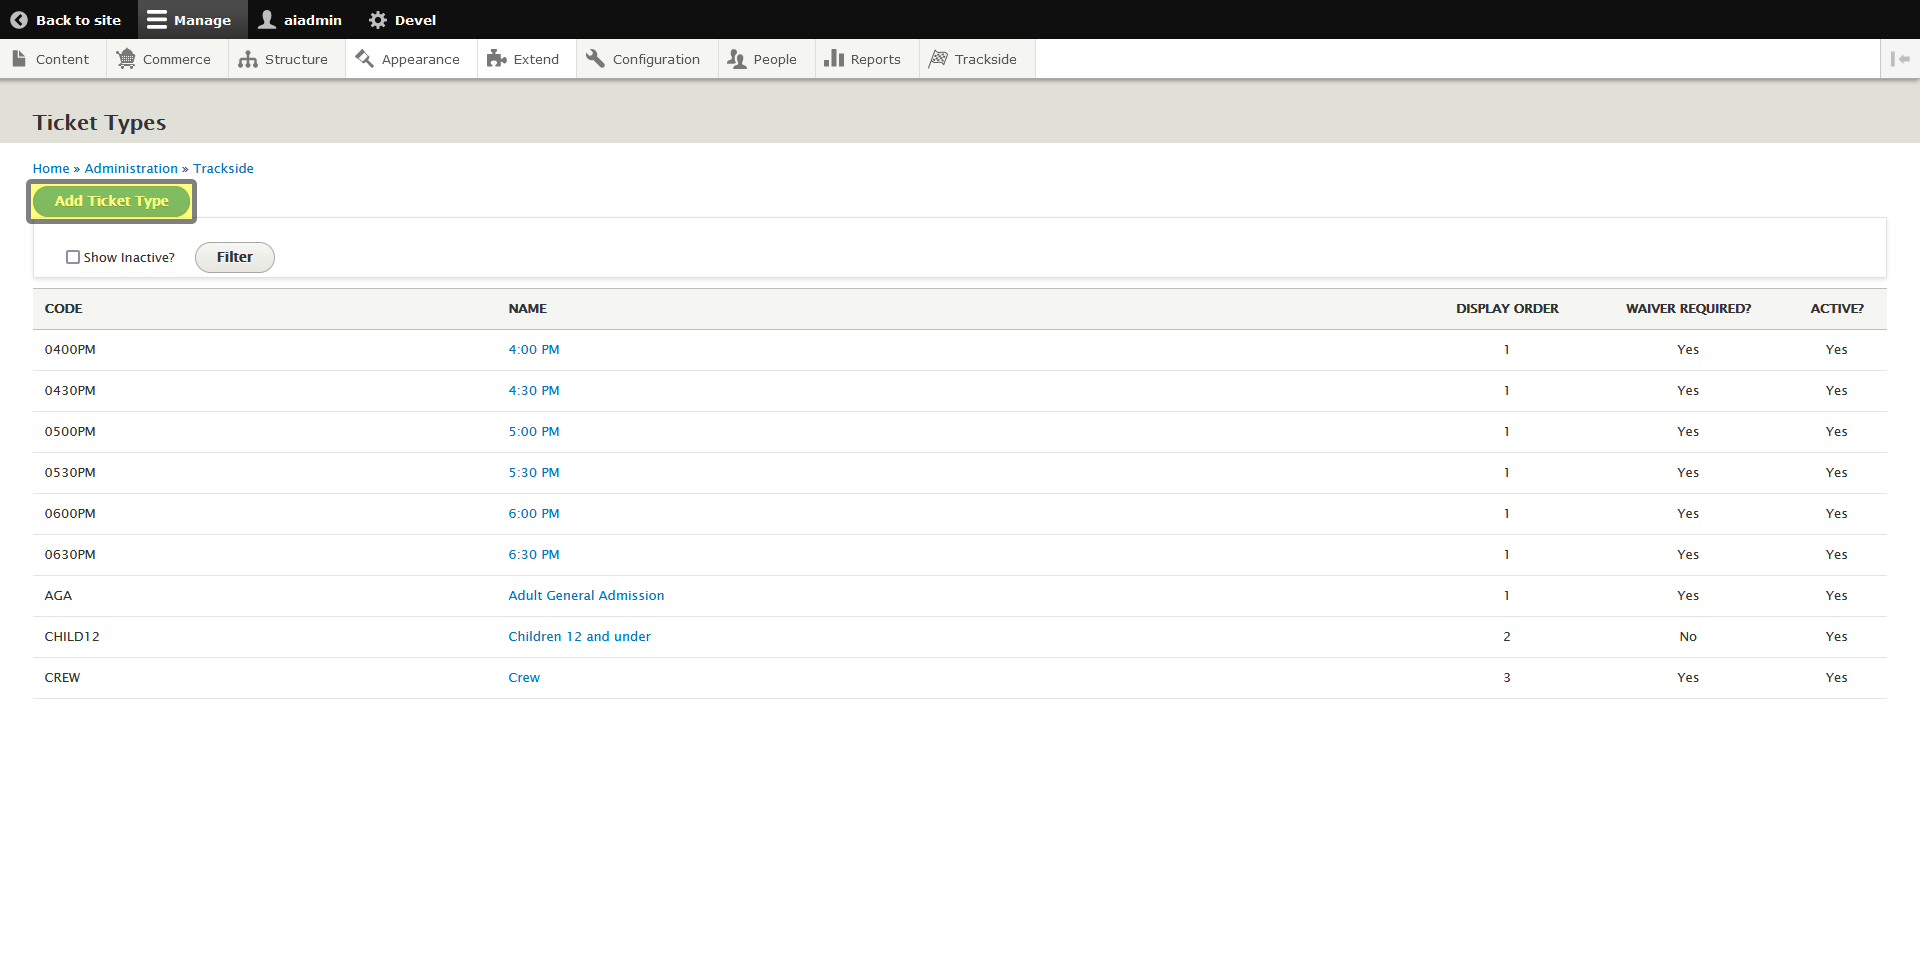
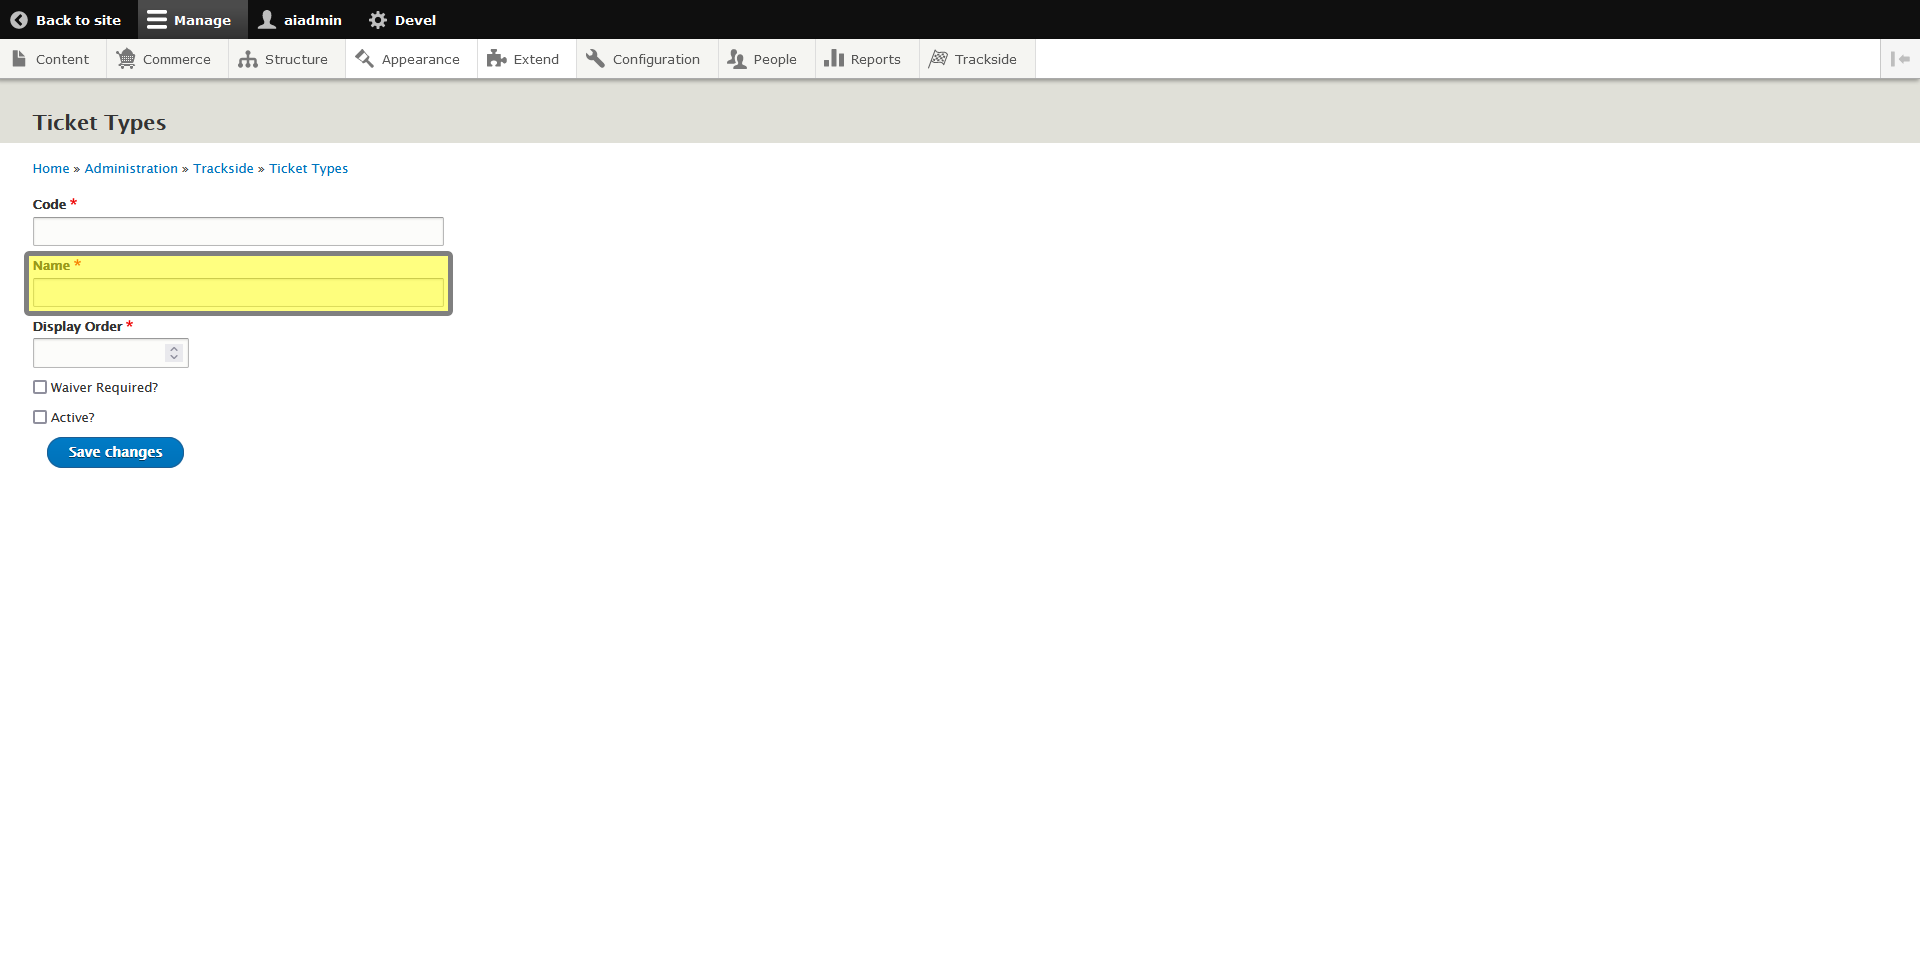
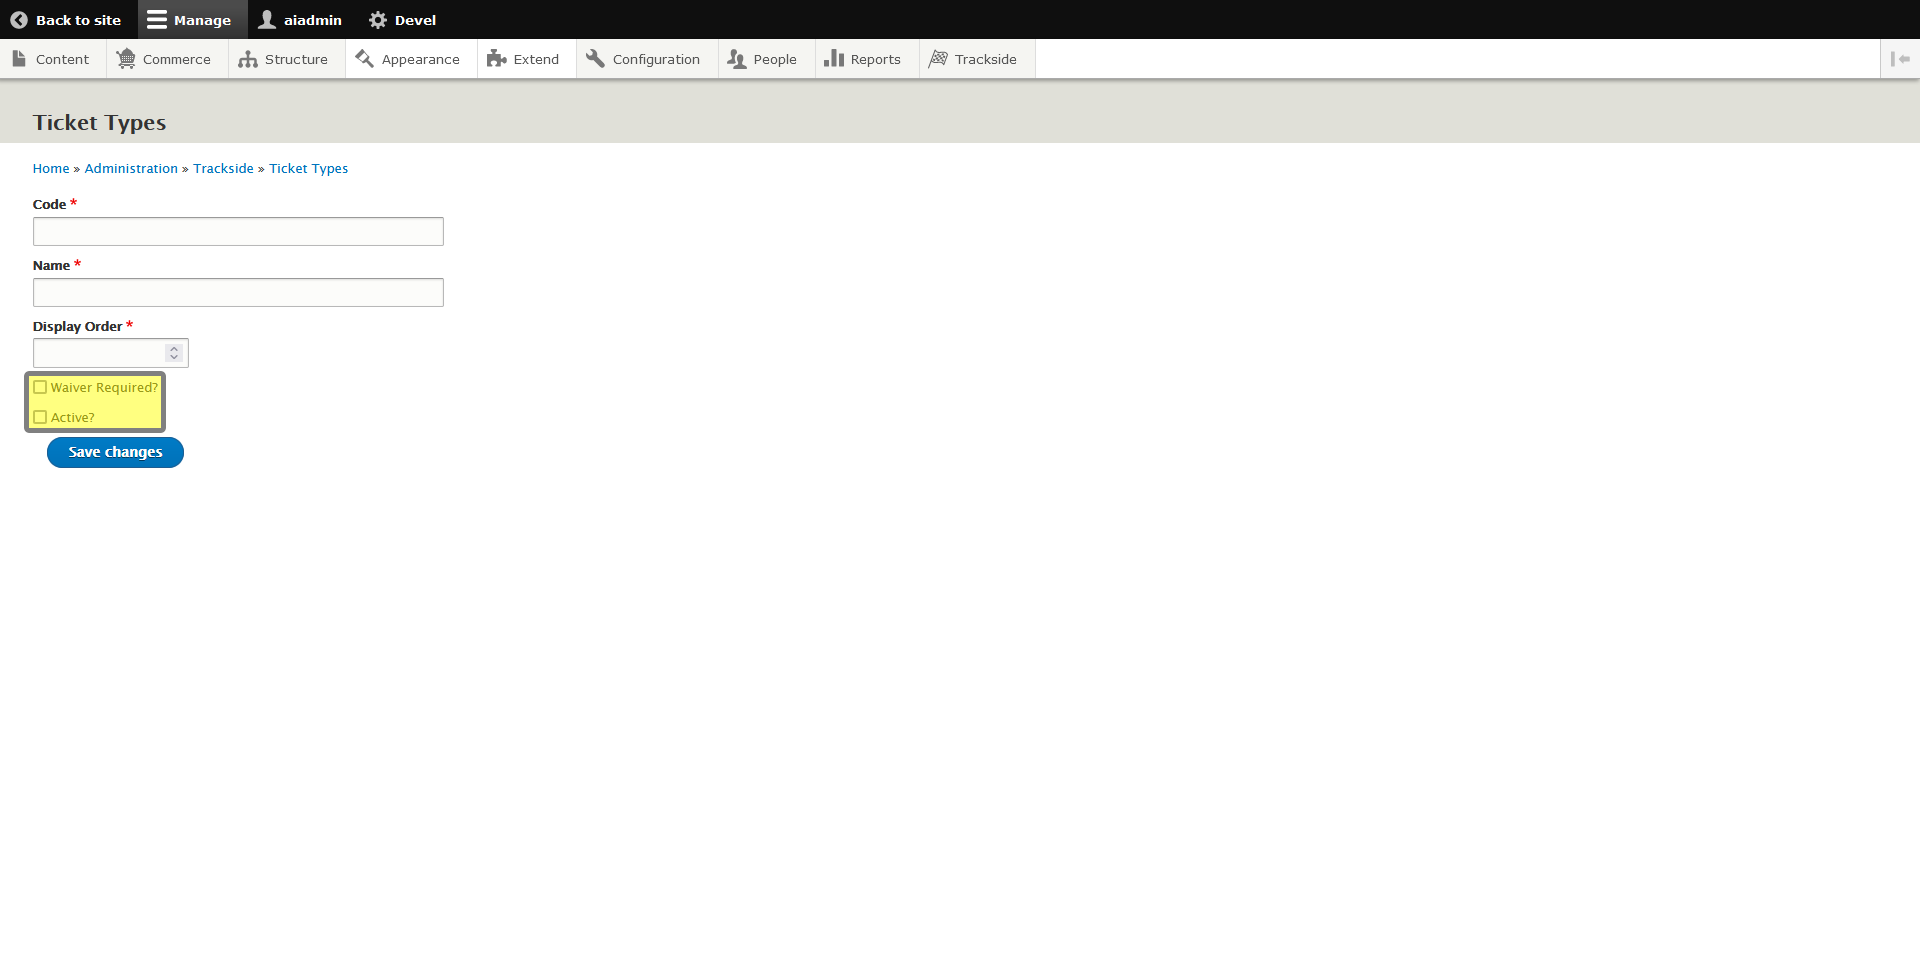
This will take us to a screen to create a new Ticket Type. The first thing we're going to do is create a short Code for the SKU generation of the General Admission Ticket Products we will be creating from this Ticket Type when events are created.
Choose a code that is short but clear. For example, if your Ticket Type is "General Admission", your code could be "GA" or "GENAD". If your Ticket Type is "Children 12 and under" your code could be "CHILD12U". If your ticket type is "Saturday" your code could be "SAT".
Codes can not contain spaces or special characters. Codes can not be changed later. Failure to follow this will require the incorrect ticket type to require being unpublished, and a new ticket type created without the special characters. See Add Ticket Types if you have already created an event and need to add a Ticket Type that was not previously made available at that event.

We will then enter a Name for the Ticket Type. This can be more of a full name description. For example: General Admission, Children 12 and under, Crew, Weekend, Saturday, etc.
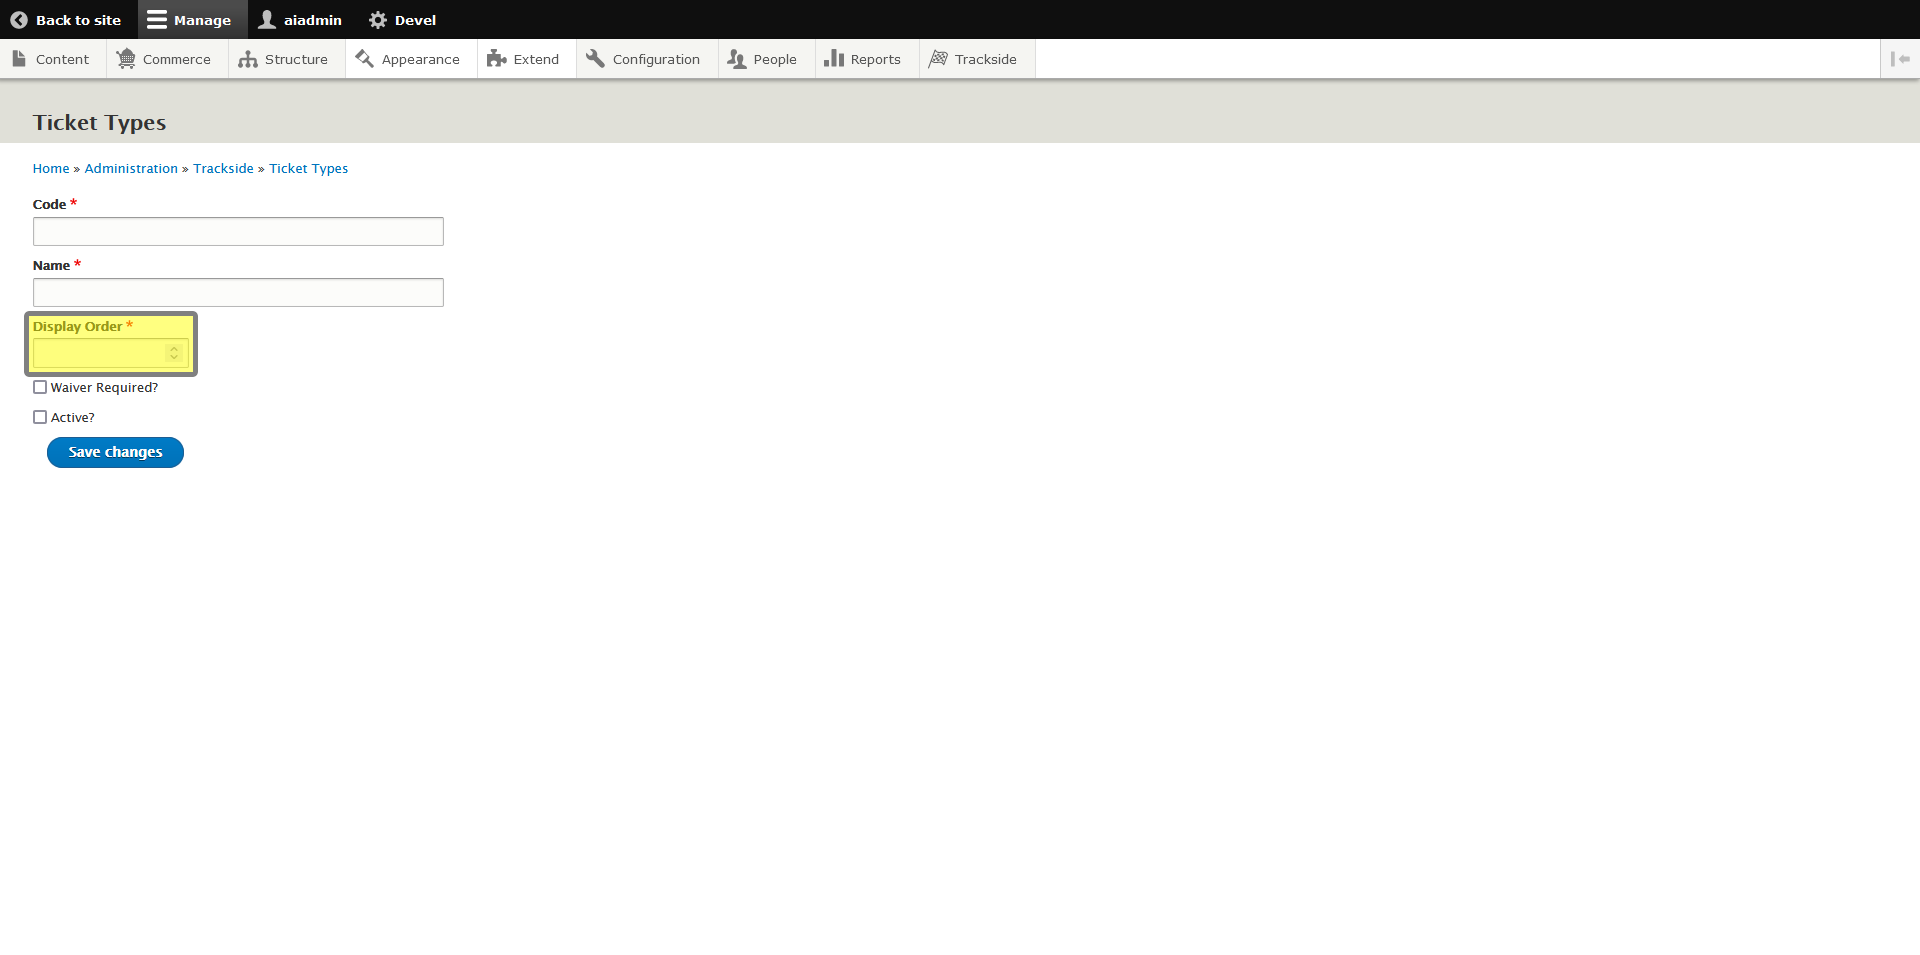
This option allows you to order how the Ticket Types will show up in the list when your customers are purchasing General Admission Ticket Products. You can number this if you want them in a specific order, or if you want to just leave it in a default order, you can just enter 1 for all Ticket Types you set up.
Step 3 - Select if Waivers are required (Modified Plan feature) and if the Ticket Type will be Active
WAIVER REQUIRED
Note: This is a Modified Plan feature. If you are on a lower level plan, use of this feature may automatically change your per-ticket usage rate to the associated higher rate.
- Will this Ticket Type be required to sign a waiver? If so, check this box.
- If this Ticket Type does not need to sign a waiver, do not check this box.
Trackside is able to utilize digital waivers, as will be highlighted in Upload Spectator Waiver, and this function will use that waiver.
ACTIVE
If this is a Ticket Type you are ready to sell, check this box. The Active box must be checked for you to be able to add this Ticket Type to an event.
If you leave this box unchecked your Ticket Type will be created but you won't be able to add it when you set up an event. You can edit this Ticket Type and activate it later by checking this box.
Step 4 - Save & Verify New Ticket Type
At this point, everything should be configured for our new (General Admission Ticket Product) Ticket Type, so you're ready to click Save Changes to add the Ticket Type.
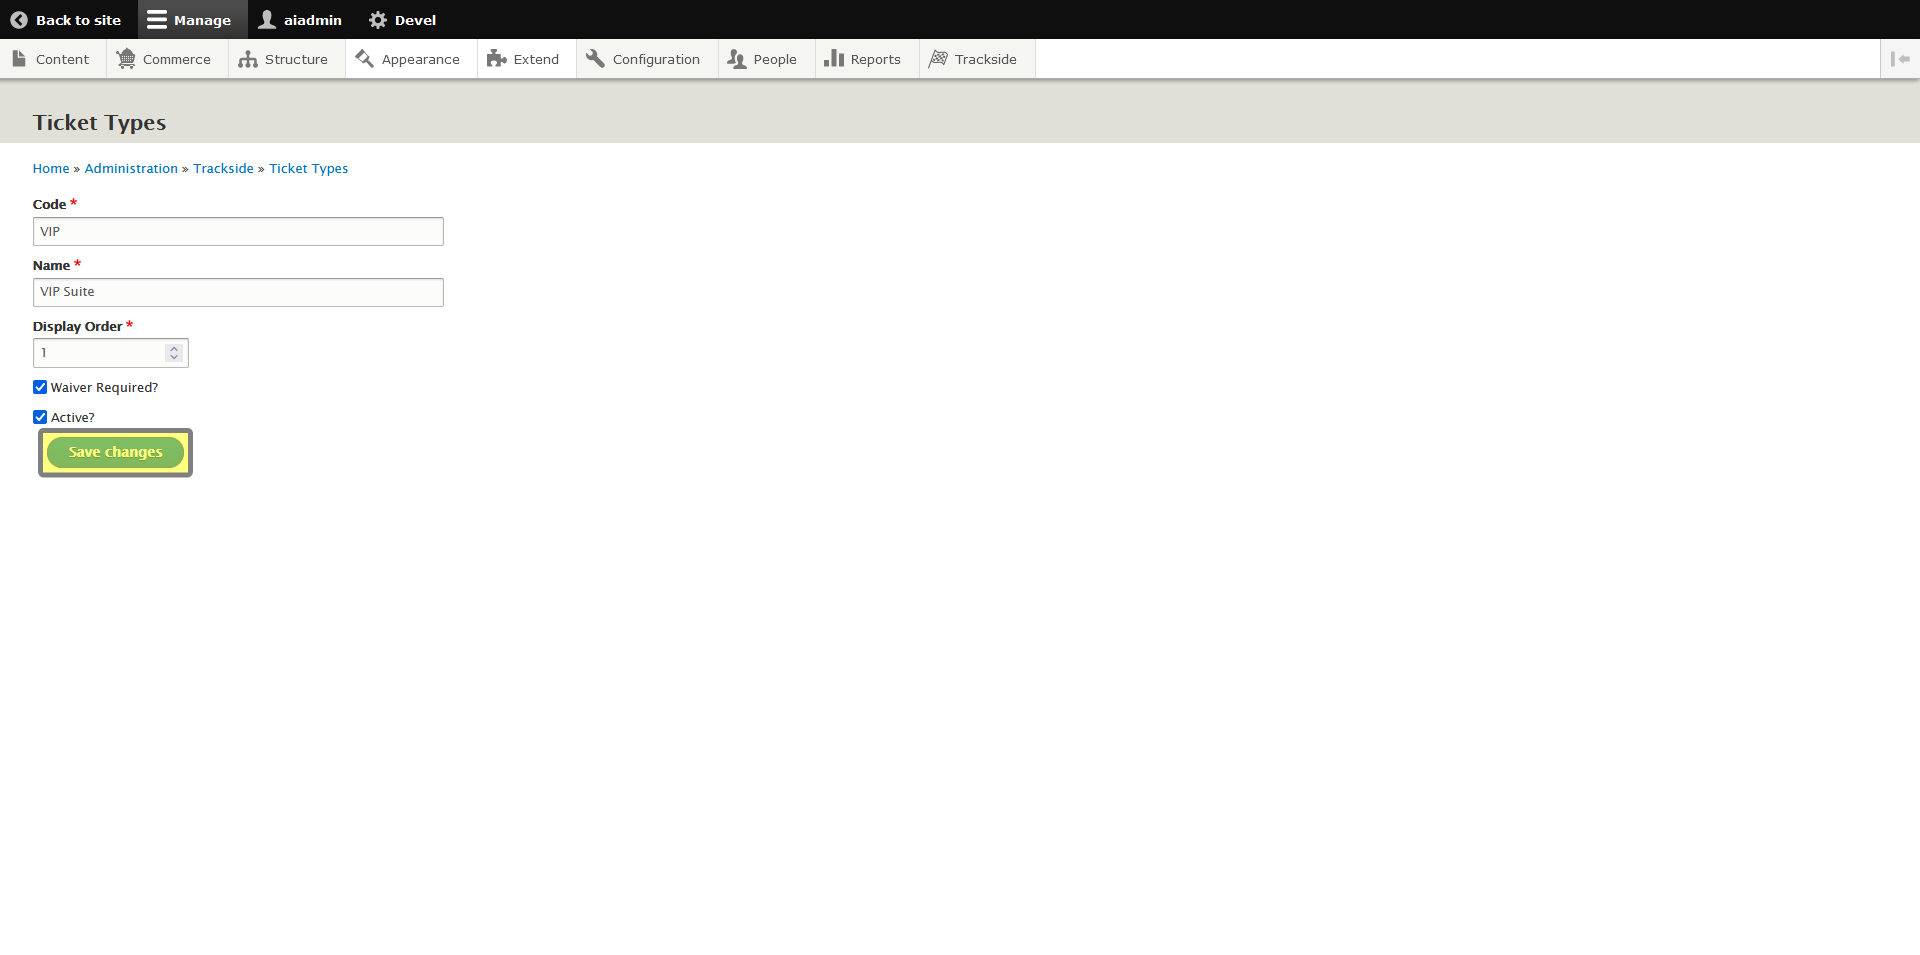
After clicking save, the list of your Ticket Type will be displayed. At this point, you should see a confirmation toward the top of the page, as well as your new Ticket Type added to the list, meaning you have created your Ticket Type.
If you do not see your Ticket Type listed, keep in mind there may be multiple pages. Use the page navigation links at the bottom.