Garage (Vehicle Components & Options)
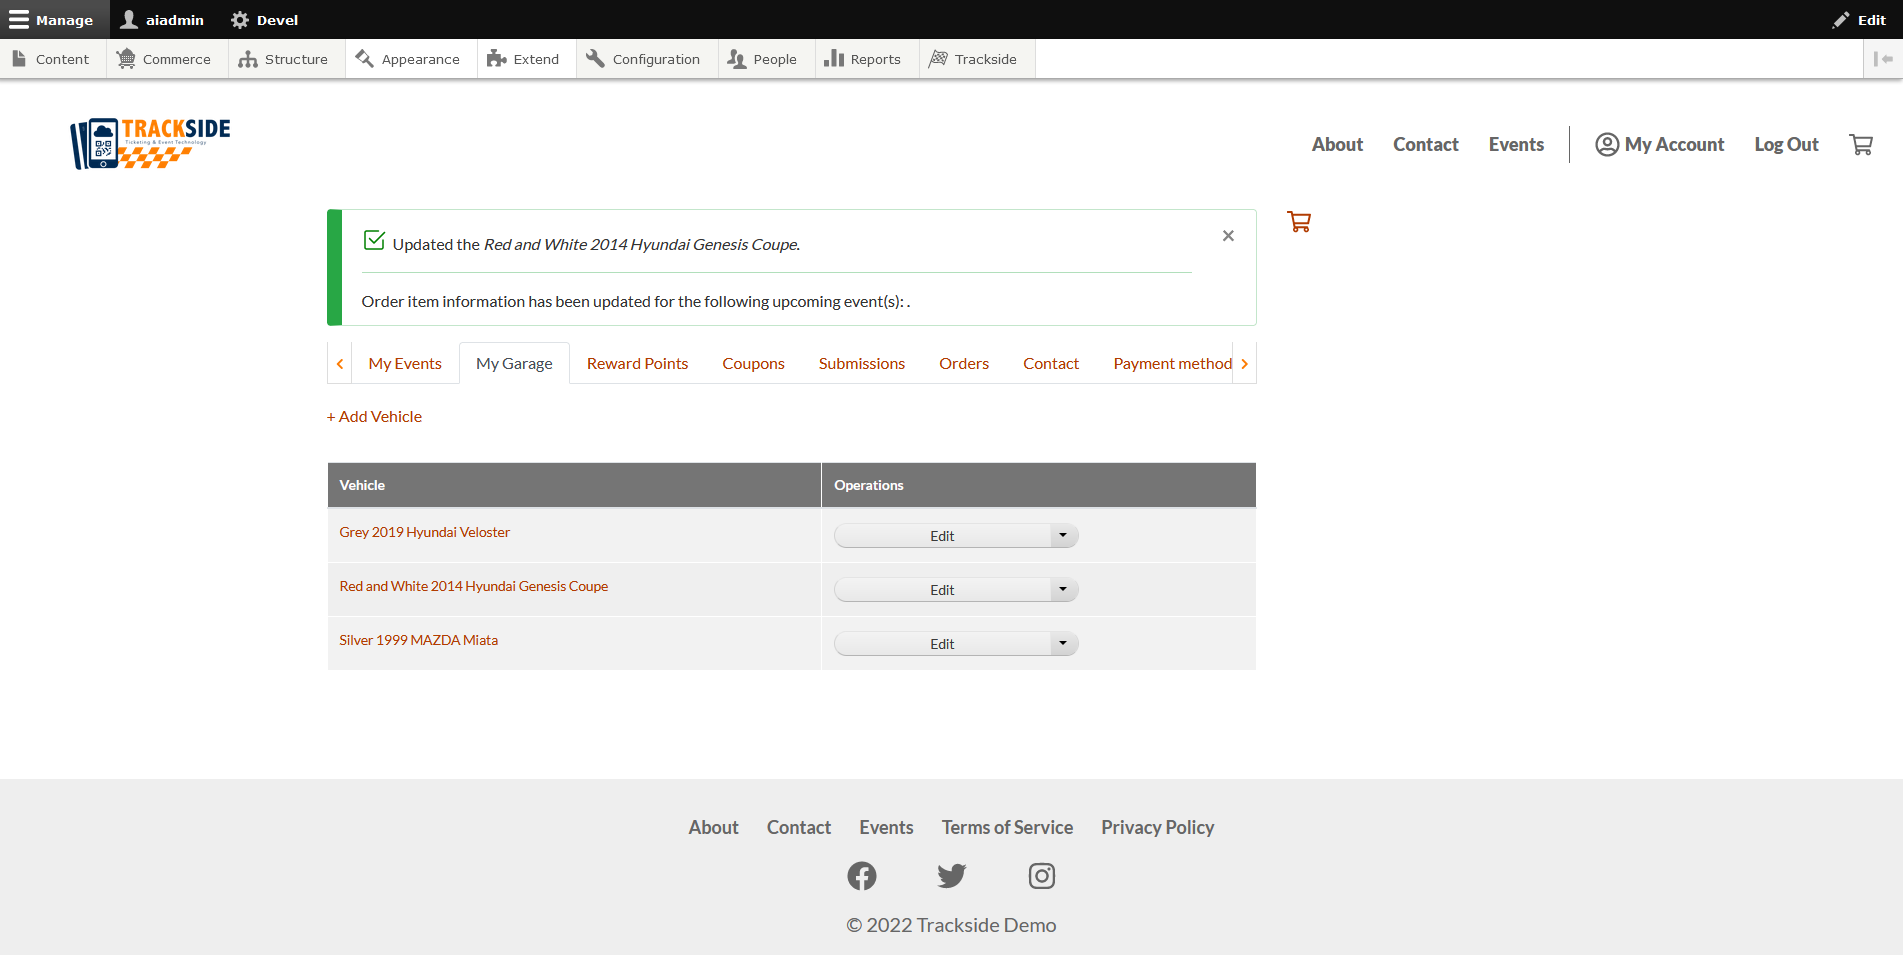
When participants register for an event, they will need to select (or create) a vehicle from their Garage. You have the ability to add different Vehicle Components to the standard Garage.
Step 1 - Navigate to Garage
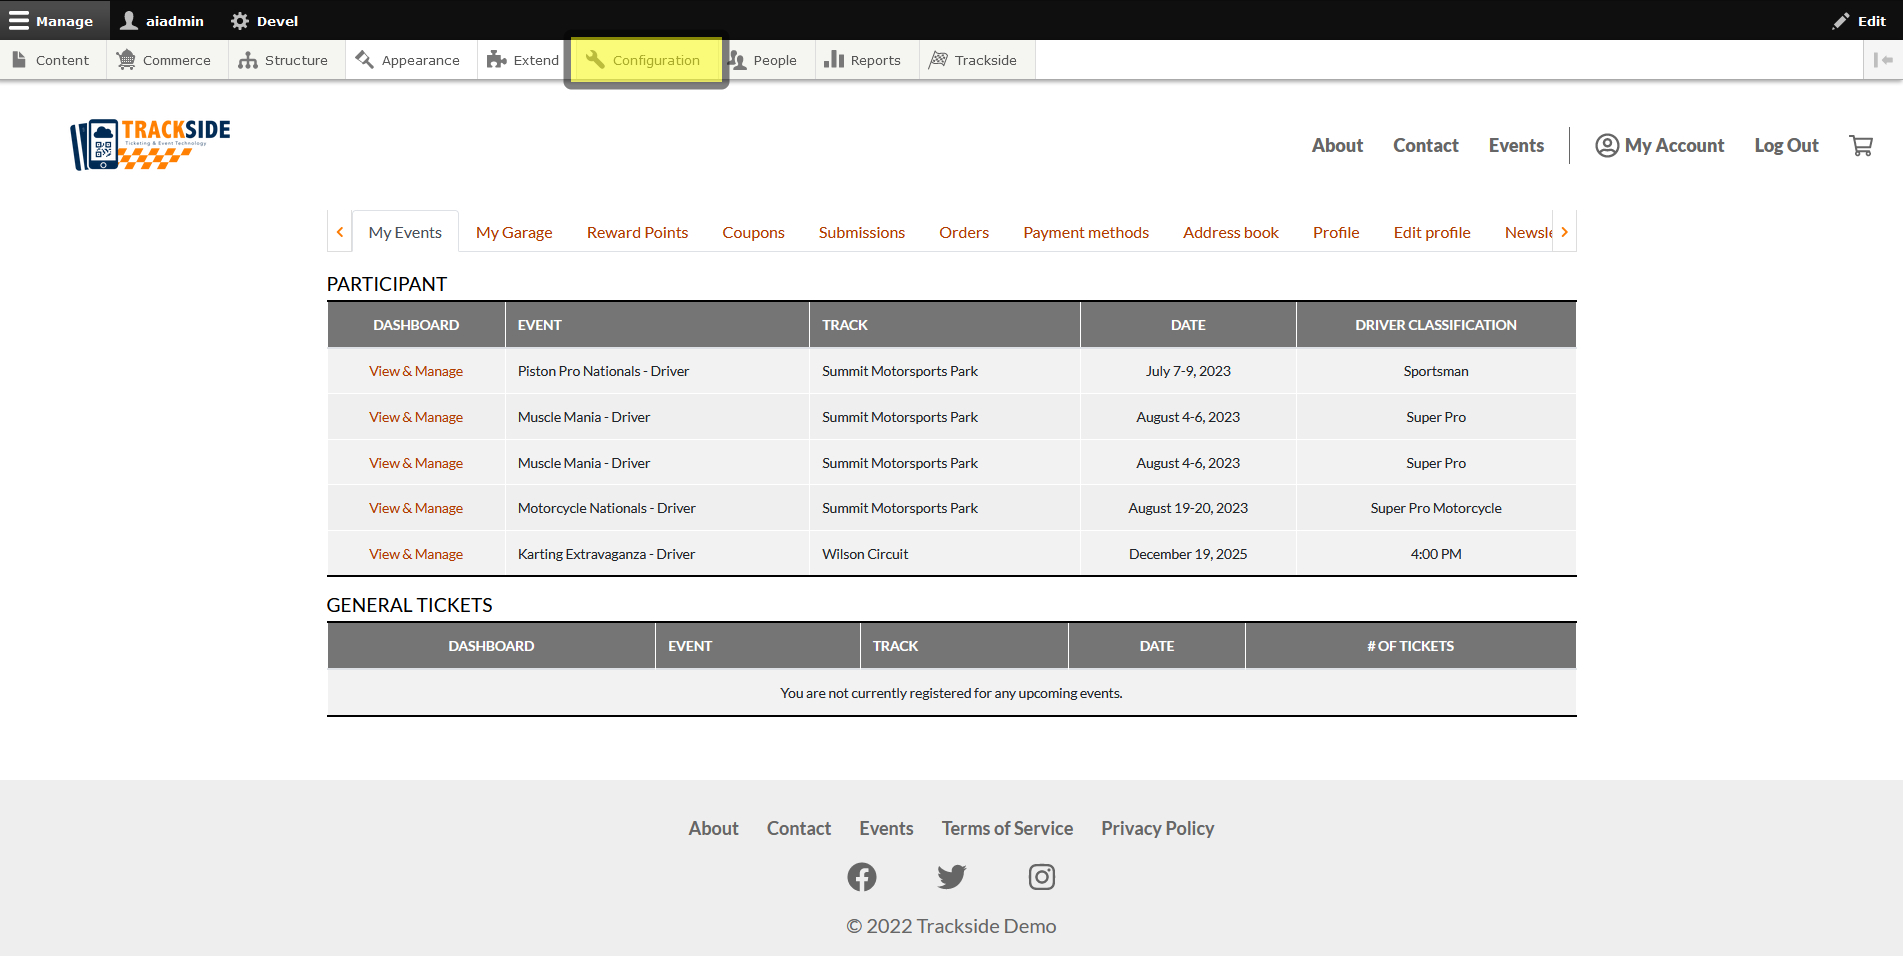
Once you are logged in, hover over Configuration in your Management Menu. If you don't see this menu, click Manage in the top left of the window. You may also click on Configuration, and it will take you to a separate page where you can click on the following steps to achieve the same results as well.
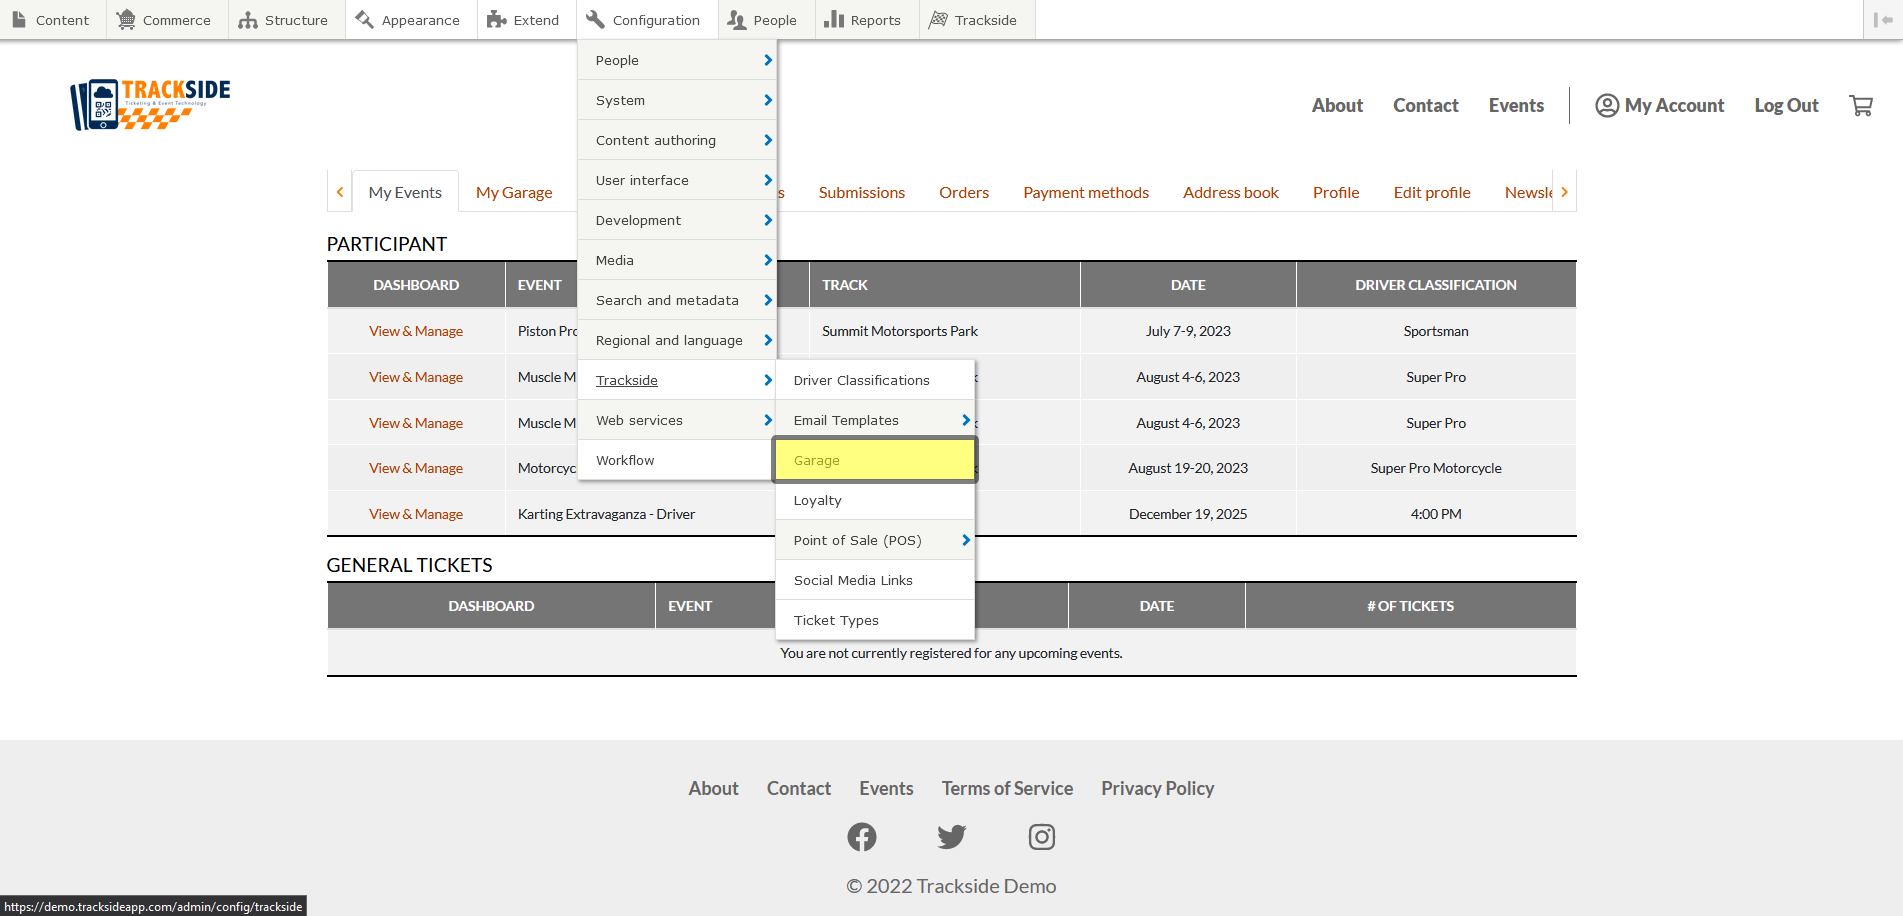
In the Configuration menu, hover over Trackside.
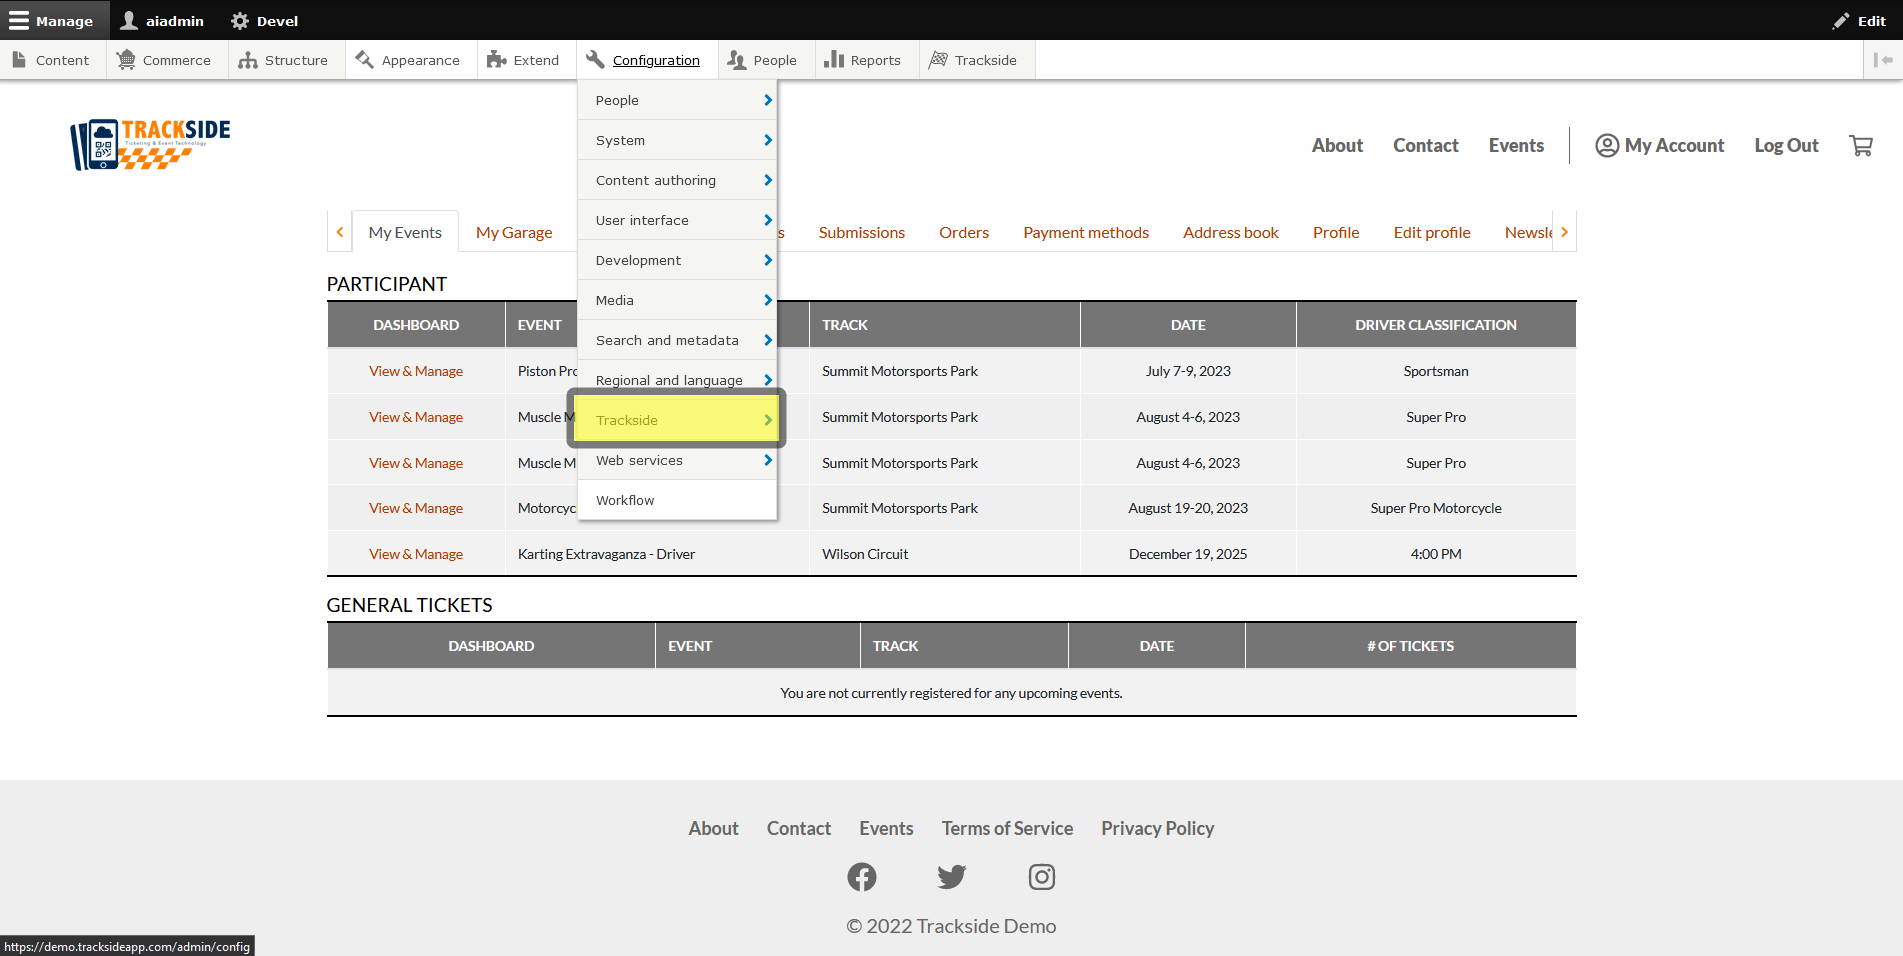
In the Trackside menu, click on Garage.
Add New Component
Step 2 - Edit or Add Vehicle Component
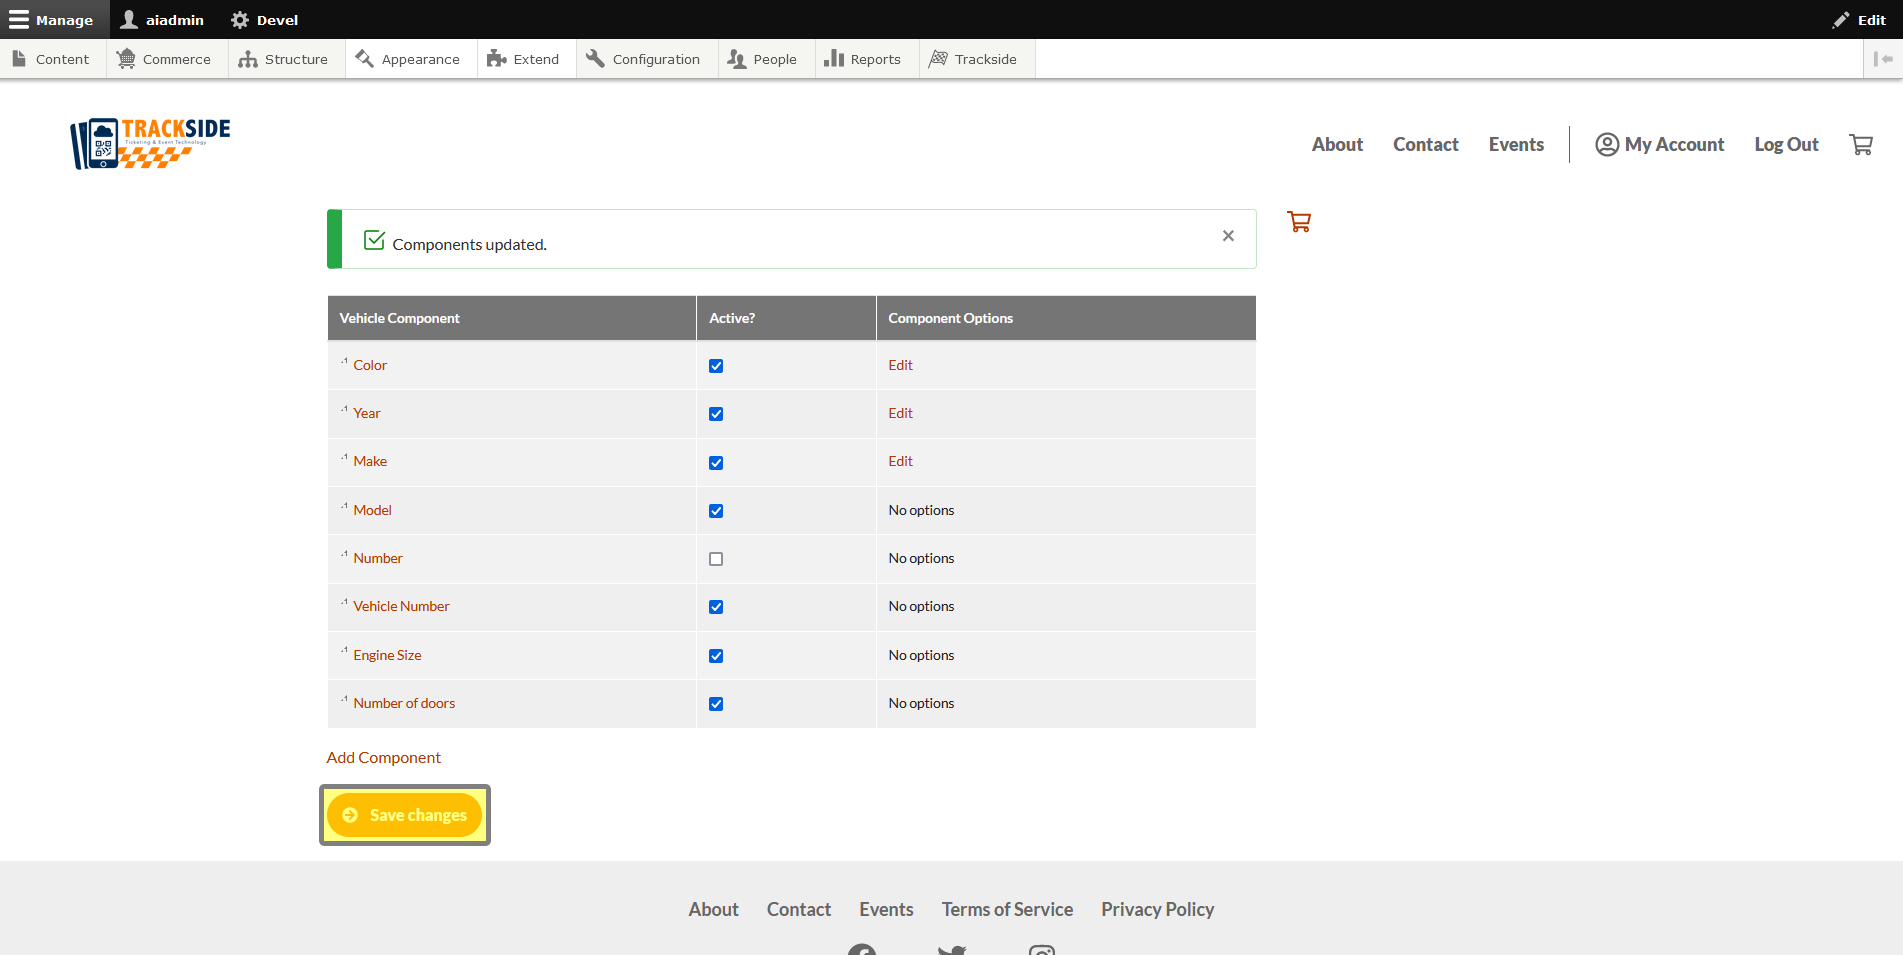
During the onboarding process, we set up your Vehicle Components for you. You will see them displayed here.
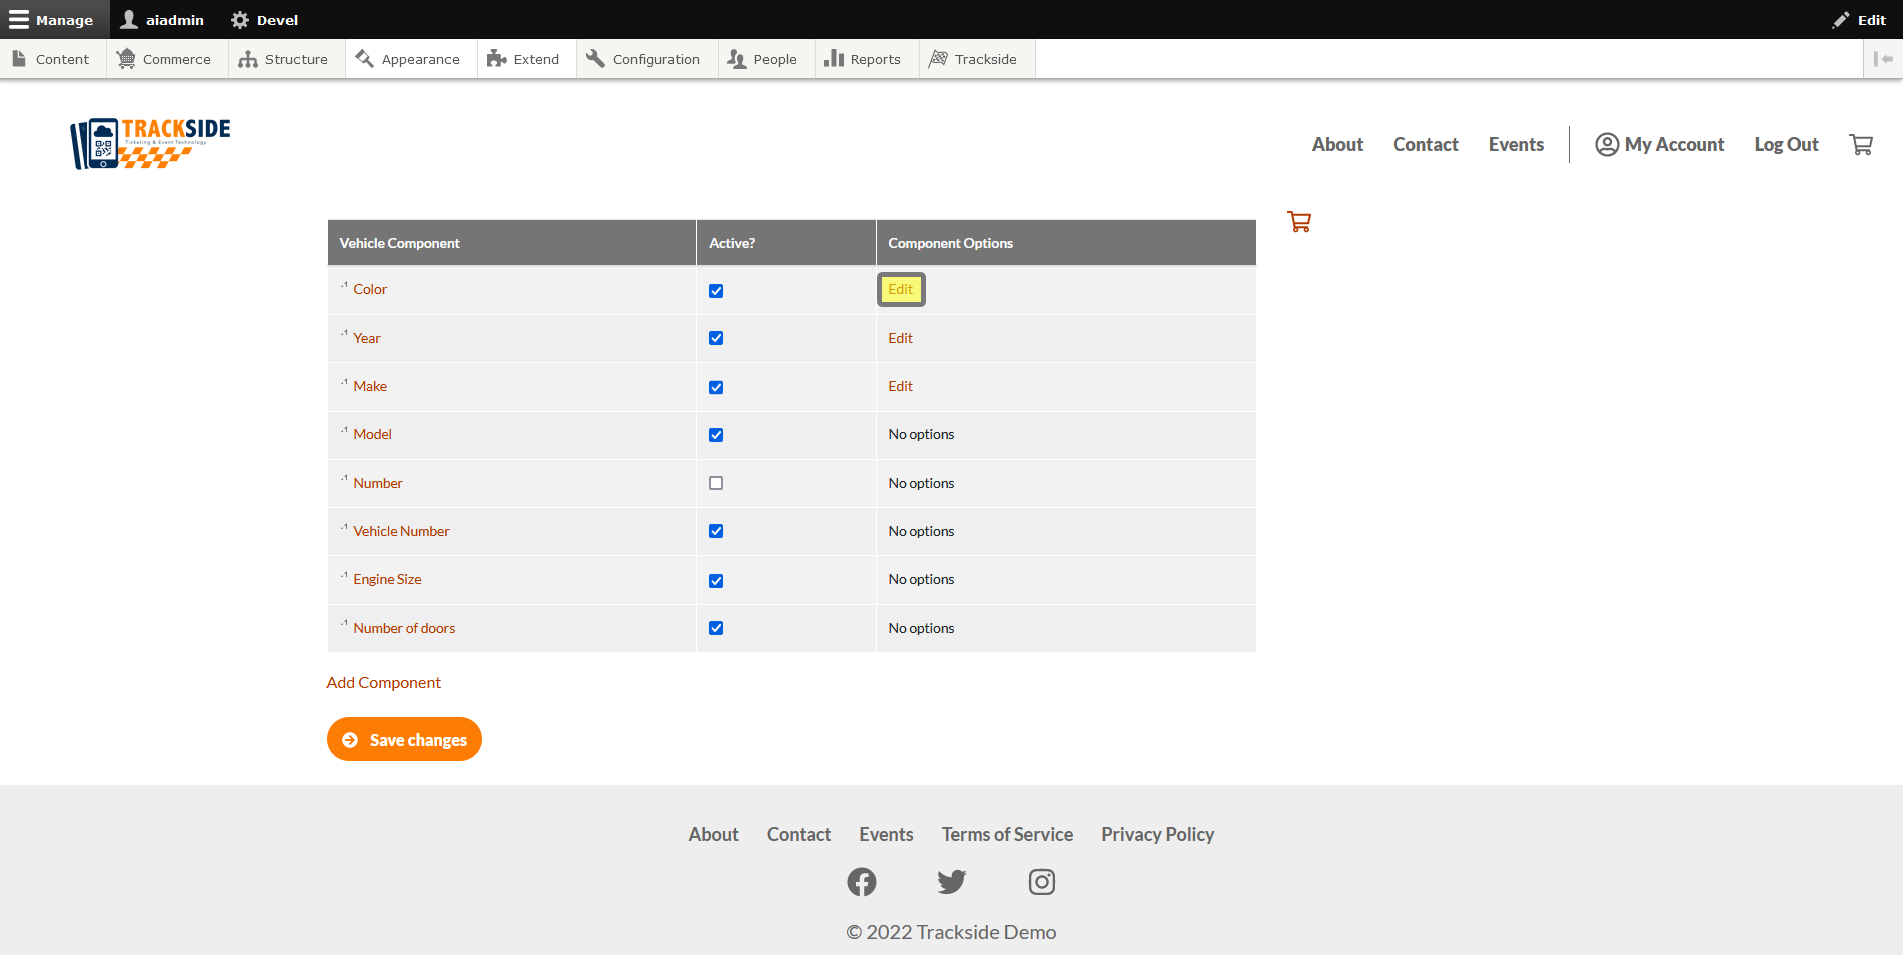
If you need to edit an existing option, you'll click it's name from the list.
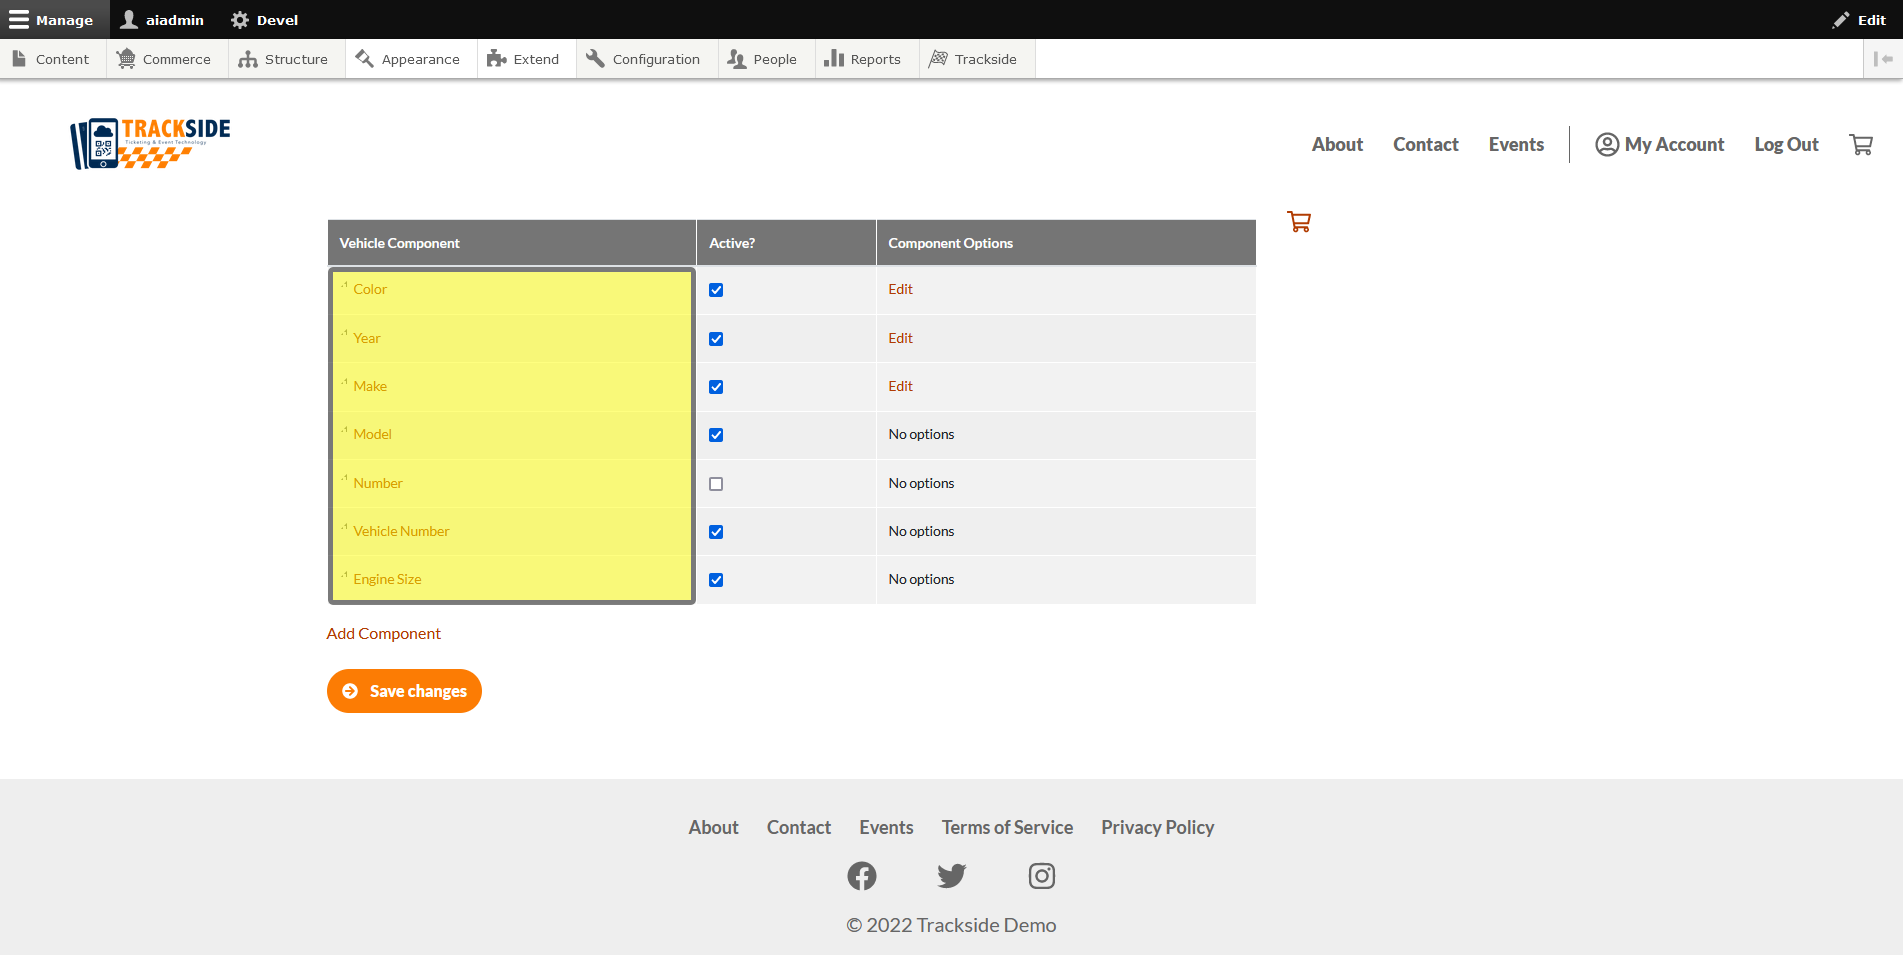
If there is a set list of options for a component, you will have an option to edit those under Component Options. Jump to Step 8 for a look at how that works.

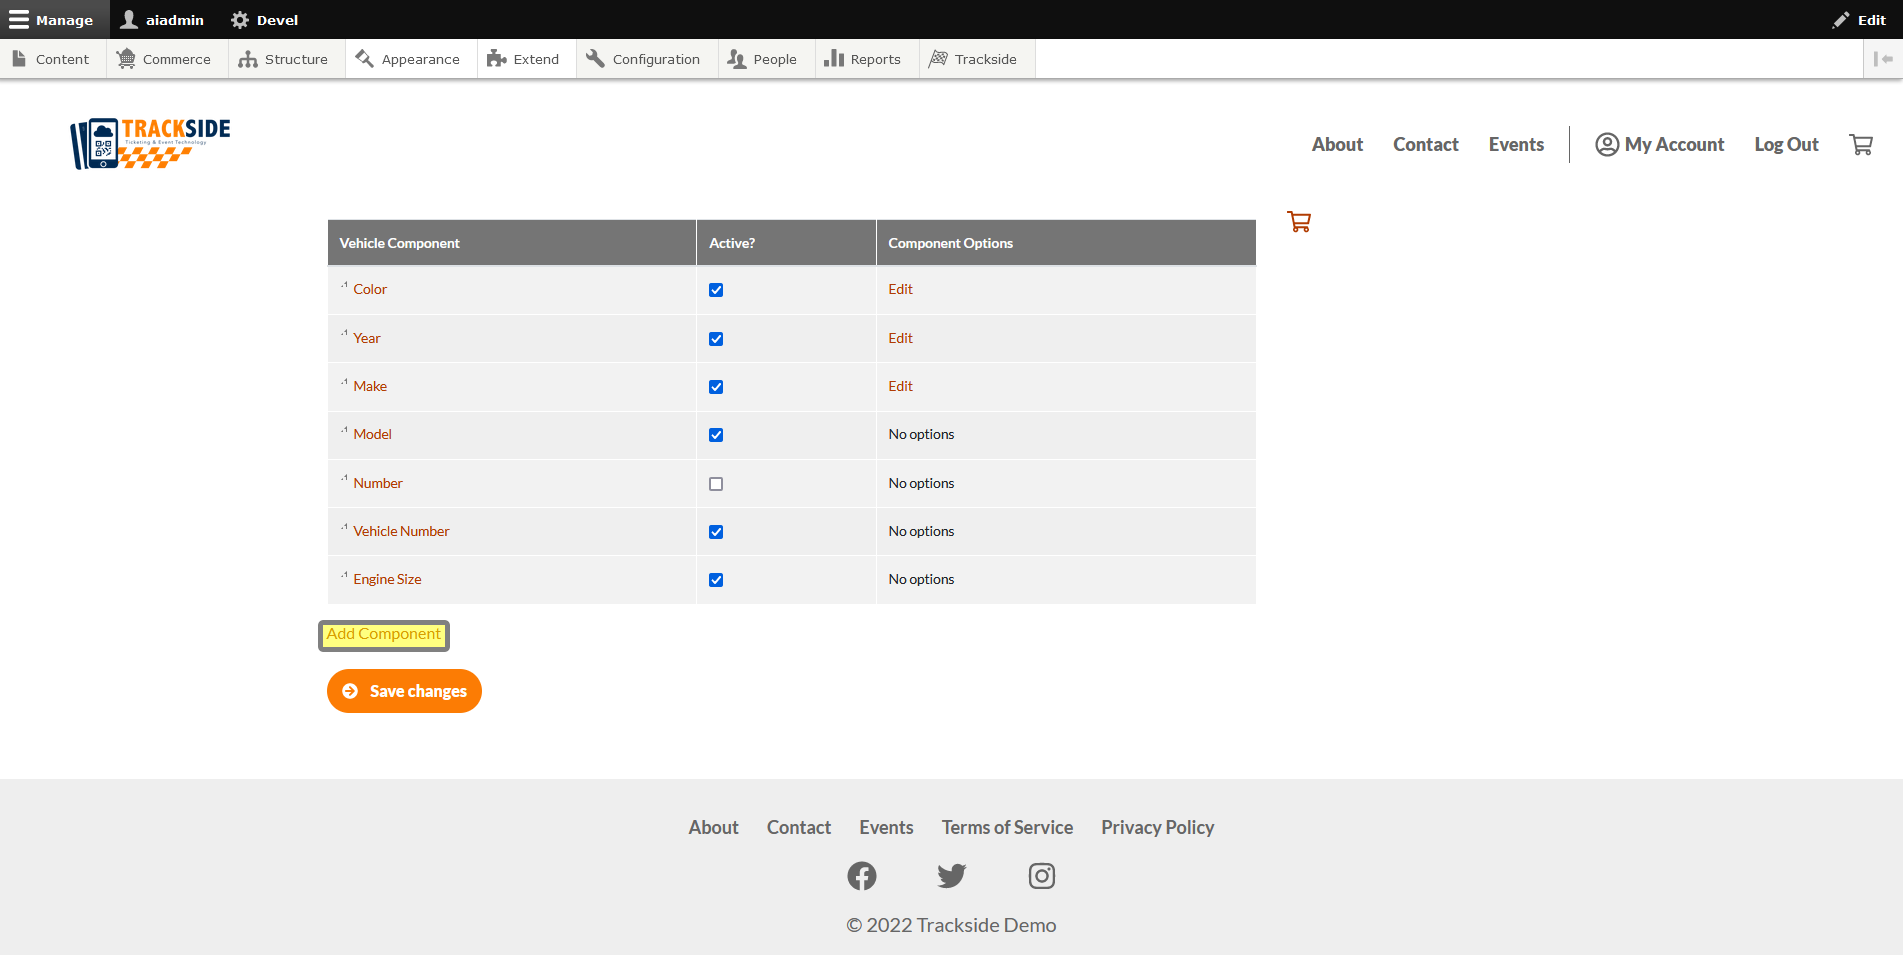
If you wish to add a Vehicle Component, click on Add Component to get started.
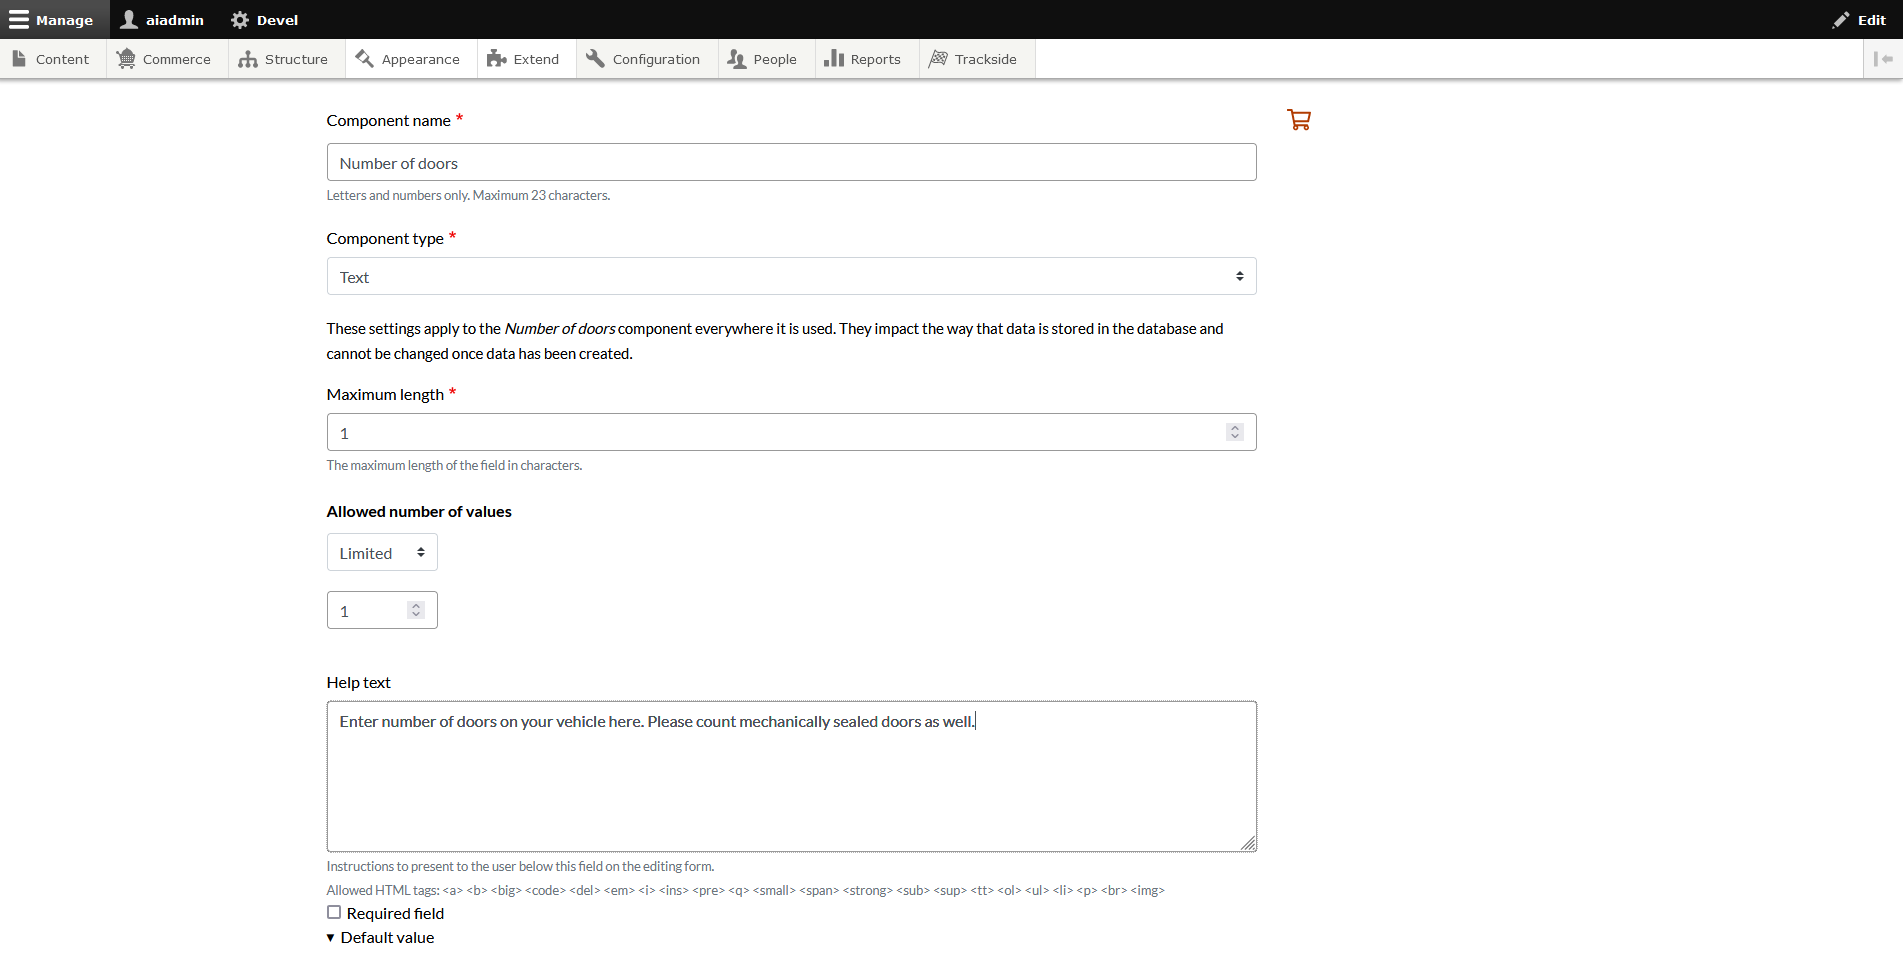
Give your new Component a name. We're going to add an option for number of doors for this example.
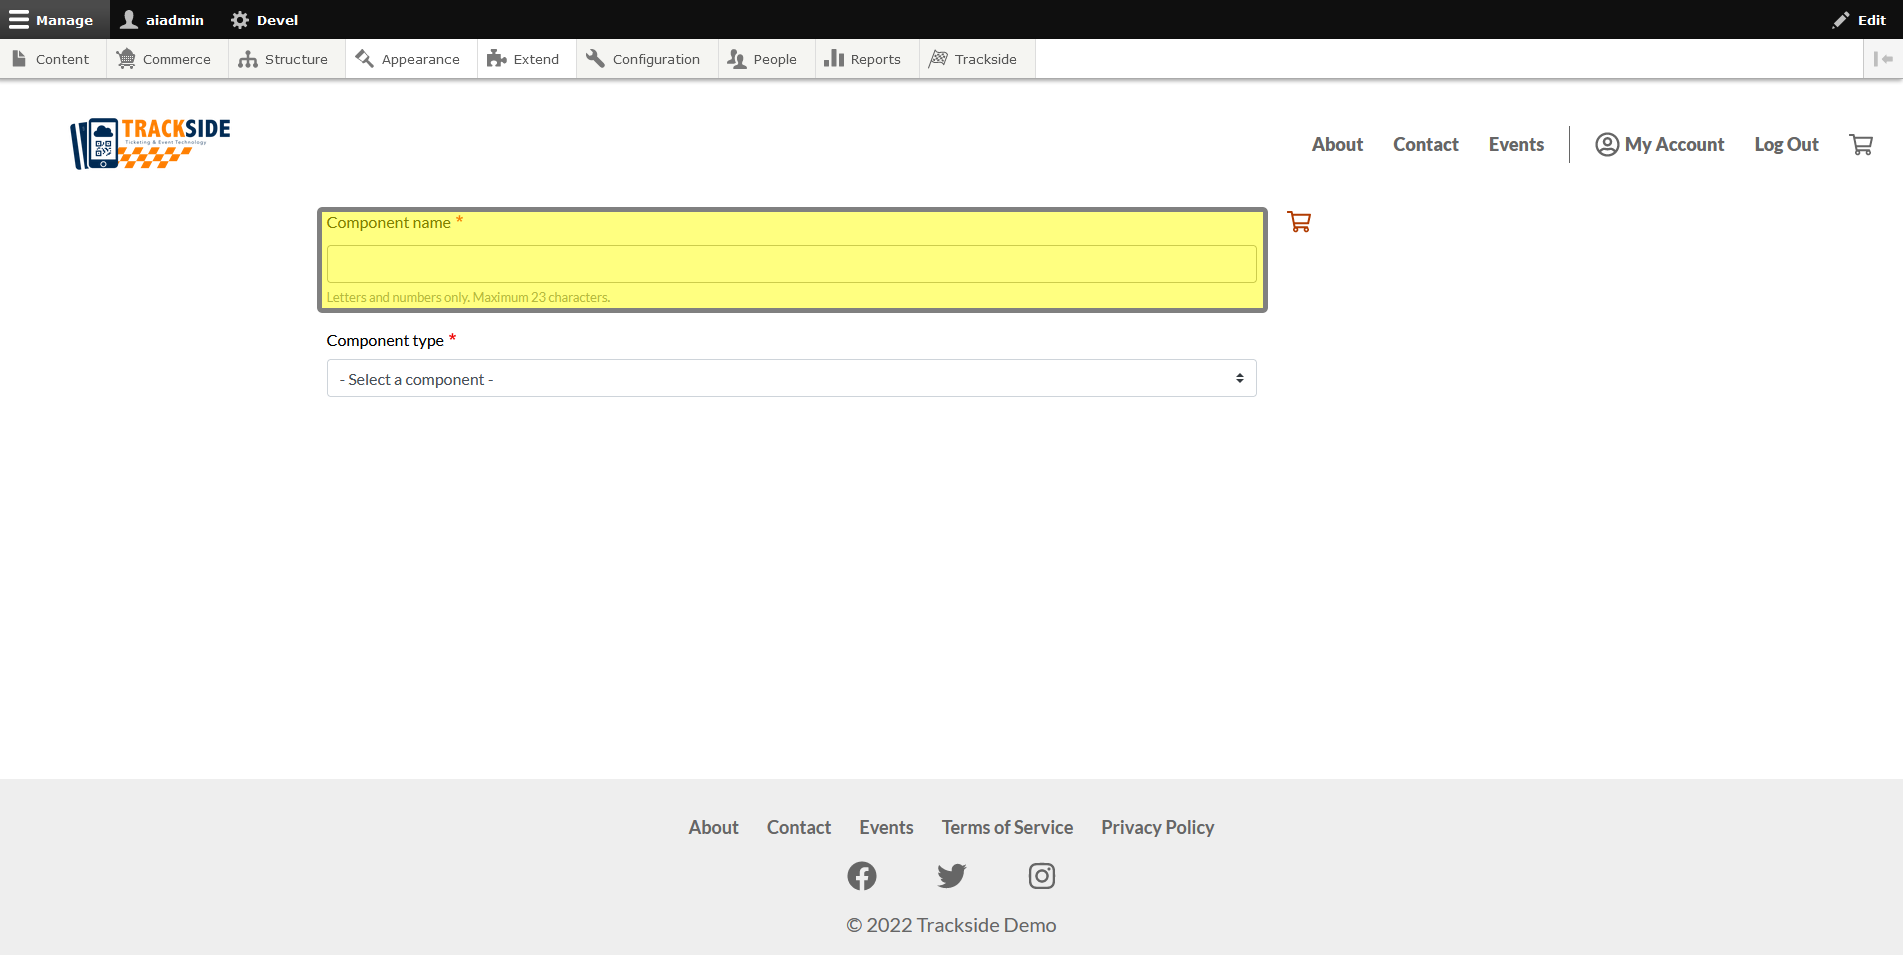
Select the Component Type from the drop down list. You will have several options for how the Participant will add data for this Component.
We suggest using ONLY these types:
- List of Numbers - you will define the set of numbers that can be selected. This should be used to standardize data that may be common between different users. For example, vehicle year would be a component which would use a "List of Numbers". You then define all possible numbers for users to choose from.
- List of Words - you will define the set of words that can be selected. This should be used to standardize data that may be common between different users. For example, vehicle make would be a component which would use a "List of Words". You then define all possible makes for users to choose from.
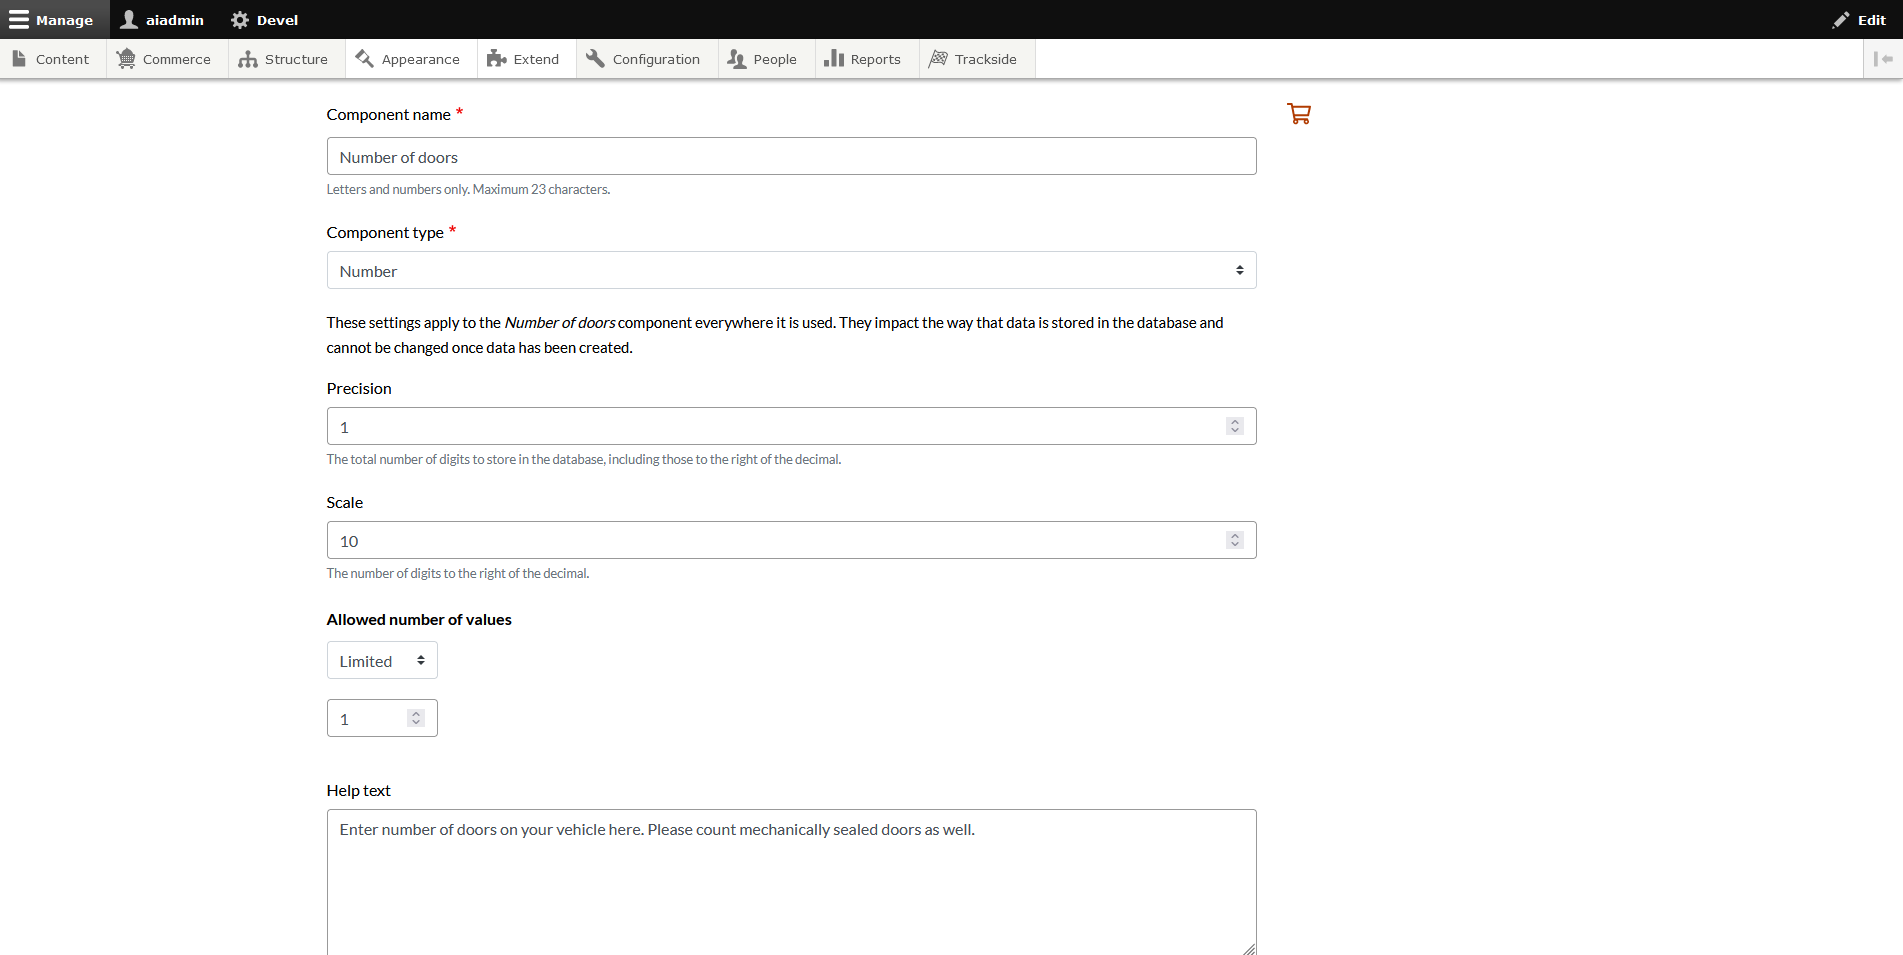
- Number - this allows users to simply enter a number from the keyboard. Numbers should only be used when users will be entering very unique data, such as a member ID number, license plate or VIN. It should NOT be used for data that you would want to be standardized. For example, if you used Number for "Vehicle Year", some people may enter 1990 whereas others may enter 90 or '90. This is not good practice for data standardization.
- Text - this allows users to simply enter text into this box. Text should only be used when users will be entering very unique data, such as sponsors or modifications. It should NOT be used for data that you would want to be standardized. For example, if you used Text for "Vehicle Make", some people may enter Chevrolet whereas others may enter Chevy or misspelling of Chevrole or Chevvy. This is not good practice for data standardization.
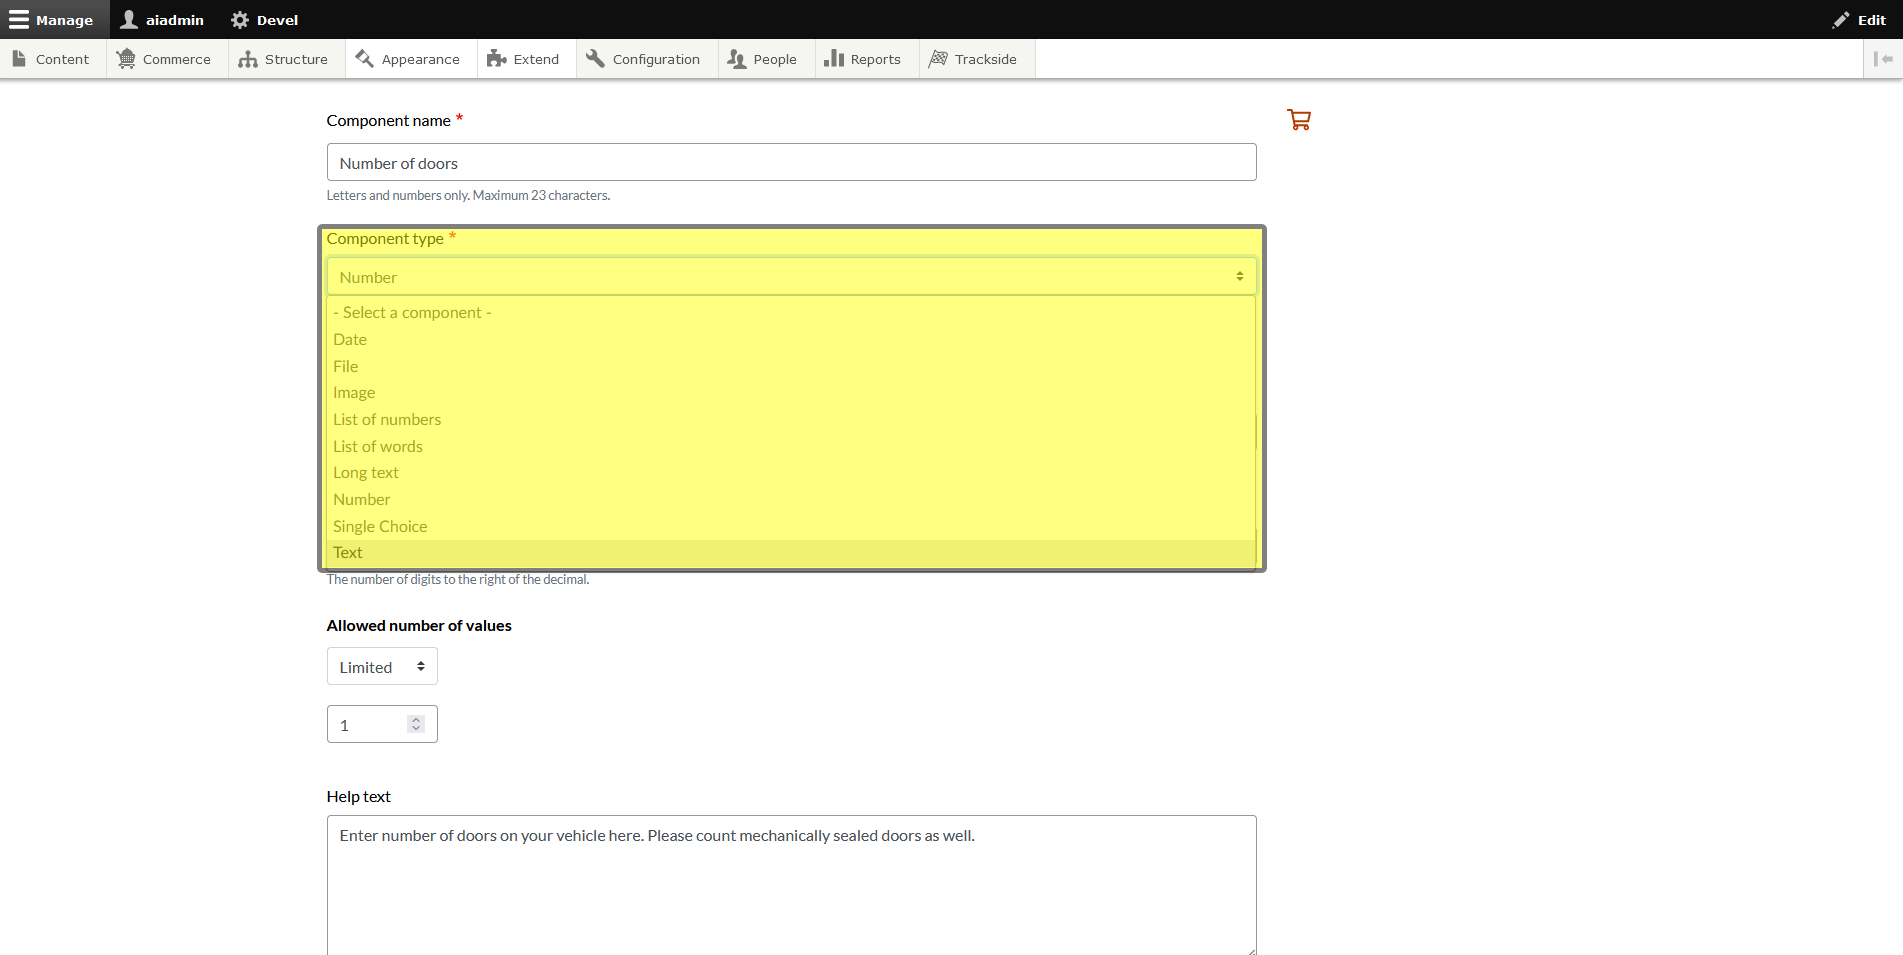
Once you select your Component Type, this will add the appropriate fields to the form for you to fill out. Different types will generate different fields. There's a couple ways we could accomplish adding a number of doors to the Garage. We could have the customer enter it as text:
But they're going to be entering a number for this particular component, so we'll add it as a Number.
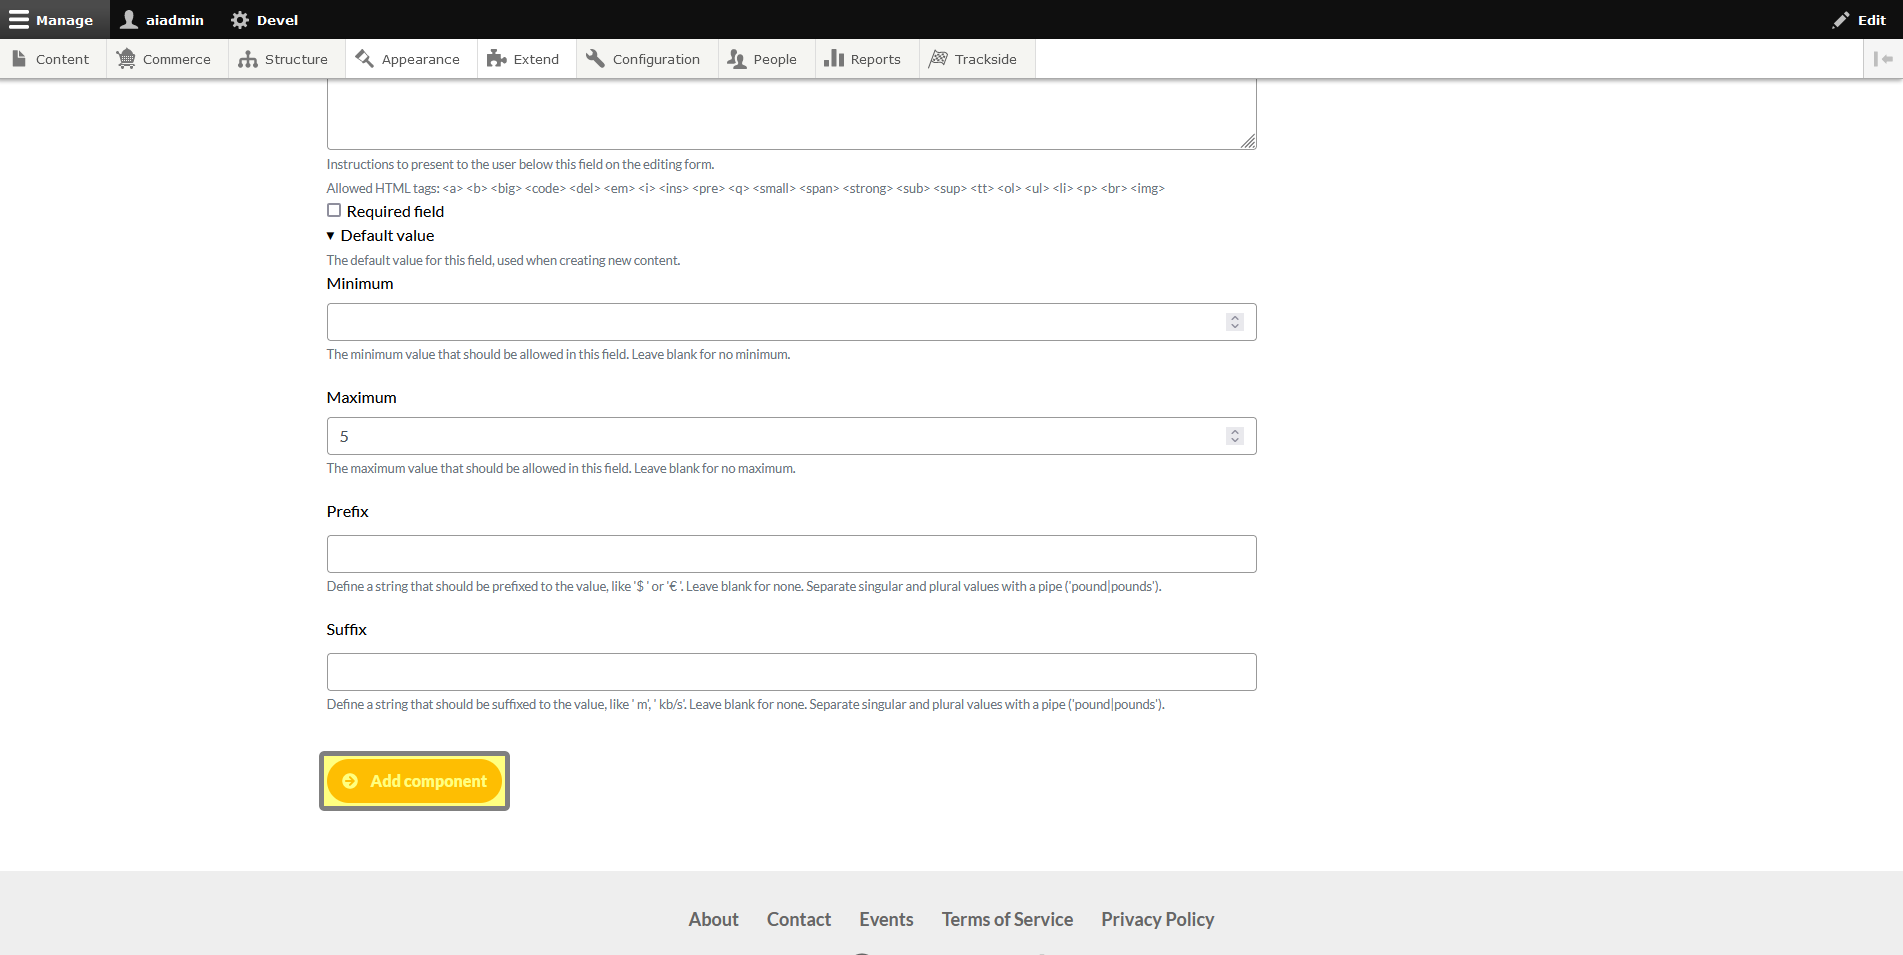
With either of these options, it's important to note that the allowed number of values is how many answers the Participant will be able to give for this Component. If you allow 2 in this situation, the Participant could answer that they own Schrodinger's car and it's simultaneously both a 2 door and 3 door, so for this example, we want to leave it set to 1 value. Also note the Required Field checkbox. When checked, this will require the Participant to fill the answer out to be able to save the Vehicle.
Specific to the Number Type, you will want to leave Precision set to 1, as it has a minimum value requirement for that box.
Help Text will be displayed to the user and provides a little extra clarification for the Component as the Participant is adding their Vehicle. This is a good place to add any details that may be applicable.
Once the form is filled out, click the Add component button to establish your new component.
Step 3 - Verify your Components & Save Changes
This will display a confirmation for you and you will see your new component listed.
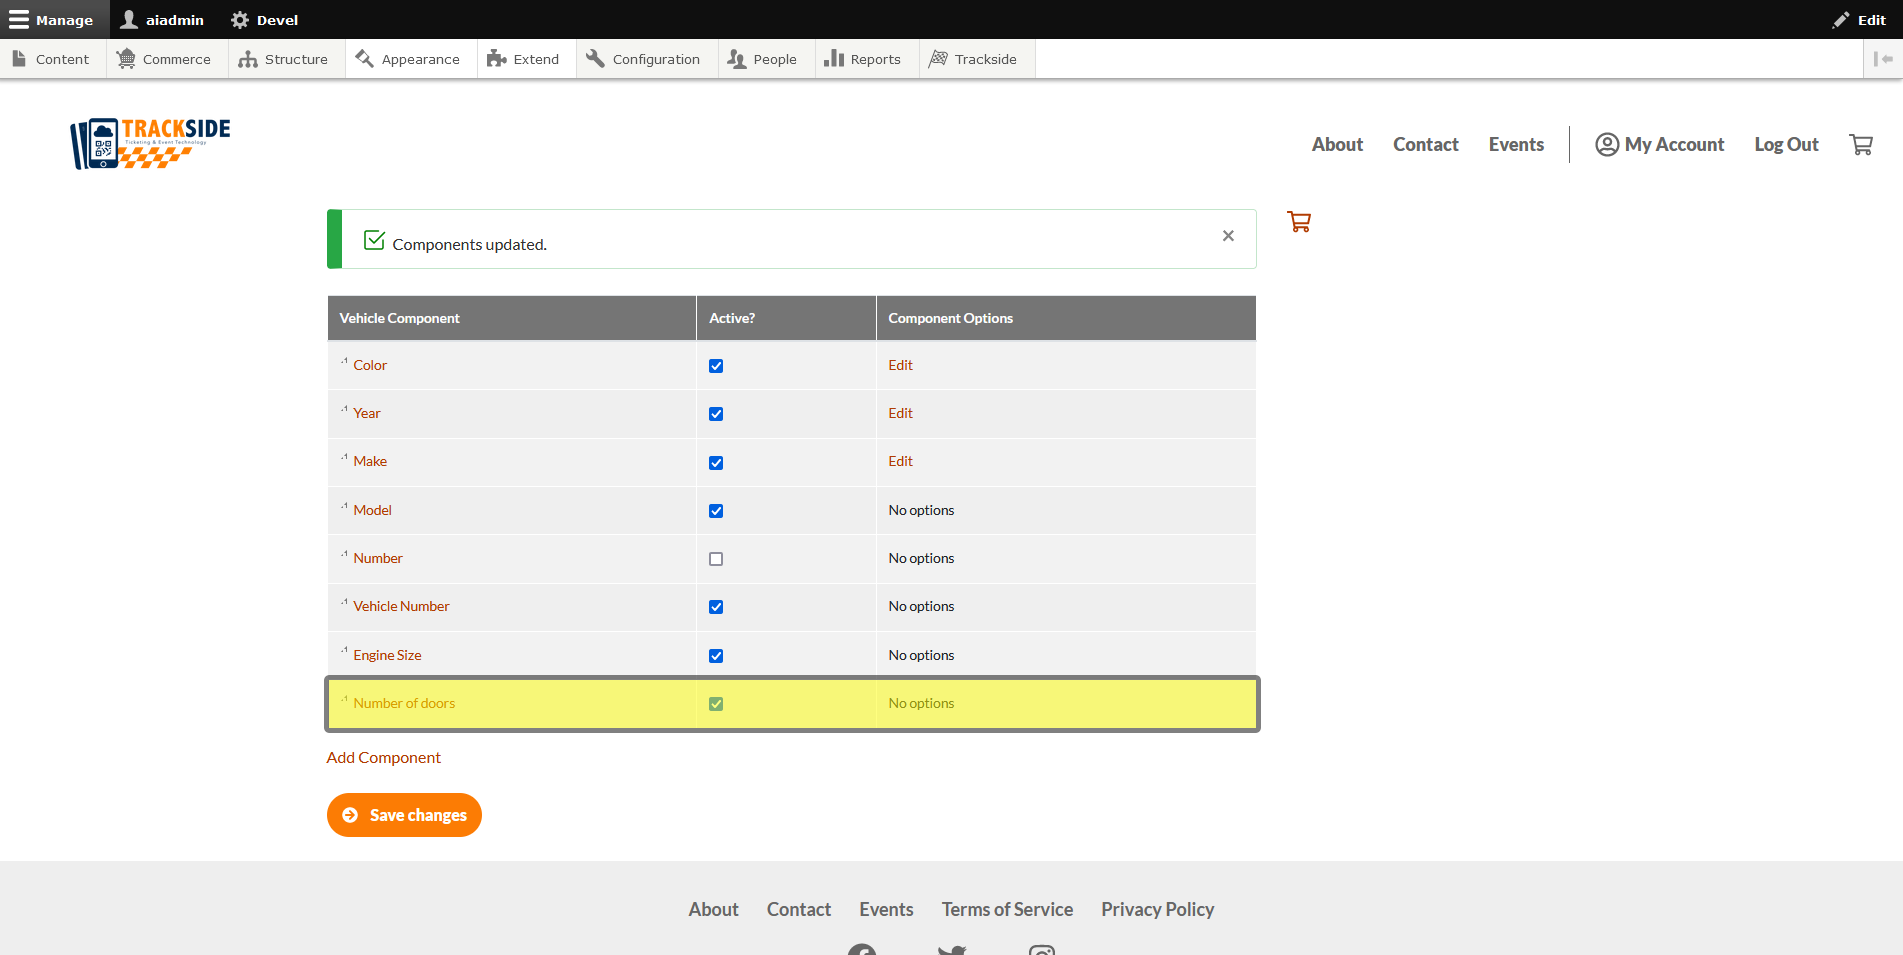
Click Save Changes to complete adding the Component.
Add Component Options (for pre-defined options)
Step 4 - Add Option
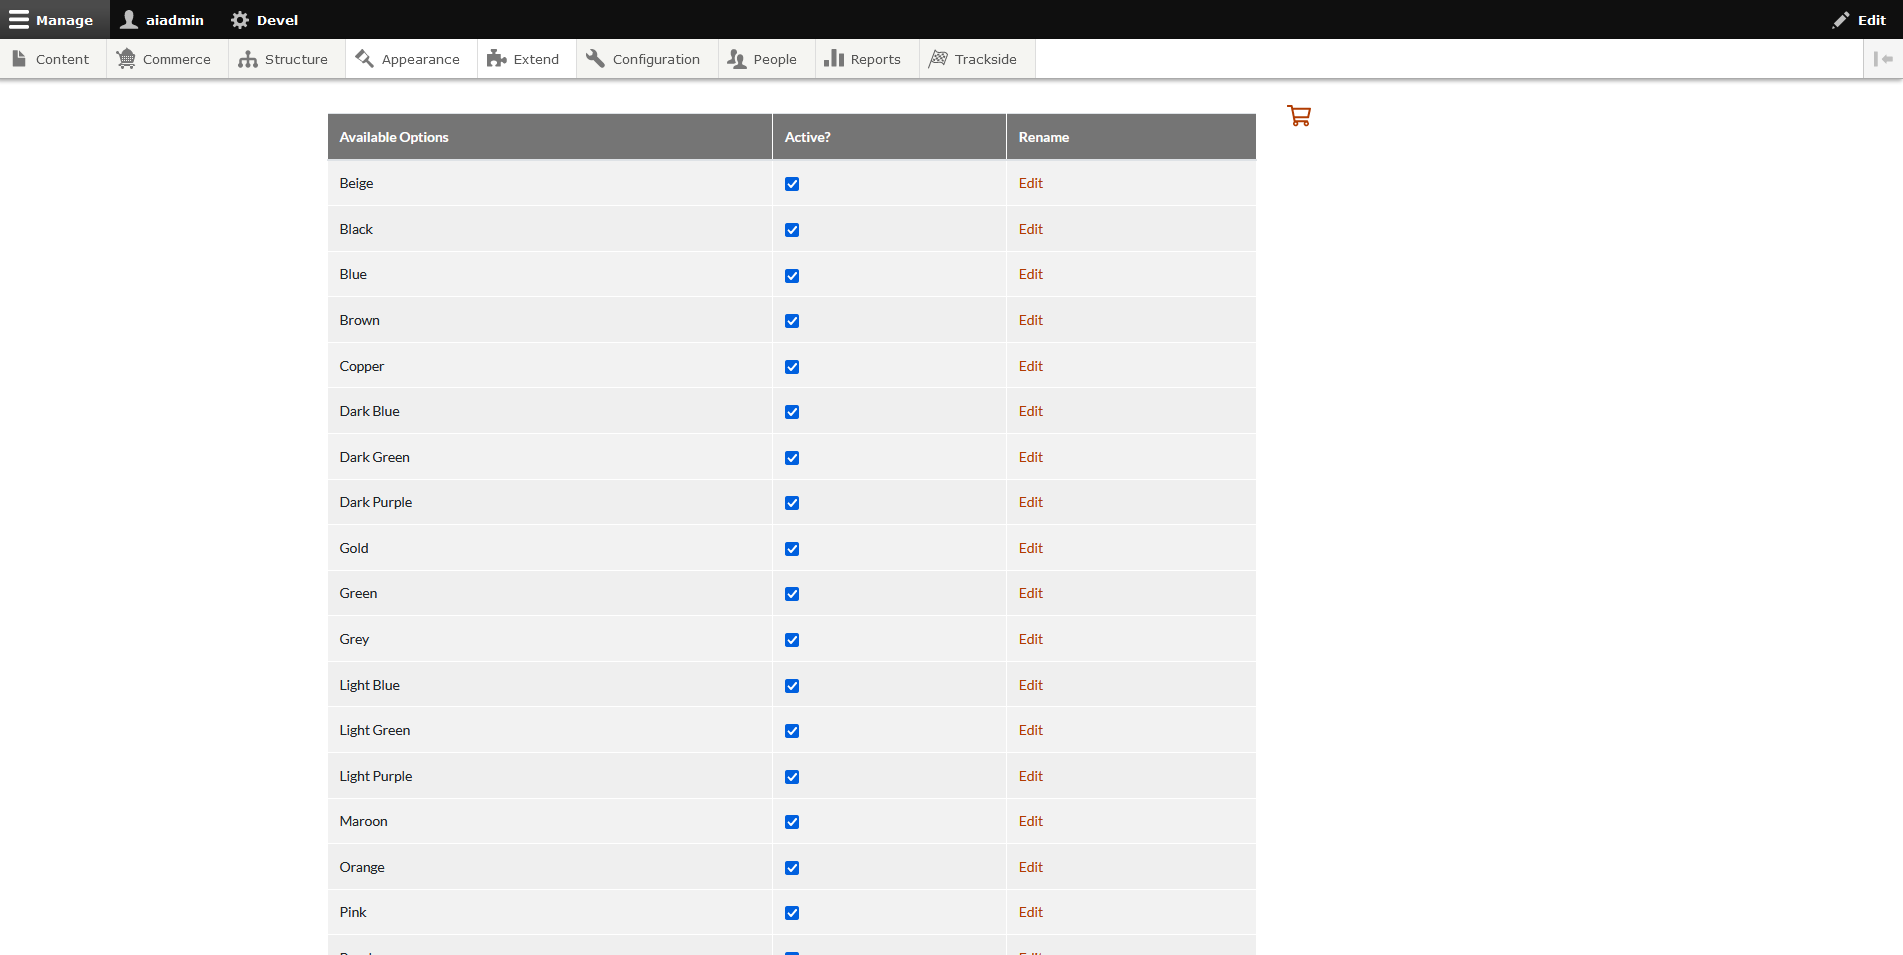
As was eluded to in Step 4, If you need to edit the Options available for a component with a set list of Options, you will click Edit under Component Options to edit the list.
For this scenario, we're going to imagine that we have a troublesome driver that has a car that's about half one color, and half another color, but maybe they're a good customer and we're going to add an option to fit their needs. We'll click edit next to color, and we'll have the current list of colors available in front of us.
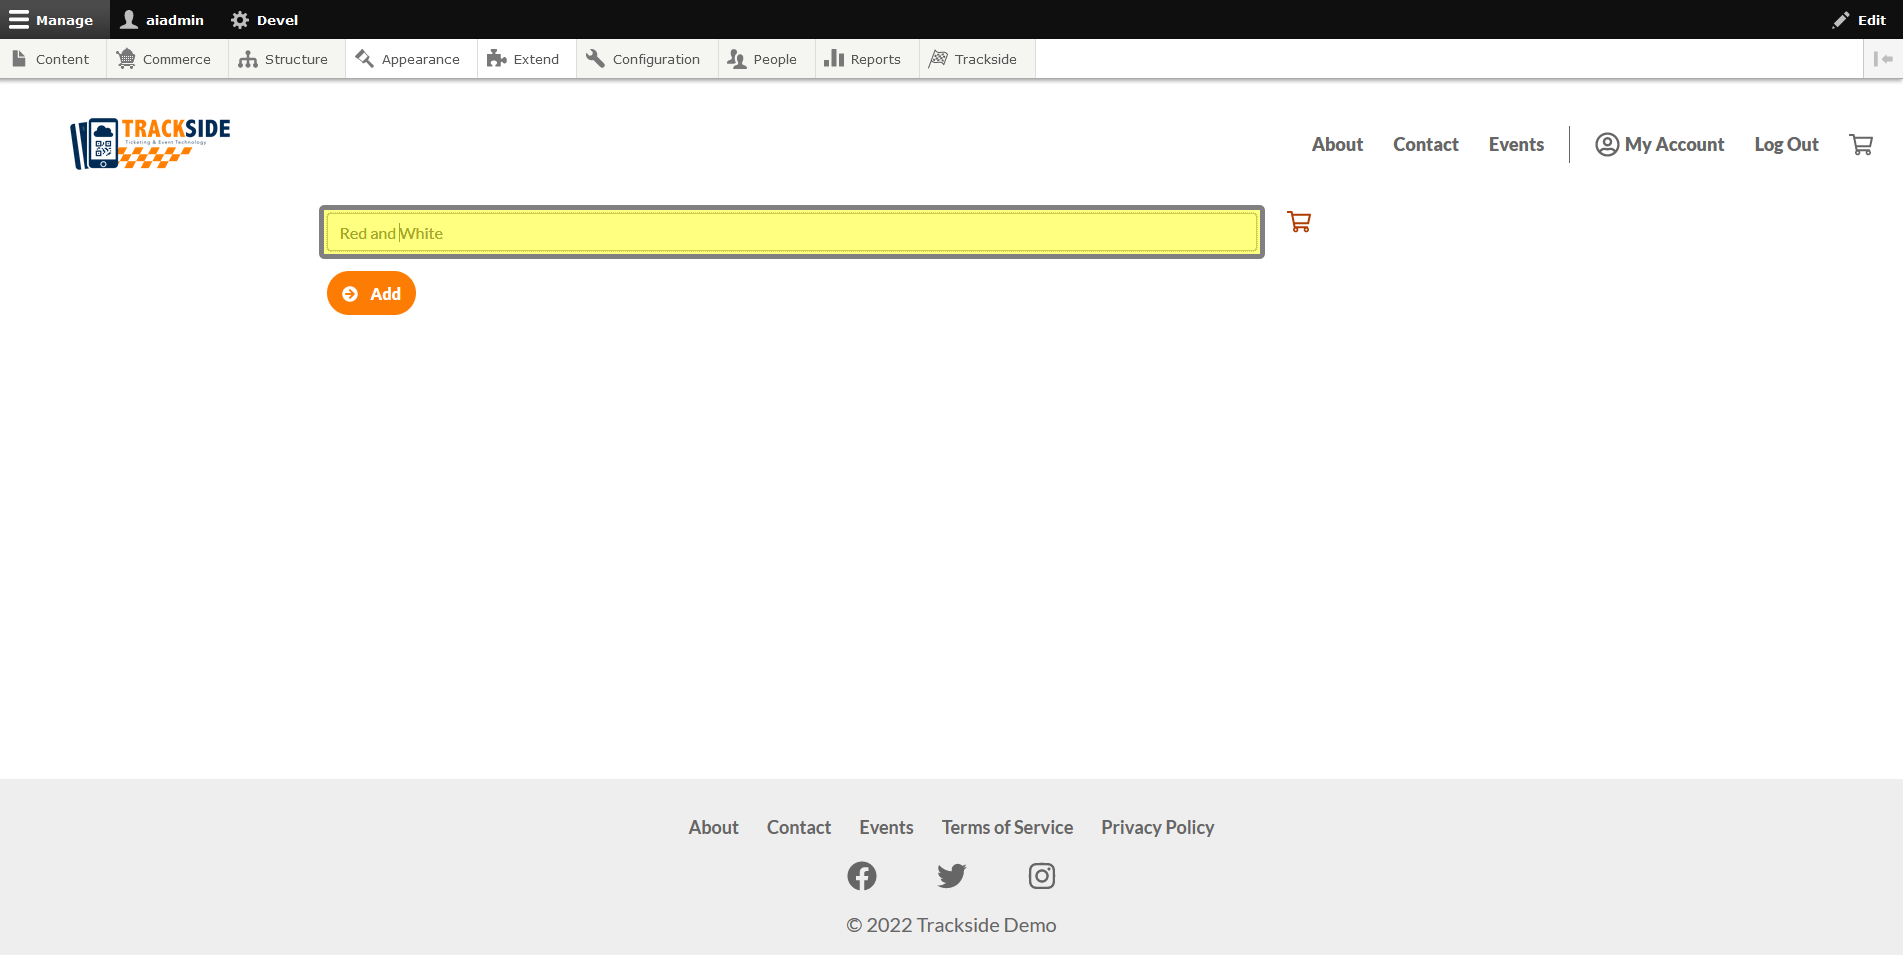
At the bottom of this list, click on Add Option.
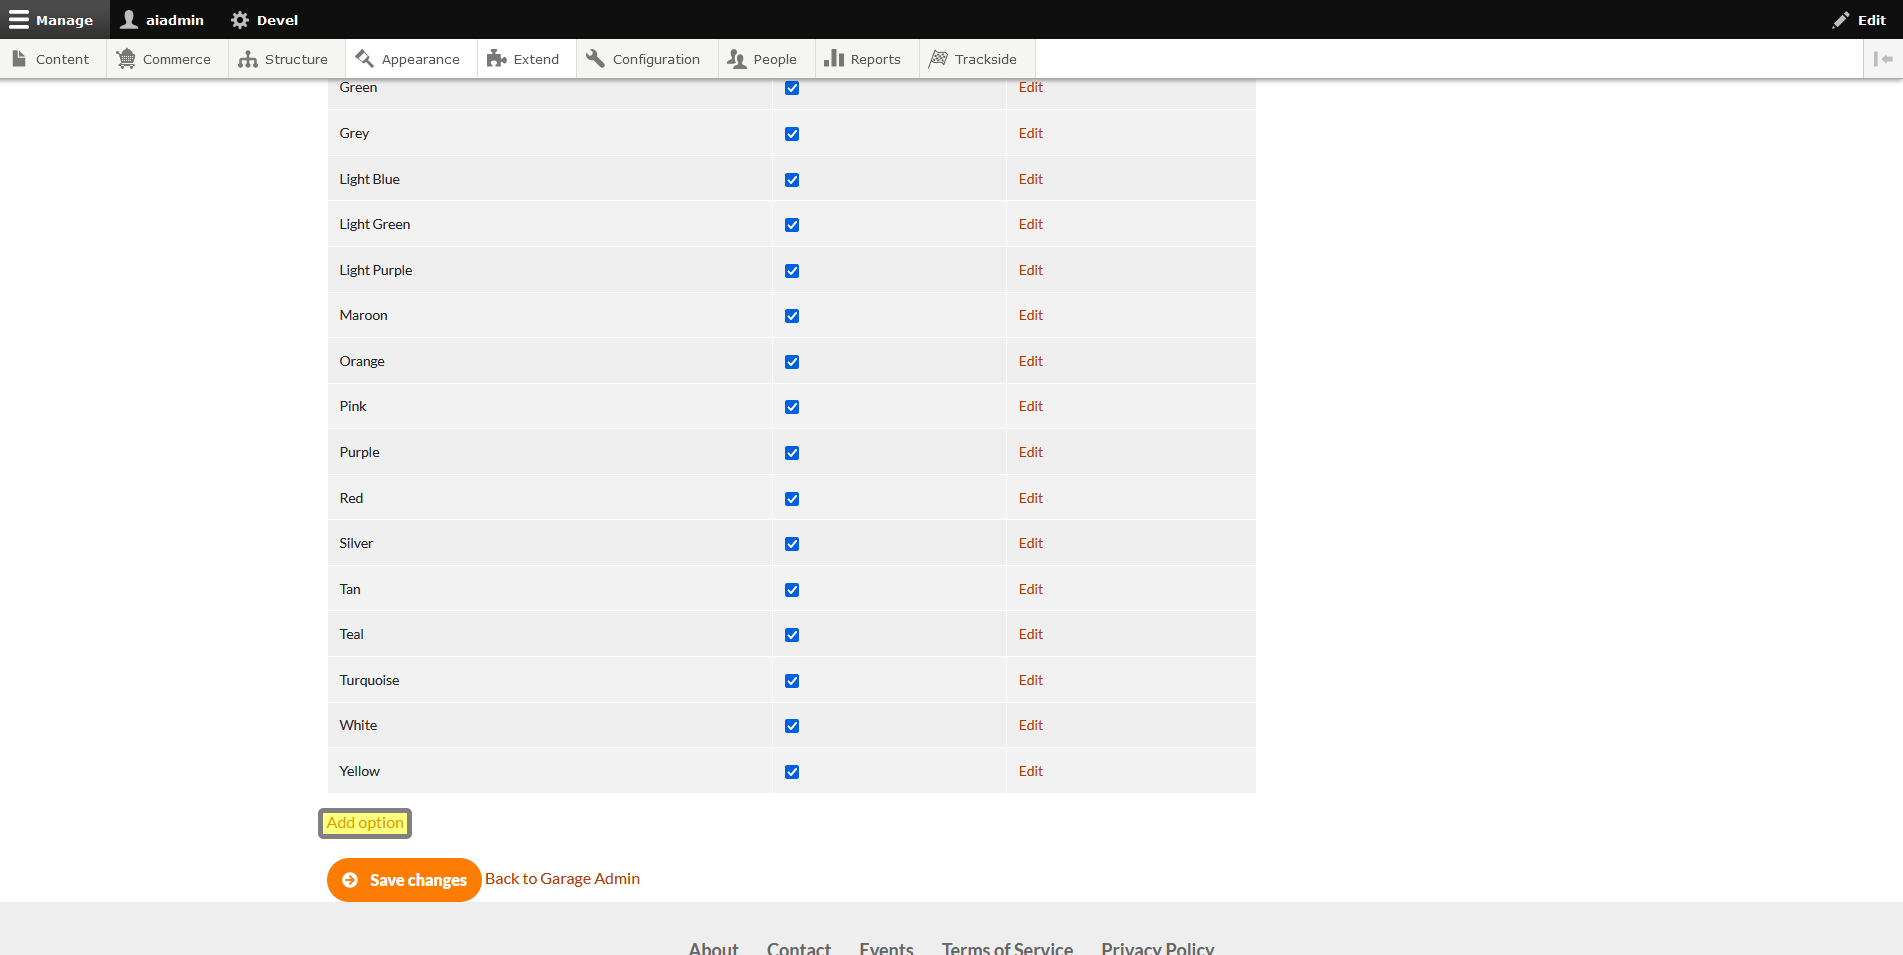
On the next screen, we will enter our new option in the text box. This can only be alphanumeric characters. No symbols in this field.
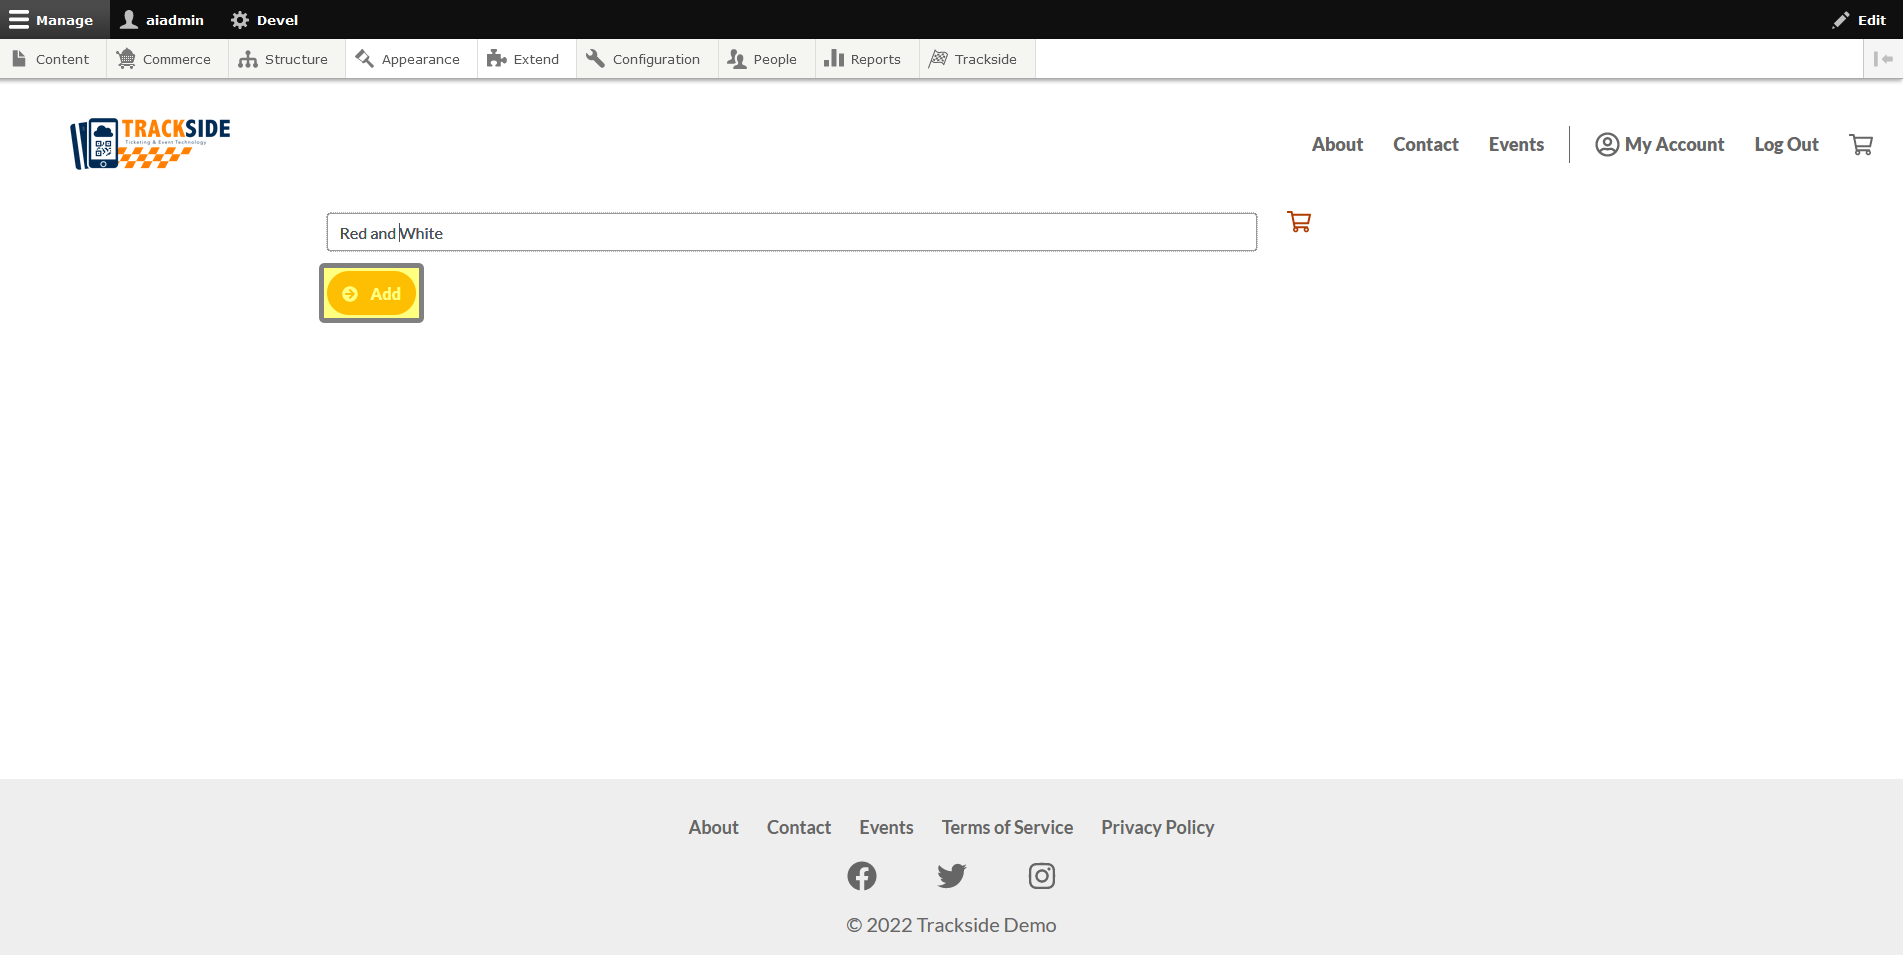
Clicking the Add button below will add our Option to the Component.
You will see the new option available in the list.
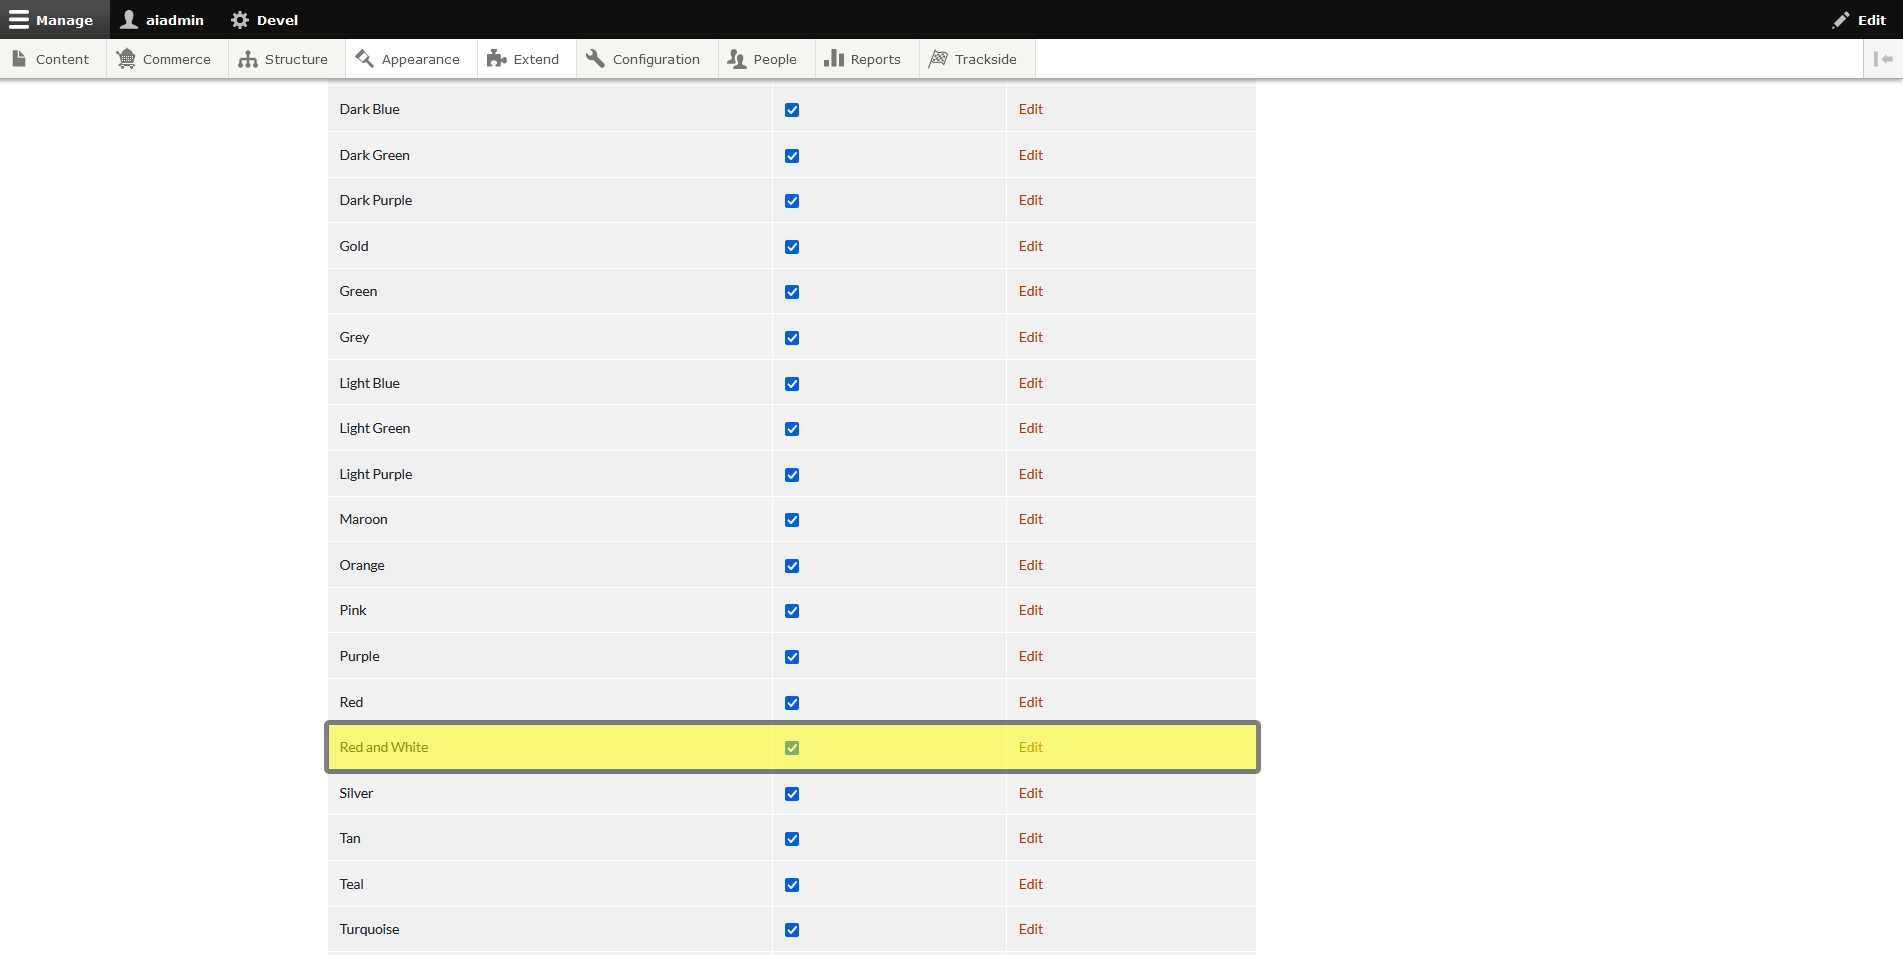
Our customer can now apply the option to the vehicle in their Garage, and they're probably feeling pretty special! You can also change options for them if needed. We'll cover that in My Garage.