Product Stock & Barcodes
Continuing from Product Options, this article focuses on continuing to use the Product Setup Assistant to generate a Product to sell. It will focus on finalizing our Product by adding stock and a barcode if applicable.
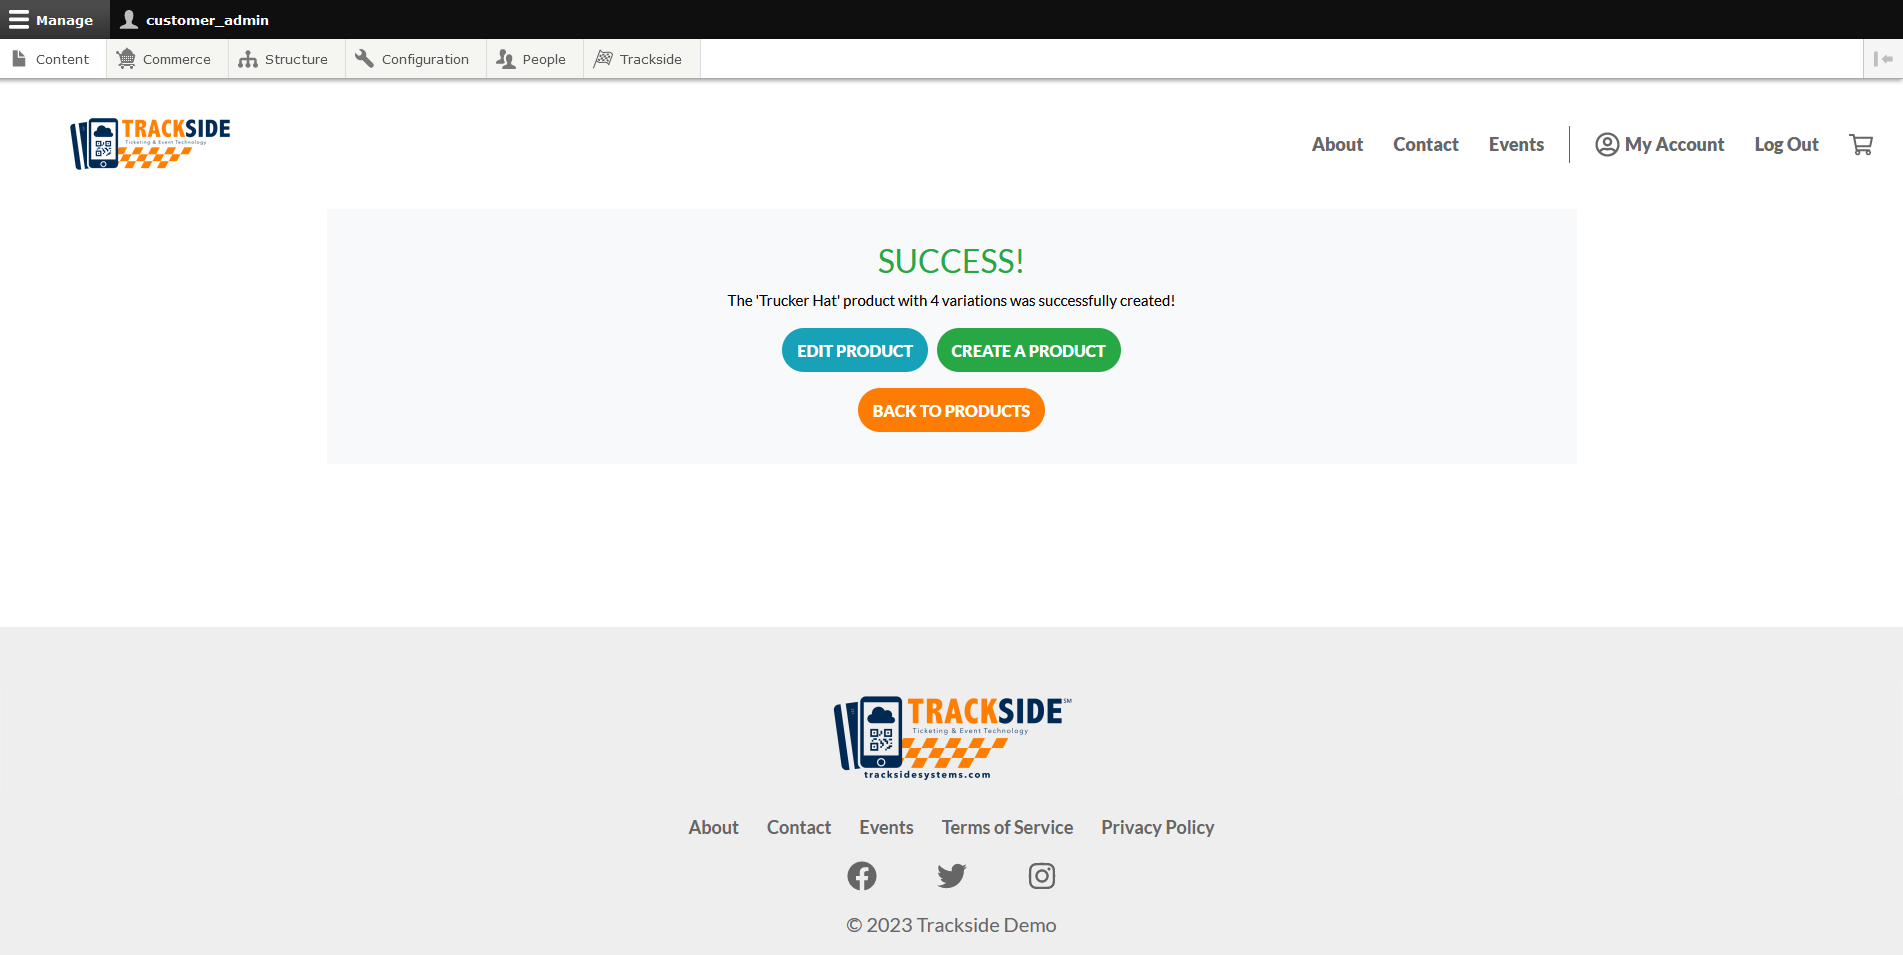
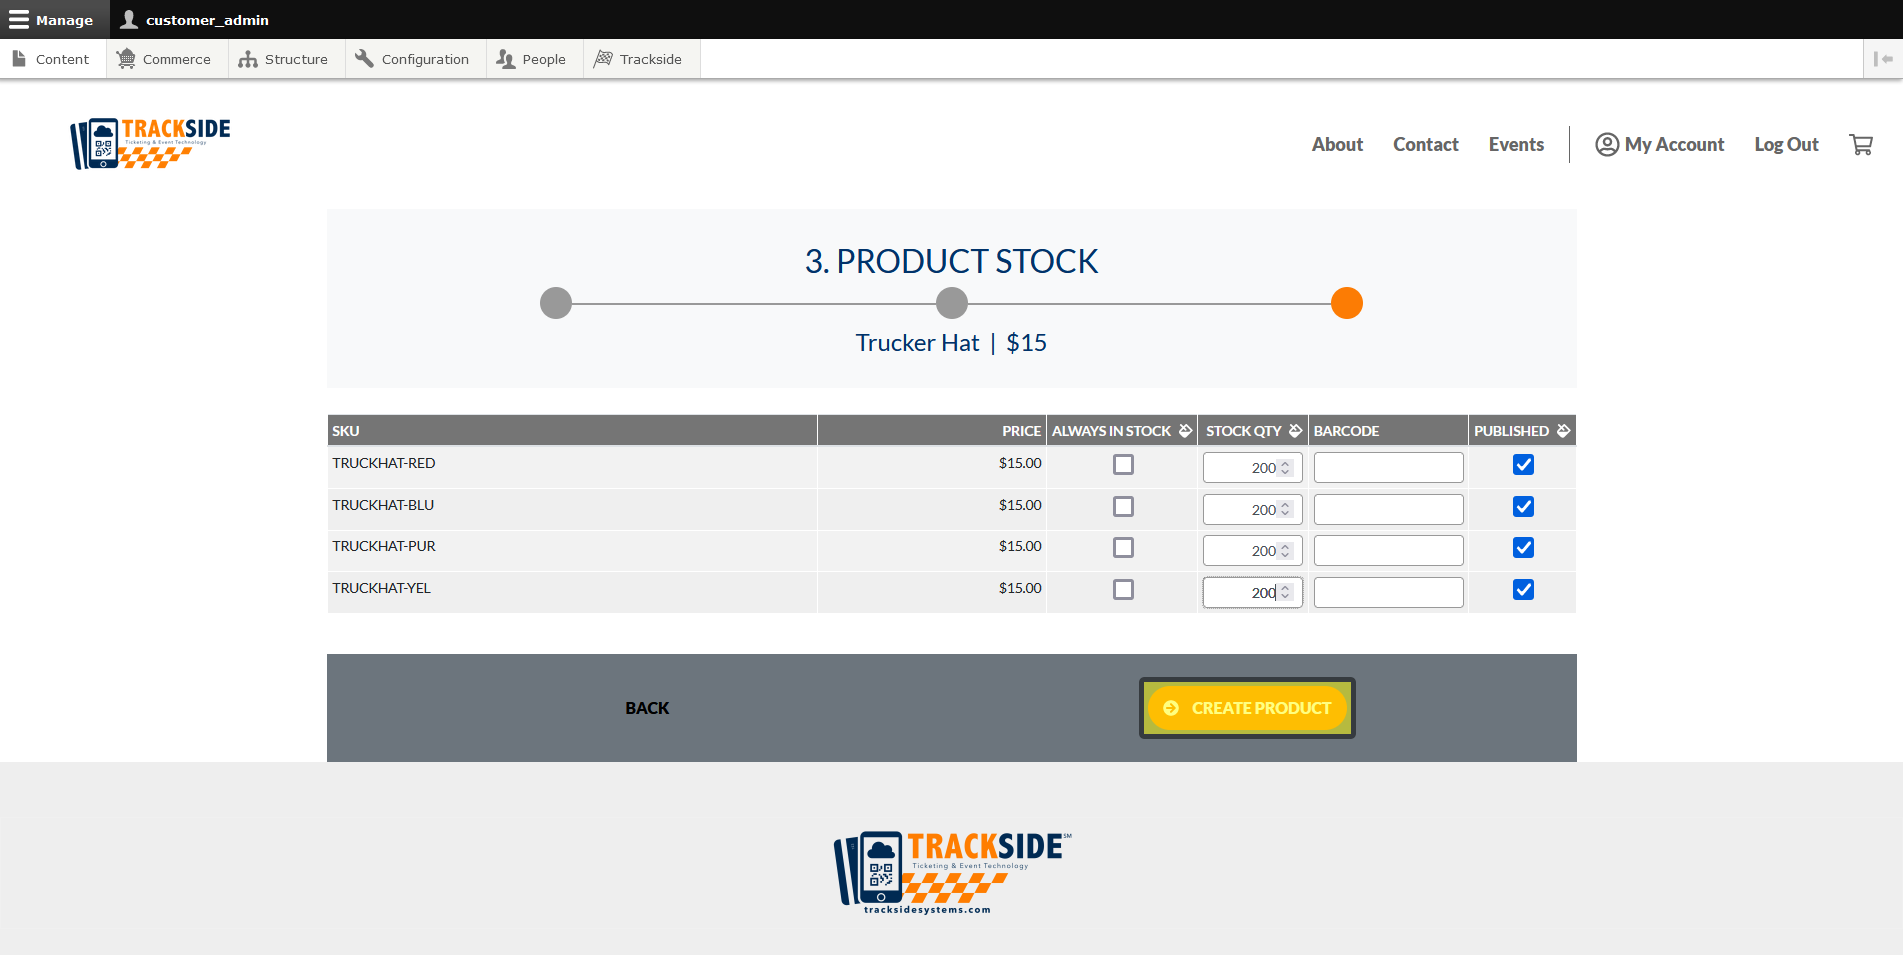
Step 1 - Enter Stock
The next step in creating our Product is to add stock to it. Each Variation will be listed separately here. If you'd like to sell without inventory tracking, click the box under Always in Stock. Otherwise, enter your stock under Stock Qty, and Trackside will stop allowing sales of the Product once stock is depleted.
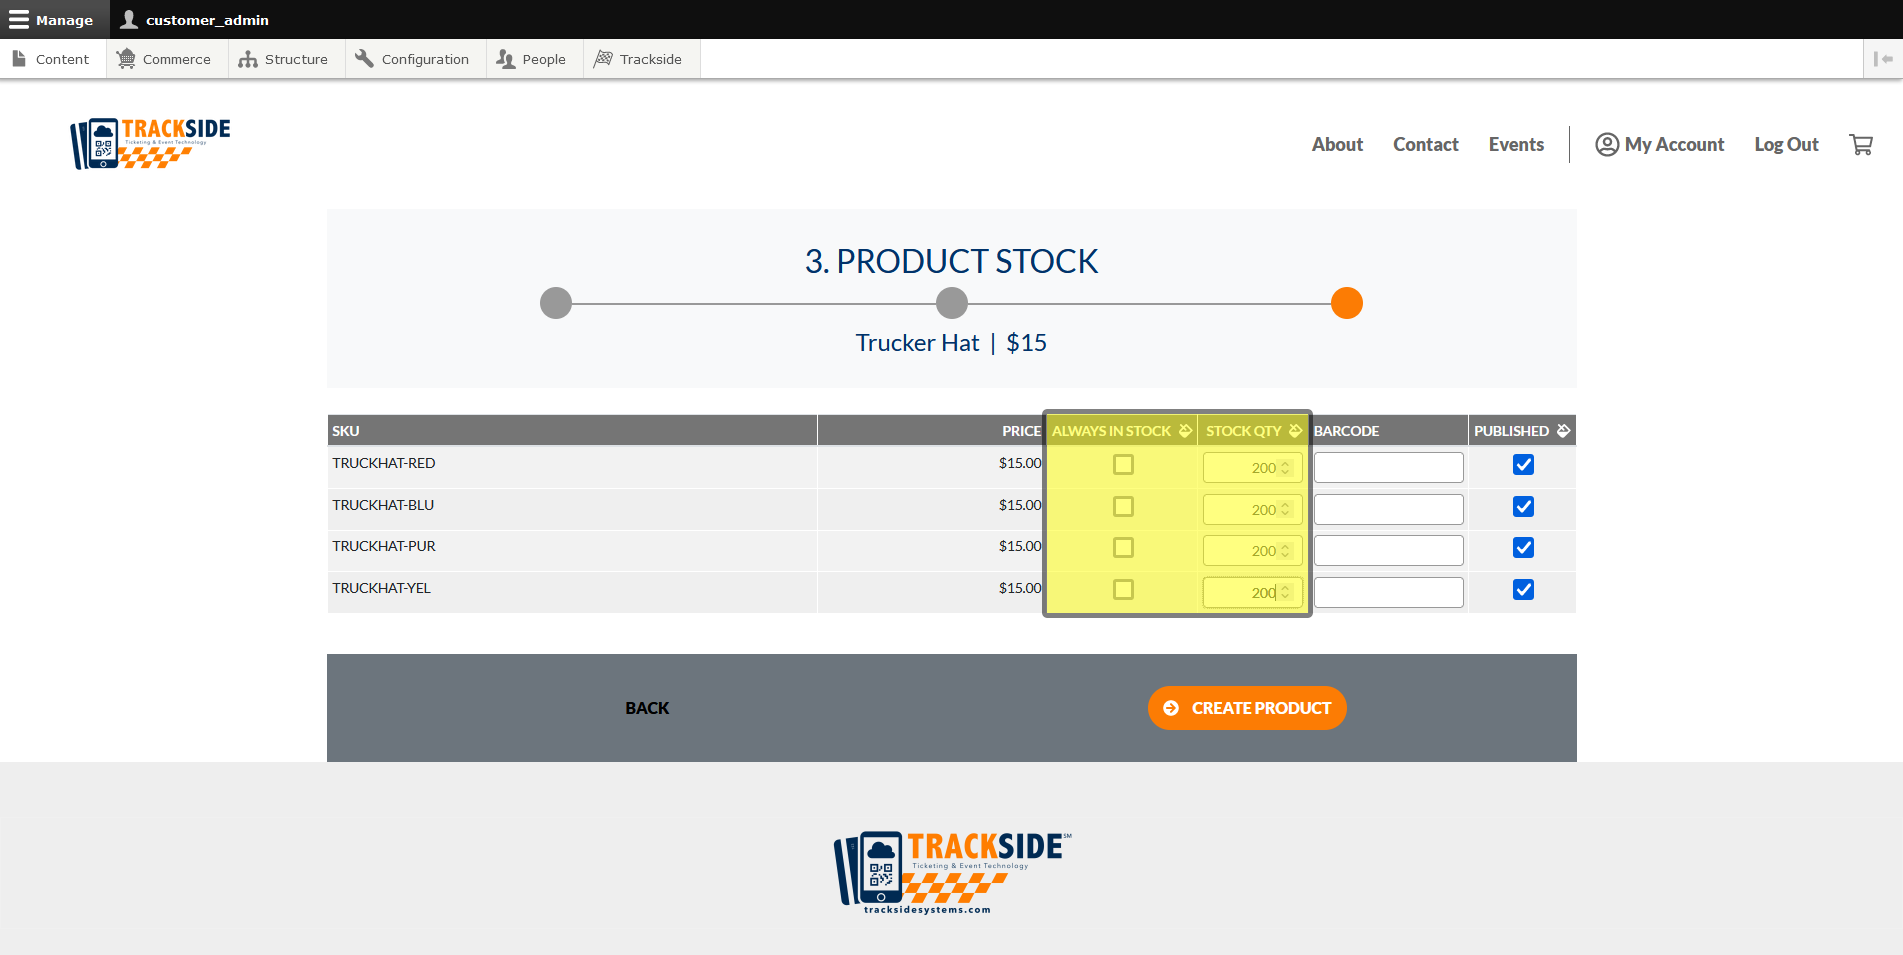
Step 2 - Enter Barcode if Applicable
If your Product has one and you would like to be able to scan barcodes in the Point-Of-Sale, you will enter your barcode here. If you have your Trackside Bluetooth QR Scanner connected to the device you're creating your Products on, you can just scan the code to enter it in these blanks.
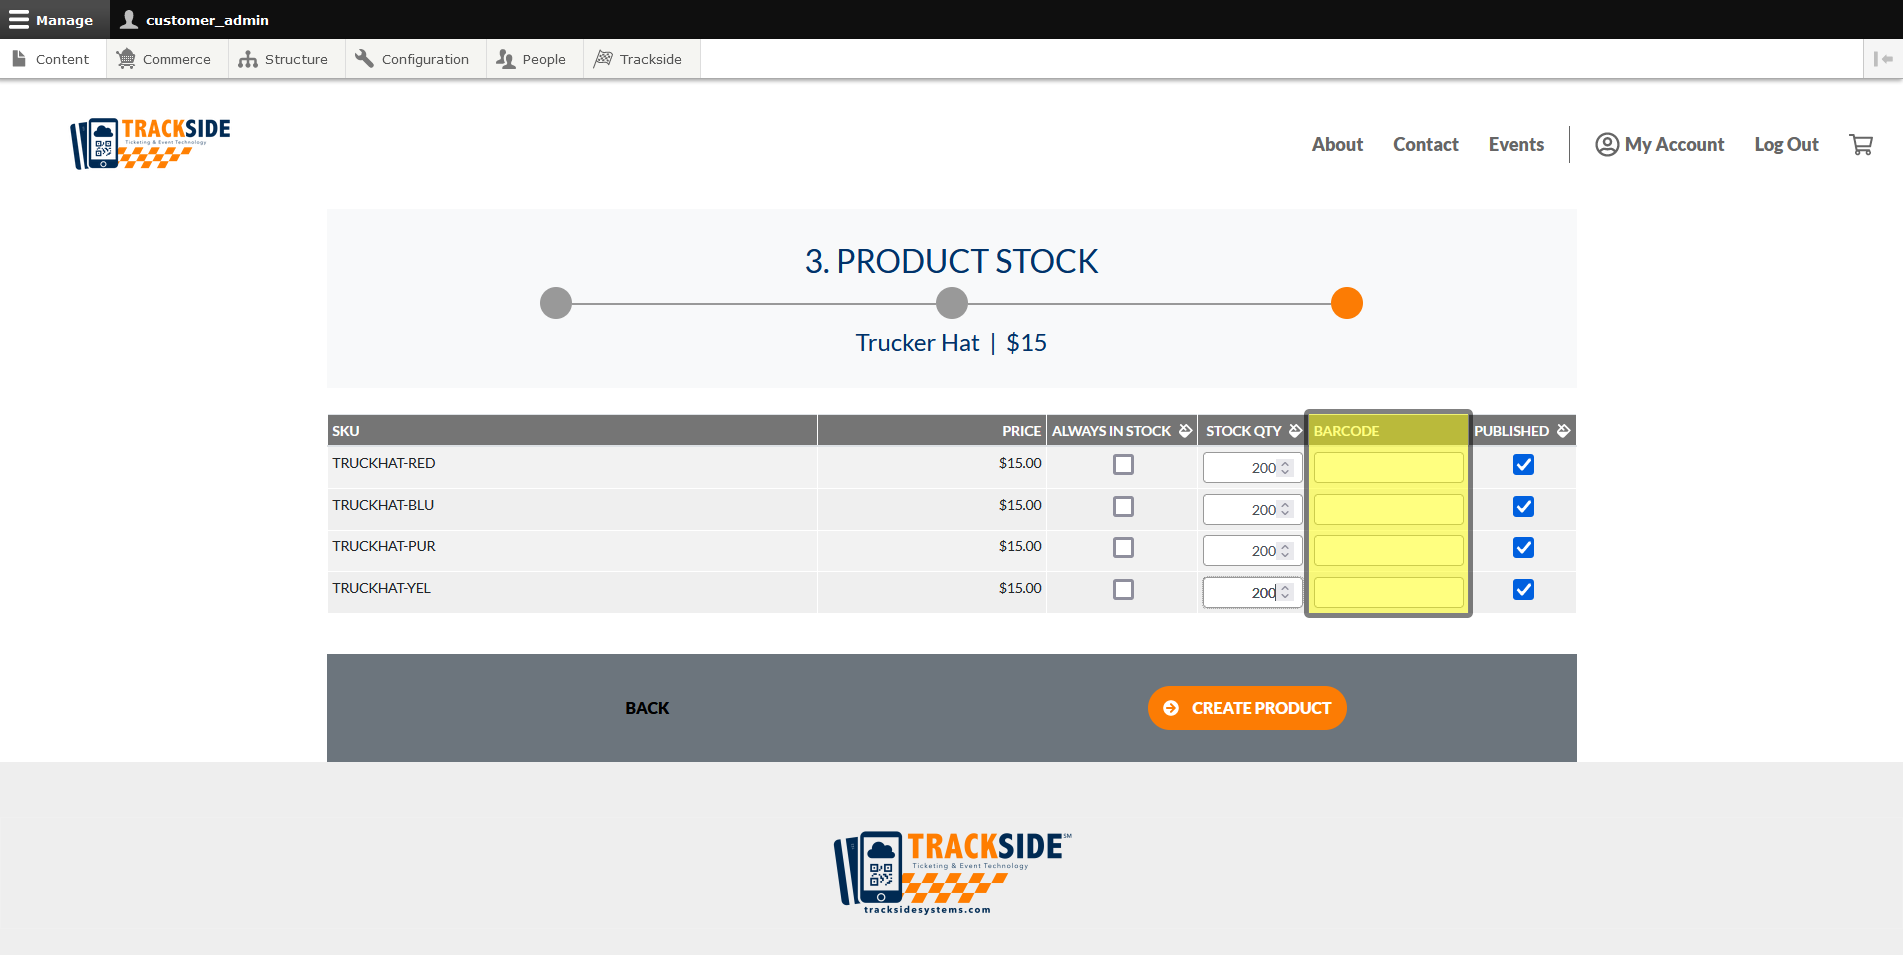
Step 3 - Publish & Create Product
At the end of the list, there's an option to publish/unpublish specific Variations if you need. If these are unchecked, they will not be available to sell and only accessible from the Product Page.
Once you have the stock and barcodes entered that you want in place, click Create Product at the bottom to finish the Product Setup Assistant.
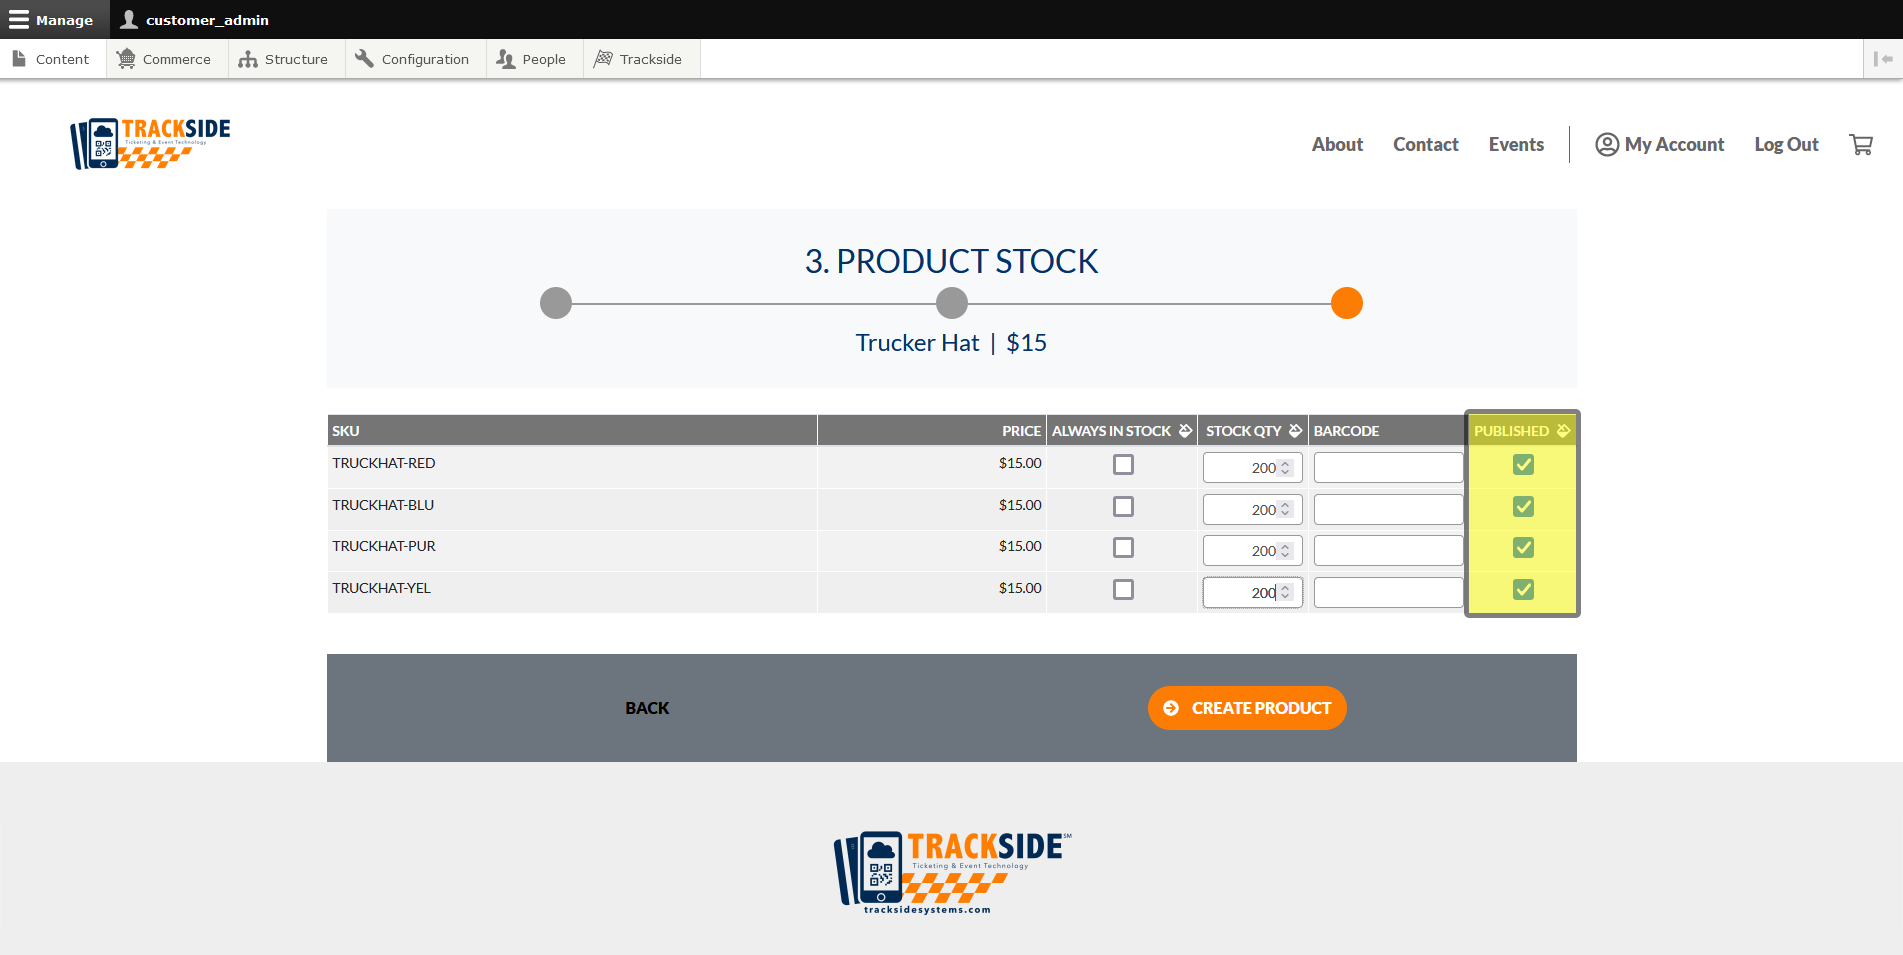
When the Product is created, you should be met with a success message, along with options of where you'd like to go next!