Payment on the Trackside Handheld
This article will go over accepting payment after an order has been created on the Trackside Handheld.
Step 1 - Apply Credits (Coupons, Gift Cards, Cancellation Codes) if Applicable
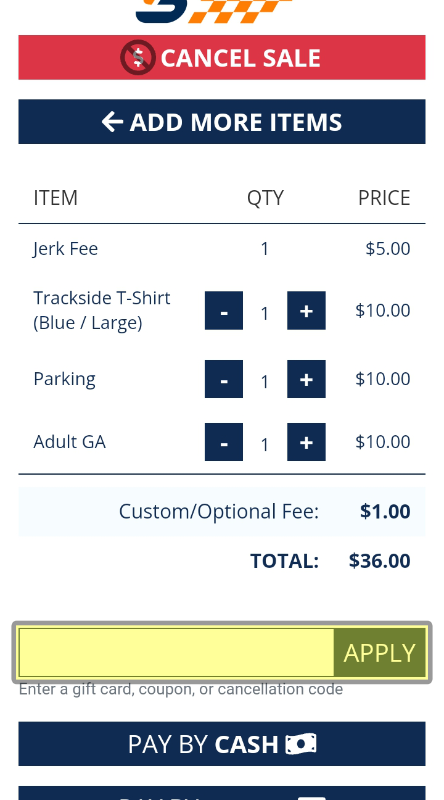
Continuing from the last article, at this point, you should already be looking at the Checkout screen. If that's not what you're seeing, press Checkout. You will see the buttons for cancelling the sale and a back button to add more items. If you need a further description of either of these, see Building an Order on the Trackside Handheld. Also take note of the Auto-scan warning at the top of the page if present. If you need more information on Auto-scan and how it functions, see Important Note Regarding Auto Scan.
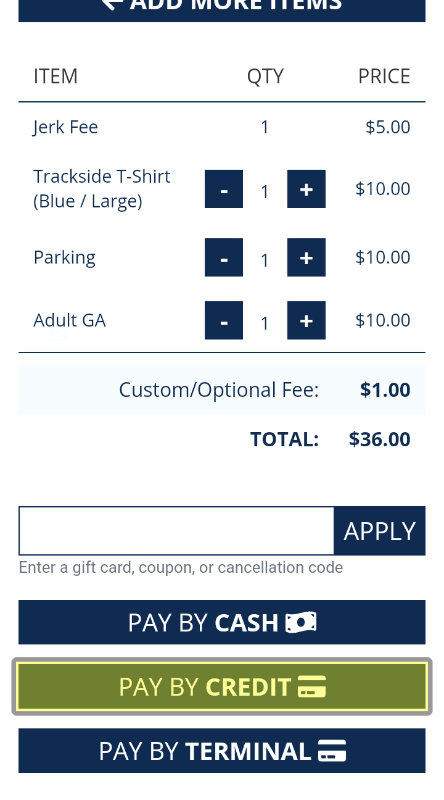
Below that is a summary of the items on the order where you'll be able to quickly adjust quantities as needed.
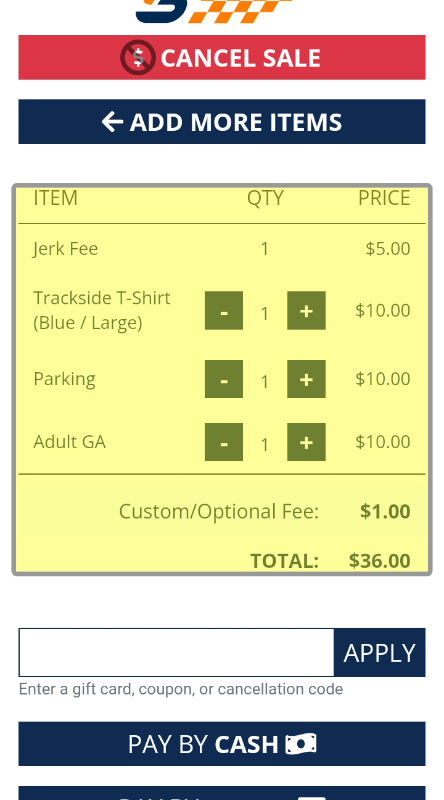
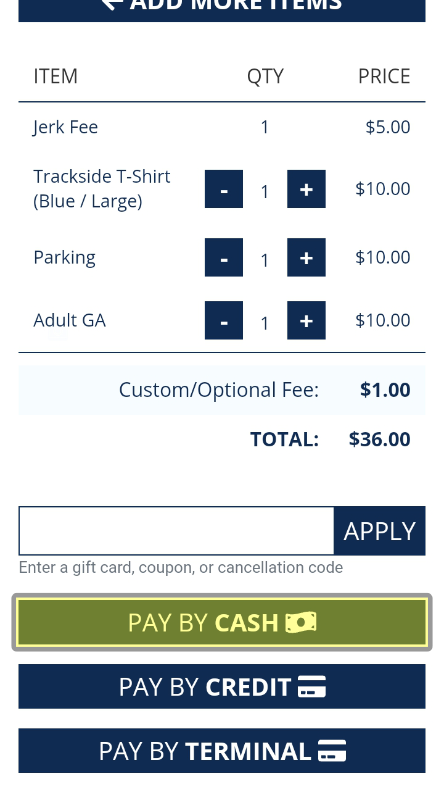
The next text box below that is where you'll input codes for any coupons and then gift cards or cancellation codes.
Step 2a - Accept Cash Payment
This is going to run very similar to how it's handled on the hardware Point-of-Sale. Tap Pay by Cash.
Once you're on the following screen, input the amount tendered, and then Submit.
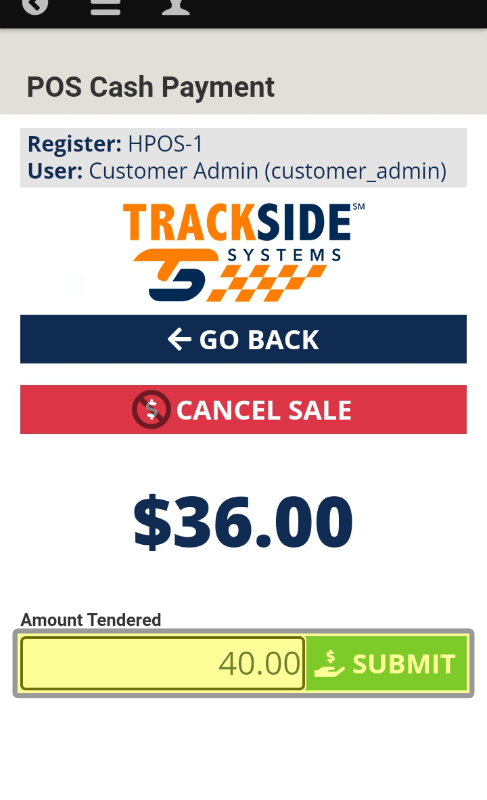
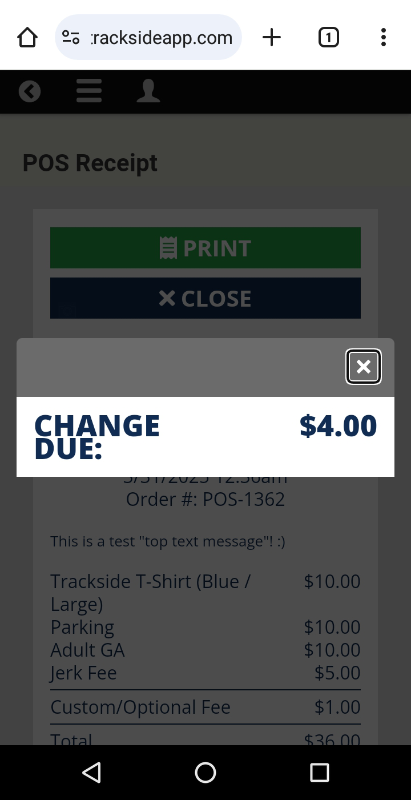
You'll just have to retrieve change from a fanny pack or however you have it on you since there's no cash drawer to pop. At this point you can skip forward to Step 3.
Step 2b - Accept Credit Card Payment
From the Checkout screen, tap on Pay by Credit
This next portion is going to make a lot more sense if you think of the mag stripe reader as what actually boils down to being. It's a keyboard. An input device for you. The only difference is you're not pressing keys. You're telling it what to write with a magnetic strip on the card. The reader reads that magnetic input and outputs numbers onto your Handheld's text boxes.
If you're swiping the card and you can't figure out why it's not inputting any of the data into the text boxes, tap on the box for the credit card number so your cursor is in it and the reader has somewhere to type to. The On-screen keyboard may also need to be visible in order for the magstripe to do it's job. Just tap in the text box to bring it up.
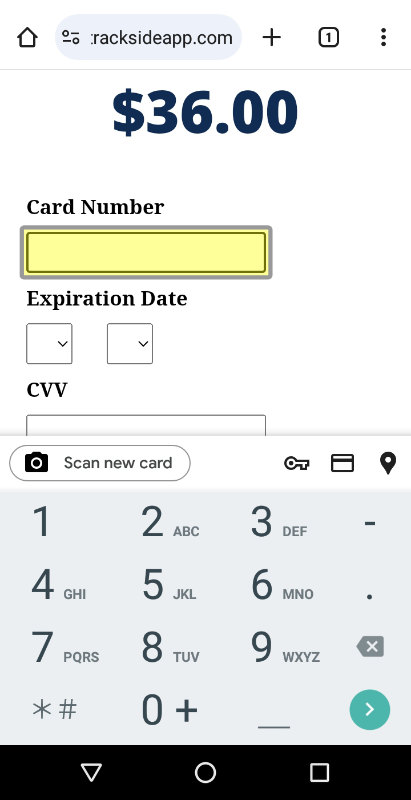
The reader is on the end of the Handheld closest to you.
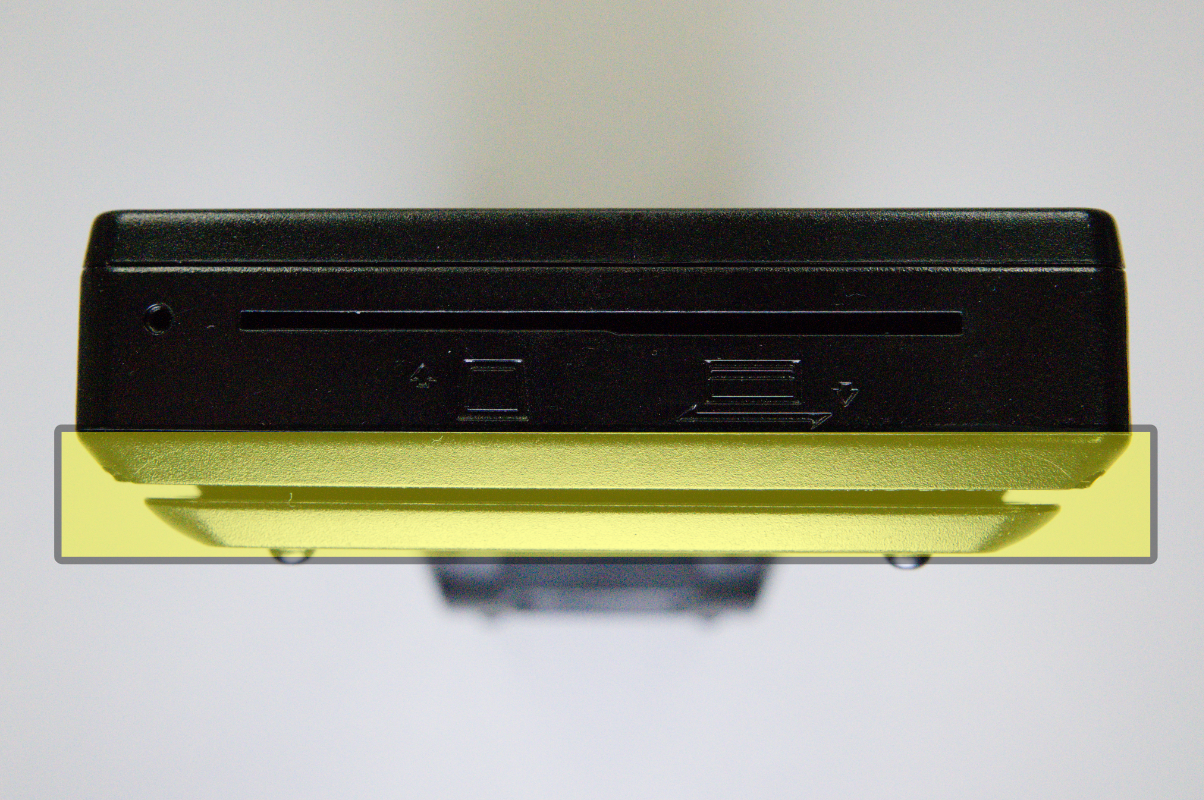
When you swipe the card, you should be looking at the magstripe on the top of the card, and obviously rotated so it's passing through your reader.
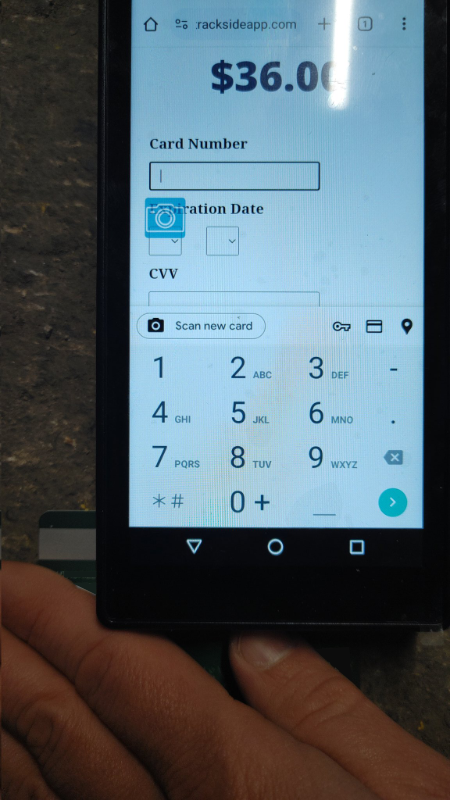
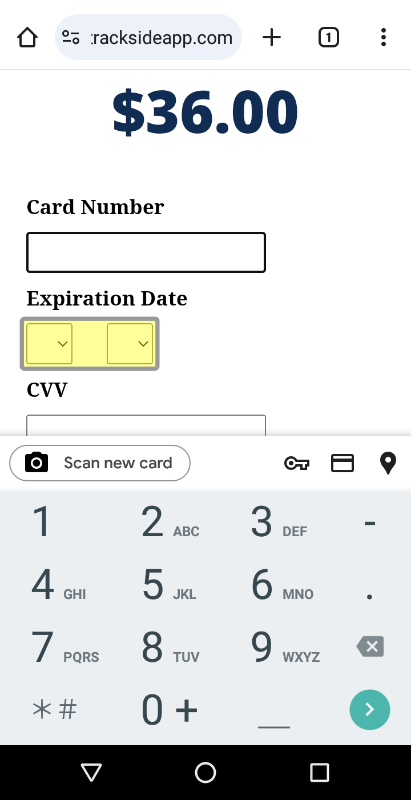
Some card processors will auto-fill the expiration date while some others will not. If your expiration date does not auto-fill, input the card's expiration date.
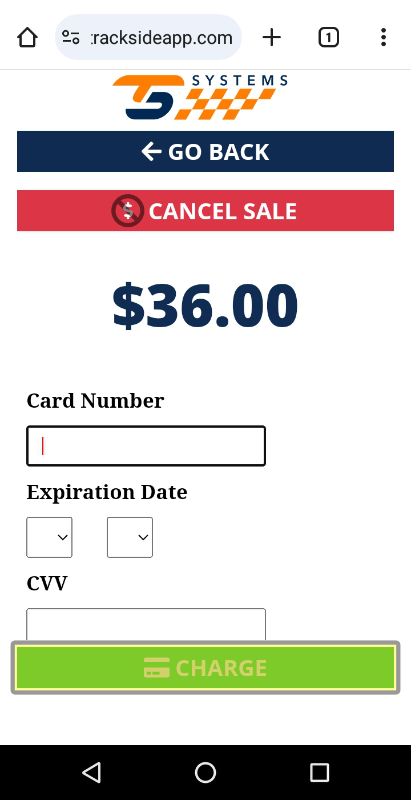
You do not have to input the zip code. Press Charge to run the card.
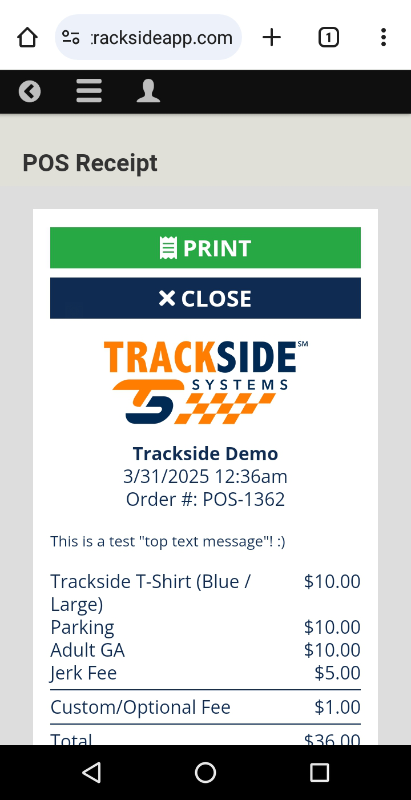
Step 3 - Hand the Customer Their Receipt
This one may be a little more difficult to adjust to for some, but the way Trackside is set up, it's very important to make sure the customer gets their receipt. This is probably most evident when it comes to ticket refunds, as the customer will have a code that prints on the receipt for redeeming any refunds given, partial or otherwise. No code, no refund. This can tie into other things like merchandise and concessions as well for things like your return policy or potentially rewards programs. It's always a best idea to give the customer the option of whether or not to throw away their receipt, and not make that choice for them.