
Via Wired USB
This article will assist you in connecting your Trackside Bluetooth QR Scanner to your Trackside Point of Sale with a cable. This method will charge the scanner as you use it.
If you ever need a replacement cable, these are easily replaced locally. You just need a cable that is USB Type-A on one side, and Type-B on the other, commonly referred to as a "Printer Cable." USB 2.0 should work fine, along with any standard after. You can get them in varying lengths also, just be aware that excessively long USB cables experience signal degradation and the scanner may not operate. 25ft should be a maximum. A standard replacement cable will be 4-6ft.
Trackside Scanner Connection Sheet
The most up to date version of the Trackside Scanner Connection Sheet now resides at https://tracksidesystems.com/scanner/ . Make sure to check the second page for additional functionalities!
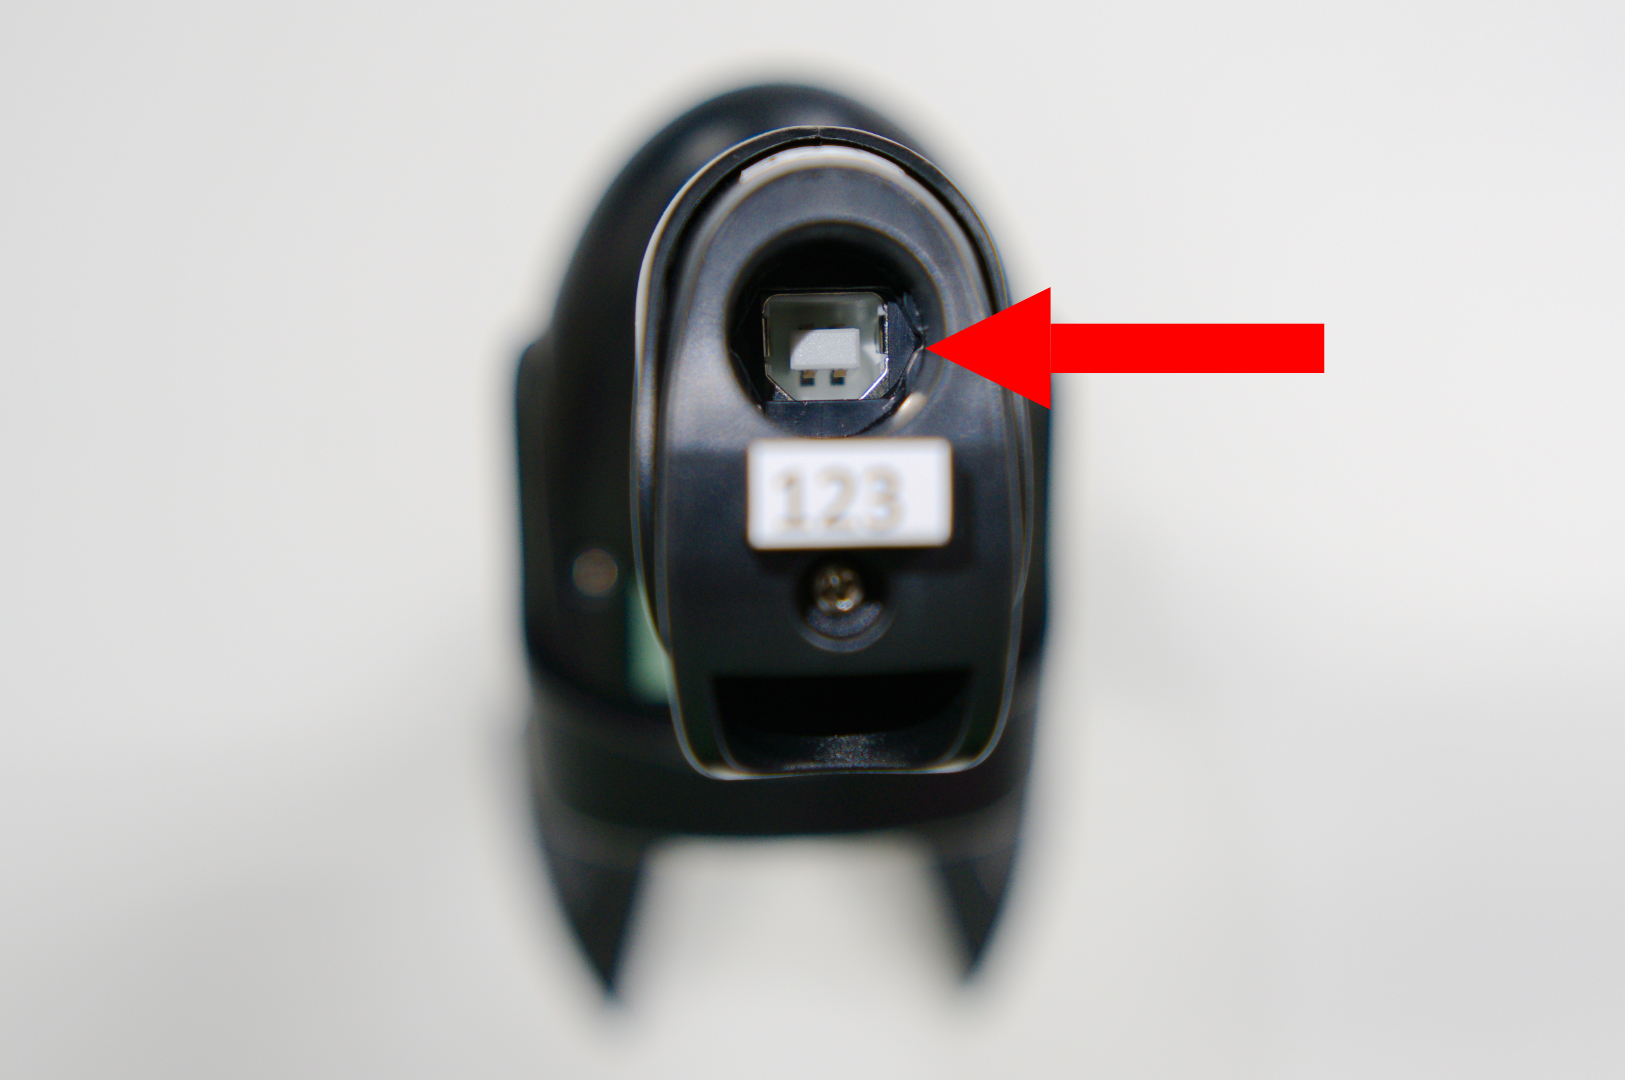
Step 1 - Connect the Scanner to the Point of Sale With a USB Cable
There is a USB Type-B port in the bottom of the Trackside Bluetooth QR Scanner. Using a USB cable, connect the scanner to an available USB port on the Point of Sale.
Step 2 - Enable USB Wired Connection
On your QR Code Scanner Connection Sheet, scan steps 1-3 under Enable USB Wired Connection in order. This should configure the scanner to scan on the wired connection and should be ready to operate. You can try a test scan by placing your cursor in a text box and scanning a QR or barcode to verify. The battery check on the QR Code Scanner Connection Sheet is another way to test this.